5 network, Integrated ethernet – Dream Property DM500 HD User Manual
Page 50
-50-
10.5 Network
If no OSD menu is visible on your screen, press the
Menu-Button
to open the main OSD menu. Navigate to
the option “Setup” and press the
OK-Button
to select.
1. Navigate to the option “System” and press the
OK-Button.
• The “System” menu will open up.
2. Navigate to the option “Network…” and press the
OK-Button.
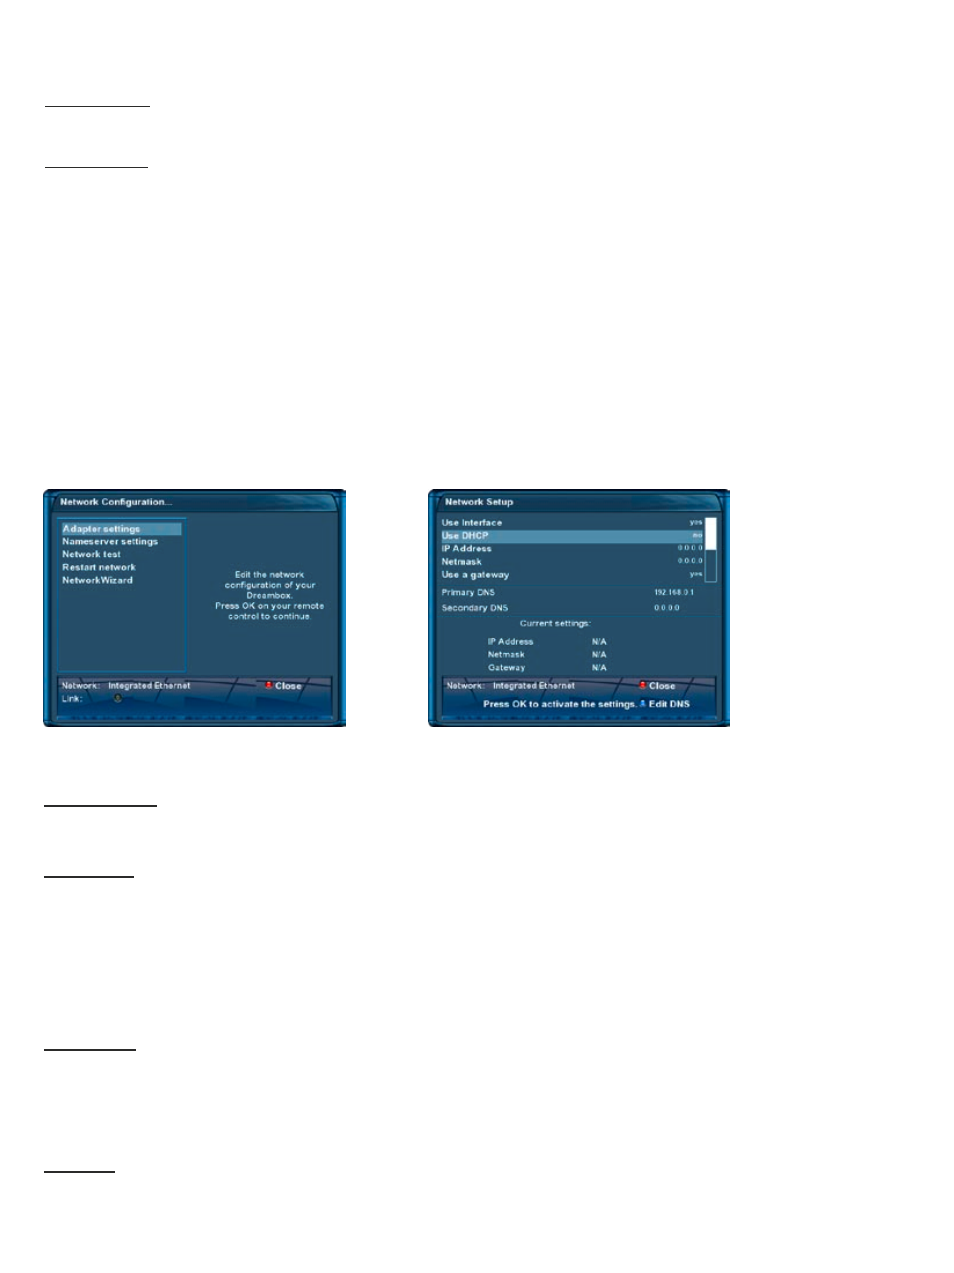
Use interface:
This options toggles the integrated ethernet interface on and off.
Use DHCP:
If set to “yes“ your Dreambox will get its IP from a DHCP server. If you are using a router to access the inter-
net you usually have a DHCP server. Disable this option to set a static IP address.
Manually setting an IP address
These settings are only needed if you have selected “no“ on the “Use DHCP“ option before.
IP Address:
You can assign any IP address to you Dreambox. The only expection is the 192.168.0.
1
IP since it usually is
reserved for you internet router and should therefor not be used.
Free IP addresses:
192.168.0.2 - 192.168.0.254
Netmask
Enter the subnet mask which usually is
255.255.255.0
Integrated Ethernet
Select “Integrated Ethernet“ and press the
OK-Button
. Select the “Adapter settings“ option and press the
OK-Button. Use the
Navigation-Buttons
and the
Numeric-Keypad
to change the settings.
Adapter settings
Color format:
CVBS (FBAS), RGB (Red, Green, Blue separated), SVideo (Color- and Brightness signal separated).
WSS on 4:3:
Check the checkbox to disable zooming on some 16:9 TV’s during 4:3 transmissions.