Screen adjustment – Da-Lite Scenic Roller User Manual
Page 3
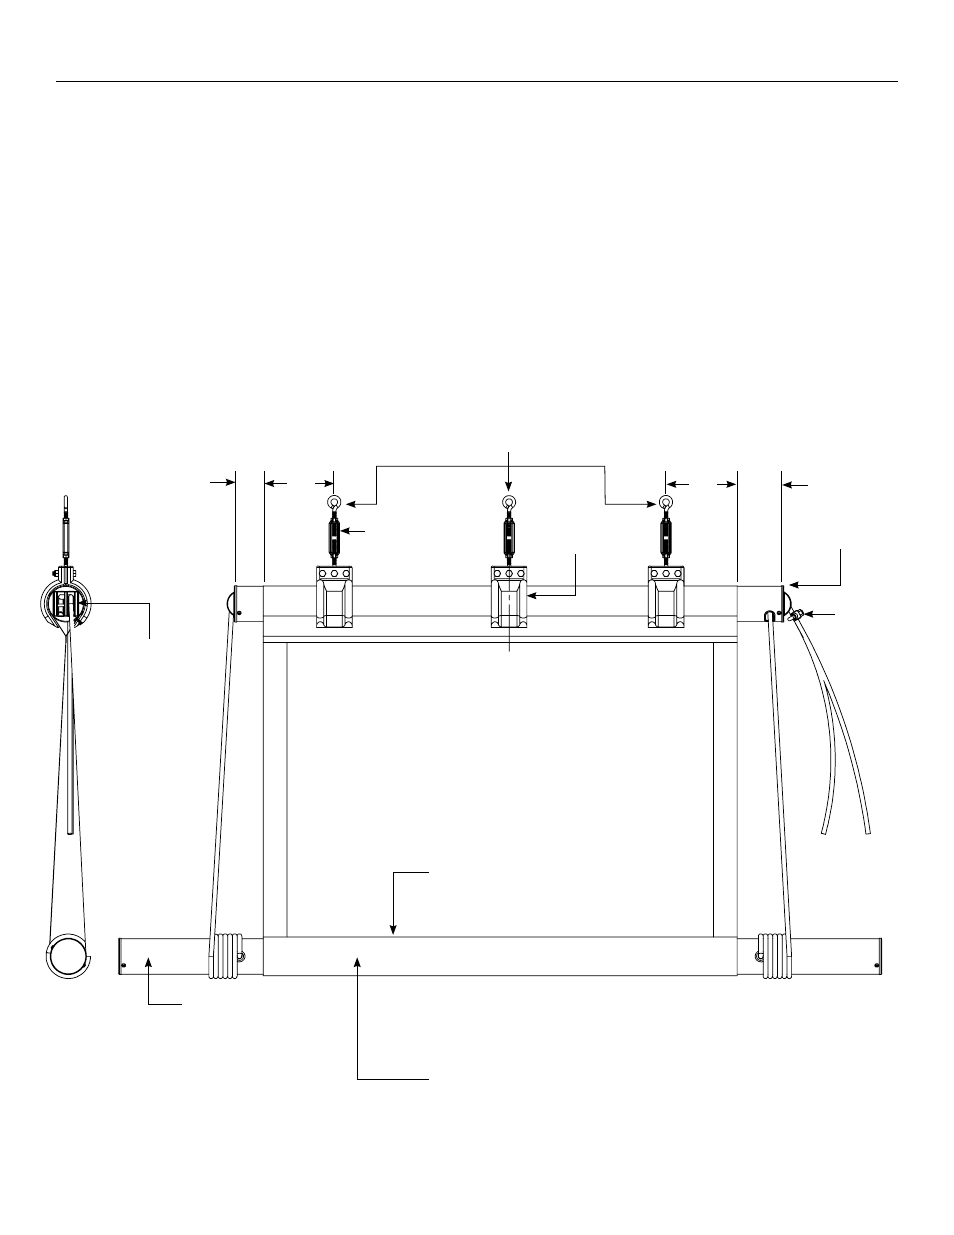
3
1. Lower screen slowly by gradually releasing ropes.
2. With screen in the “Down” position, turn the header in the
fabric pocket carefully to adjust the pulleys to a vertical end
position. Check the 2-1/4" and 3-3/4" end tube dimensions.
Adjust the clamps on the reinforcement tape. Clamps are not
to push into fabric pocket. Tighten nuts on all bolts.
3. Total screen drop may be controlled by adjusting rope clamp.
Do not adjust for more drop.
4. With unit in completely unrolled position, examine the screen
carefully. If slight sag appears in center of fabric, adjust
turnbuckles at the eye bolts until fabric hangs flat.
5. Screen may be raised by pulling on ropes. Tie off ropes to
keep screen in raised position.
6. Protect your screen against damage and it will give many
years of enjoyment.
a. When lowering screen, do so gently. Never allow it to
drop uncontrolled.
b. Before raising screen, be sure both front and back sides
are free from insects or any foreign matter.
c. Form the habit of looking in space between fabric and
roller for foreign matter before raising screen.
d. Caution stage hands and others to avoid bumping
screen with ladders, scenery, etc.
Screen Adjustment
Don't Adjust
Rope Clamp
Already Set
for Proper
Full Screen
Opening
Mount Header
Tube Level
Locate Clamps on
Reinforcement Tape
Mount at These Points Only
Turnbuckle – Adjust
for Flat Fabric Hang
Do Not Handle Unit by
Fabric Area
Pulley Must be Installed
in The Vertical Position
Check Here for Foreign
Matter Before Raising
Screen
Center Line of Screen
Handle Unit Only
by Top Header and
Roller Ends During
Installation
Figure 2
2 1/4"
3 3/4"
6"
6"