Tools required for installation, Installation important safety instructions, Pre-installation – Da-Lite Tensioned Contour Electrol User Manual
Page 2
2
Tools Required for Installation
NOTE: Carefully unpack screen. Use supplied 1/8" hex key to
remove silver shipping brackets attached to slat and screen case.
There are three ways to install the Tensioned Contour Electrol —
Wall Mount, Ceiling Mount, or Ceiling Hook. Procedures for each
method are as follows:
Wall Mount
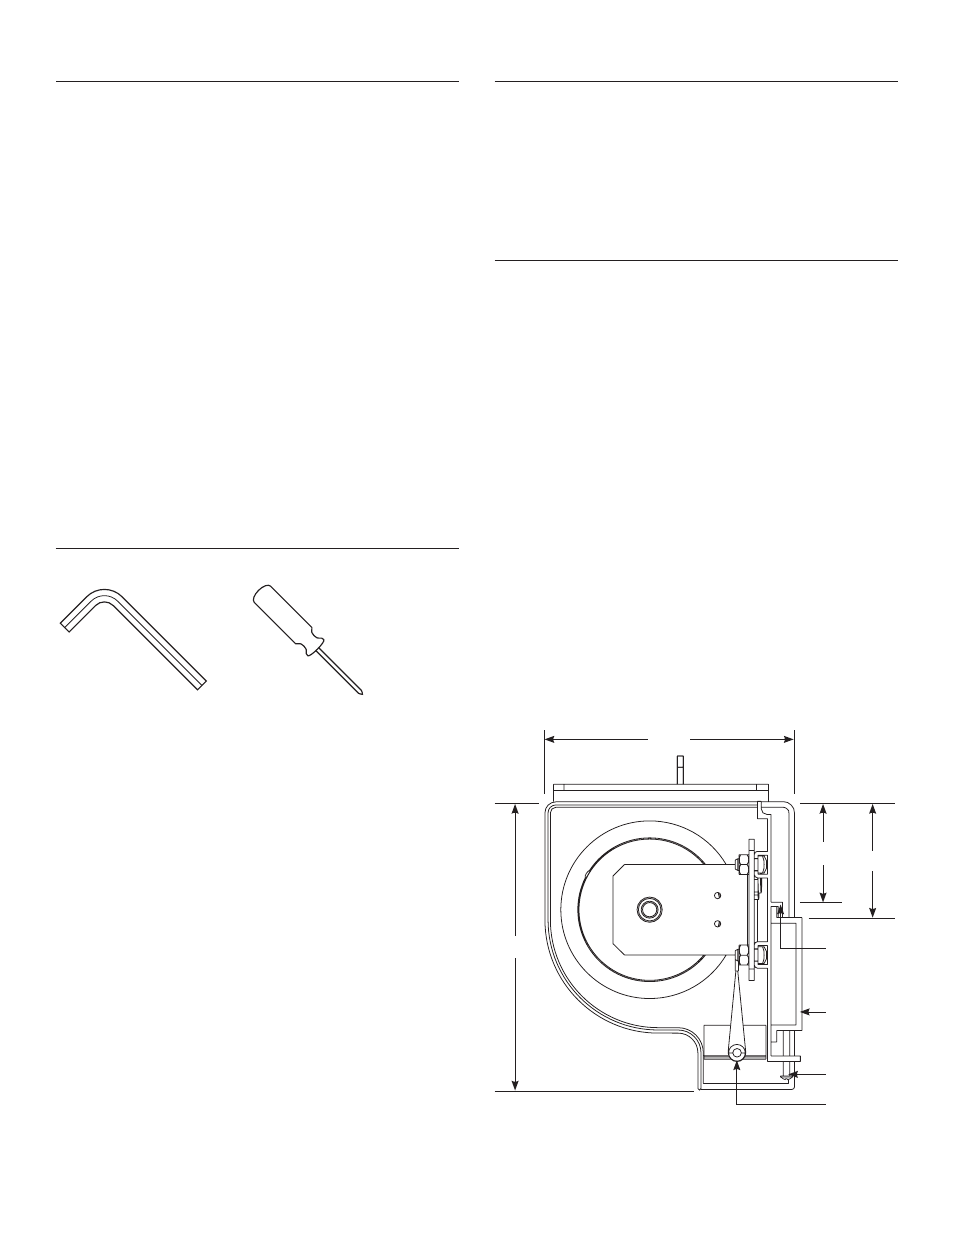
1. Using a #2 Phillips screwdriver, loosen the two stop screws
and remove the wall mount bracket from the back side of
the case (Figure 1).
NOTE: The ceiling flush mount and ceiling hook mount
brackets are attached to the top side of the case. These
brackets are not necessary for wall mounting and can be
removed at this time.
2. Secure the wall mount bracket to the wall at the desired
height. The wall mount bracket should be fastened to the
wall studs or some reinforcement within the wall. Concrete
or brick walls require special fasteners and anchors. Allow at
least 2-3/8” above the wall mount bracket to be able to
position the case on the bracket (Figure 2).
Installation
Important Safety Instructions
When using your video equipment, basic safety precautions
should always be followed, including the following:
1. Read and understand all instructions before using.
2. Position the cord so that it will not be tripped over, pulled, or
contact hot surfaces.
3. If an extension cord is necessary, a cord with a current rating
at least equal to that of the appliance should be used. Cords
rated for less amperage than the appliance may overheat.
4. To reduce the risk of electric shock, do not disassemble this
appliance. Contact an authorized service dealer when repair
work is required. Incorrect reassembly can cause electric
shock when the appliance is used subsequently.
5. The use of an accessory attachment not recommended by
the manufacturer may cause a risk of fire, electric shock, or
injury to persons.
Save These Instructions
Pre-Installation
1. Carefully unpack screen and remove outer wrapping
from case.
2. Set aside the Installation Kit. Items inside will be used during
installation.
Figure 1
2 5/16"
5 11/16"
2 9/16"
6 3/8"
Case Hook
Slat Bar
Wall Mount
Bracket
Stop Screws
#2 Phillips Screwdriver
1/8” Hex Key
(included)
- 88376LS Contour Electrol Motorized Projection Screen (87 x 116") 88368LS Contour Electrol Motorized Projection Screen (60 x 80") 92639L Contour Electrol Motorized Projection Screen (78 x 139") 84256LS Advantage Electrol Motorized Projection Screen (84 x 84") 92605LS Advantage Electrol Motorized Projection Screen (84 x 84") 92619LS Advantage Electrol 65 x 116" Ceiling-Recessed Motorized Screen (120V) Advantage Electrol Tensioned Advantage Electrol ViewShare Advantage Electrol ViewShare Tensioned Advantage Electrol Contour Electrol