Access door installation screen adjustment – Da-Lite Executive Electrol User Manual
Page 4
4
1. Press switch “down” so that fabric door opens (Fig. 3).
2. Remove screws (2) located on each bumper bracket.
NOTE: The access door is slotted on one edge, permitting the
grooved section to fit over the support clips on inside of case.
3. Place access panel so groove can be pushed over clips.
Holes in access panel brackets should align with bumper
bracket holes.
4. Replace screws.
5. Make sure there is approximately 3⁄16" clearance around
access door. Keep paint, plaster, tile or mastic out of hinge.
Fit access panel so it can be removed for maintenance.
The picture surface drop, and the opening and closing of the fabric door, are controlled automatically by limit switches which have been preset
at Da-Lite. When the picture surface is moving upward, it is controlled by a limit switch that shuts off when the door closes. To adjust for more or
less picture drop (viewing area), proceed in the following manner:
Screen Unrolled in "Down" or "Bottom" Position.
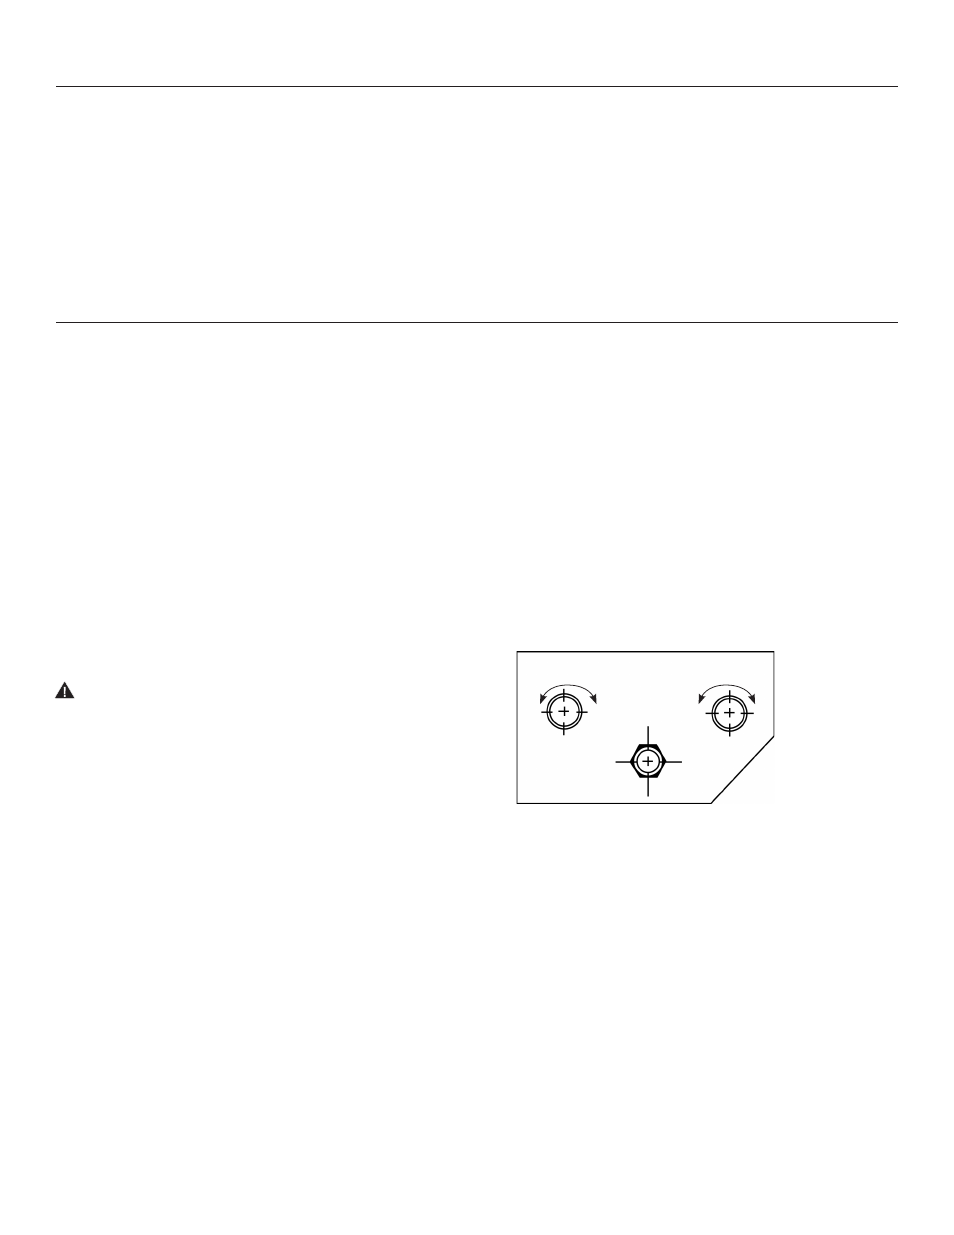
NOTE: Limit switch knob labeled DOWN controls point of picture
surface in bottom position. Limit switch knob labeled DOOR controls
the synchronization of the door opening or closing. Do not adjust!
More screen drop
1. Place operating switch in “down” position.
2. When the screen stops, turn the “down” limit knob one turn at
a time clockwise, until the desired picture surface position is
attained. Test by raising picture surface approximately two
feet, then lower again. Repeat until desired picture surface
position is attained.
CAUTION! When picture surface is in "Bottom" position,
do not adjust for more than 3" of additional drop. Do not
allow any part of the roller to become exposed.
ATTENTION! Lorsque la surface de projection est sur la
position "Bas", ne déroulez pas la toile plus de 7,6 cm (3
po). N'exposer aucune partie du rouleau.
Less screen drop
1. Raise picture surface approximately two feet
above desired level.
2. Place operating switch in
“off” position.
3. Turn the
“down” limit knob one turn at a time
counter-clockwise.
4. Place operating switch in
“down” position. Repeat
steps 2 and 3 until desired position is attained.
Access Door Installation
Screen Adjustment
Down
Door
Raise
Raise
Lower
Lower