Installation, Internal fixing of the unit – Bonaire Durango Window Cooler User Manual
Page 9
B
ONAIRE
D
URANGO
W
INDOW
C
OOLER
Installation
I
NSTALLATION
Note that it is not necessary to remove the Rear Filter Panel from the unit
for installation.
Do not connect the power to the cooler until the installation is complete.
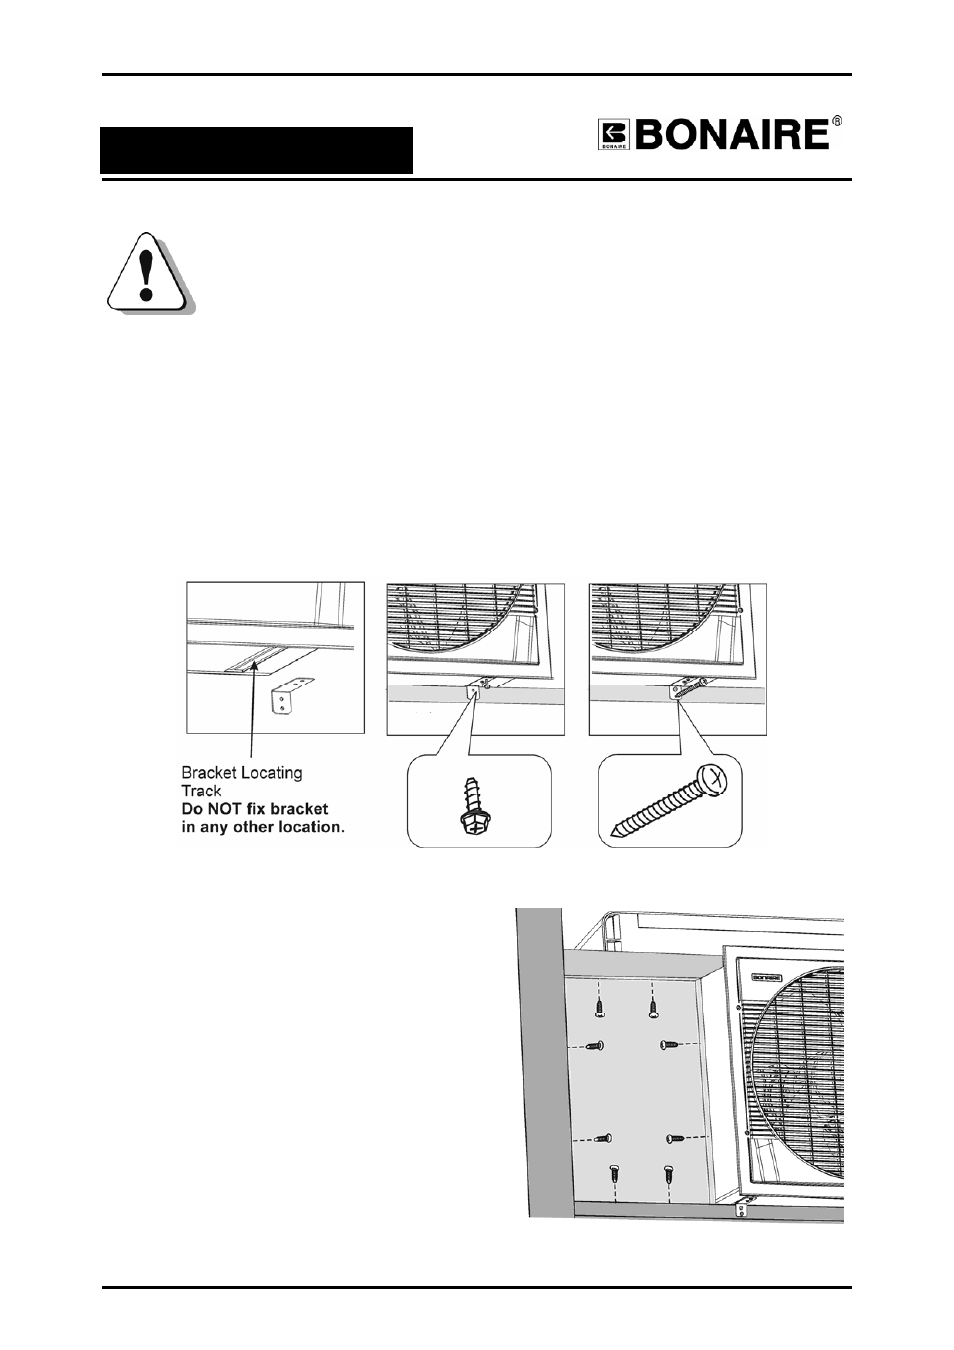
Internal Fixing of the Unit
•
IT IS MANDATORY THAT THE METAL FIXING BRACKETS SUPPLIED ARE FITTED
TO ENSURE A SECURE INSTALLATION.
Utilise the 2 fixing brackets and 4 screws provided as shown in the diagram to ensure the
unit is adequately locked into position.
•
Ensure that the bracket is aligned within the indicated mounting track area on the
underside of the fan housing – see diagram below. Drill 2x1/8” (3.2mm) holes and insert
screws into unit as per diagram and repeat for window frame with appropriate screws.
•
Ensure that the cooler is now fixed rigidly to the house structure
•
e in-fill panel to fit in the gap
•
and seal any gaps
•
top edge of
Rear Filter Panel.
Close window against unit.
Measure the gap of the opening &
cut th
left.
Fit in fill panel with screws (length
of screws must not exceed 25mm
(1”) in length)
with silicone.
Check that the unit is still level
using spirit level on
Page 9
WEAC628