3 > wall-mount installation - ap / nap-w47 – Austin Hughes OP-W47 User Manual
Page 9
UM-UV-621-W47-Q215V1 www.austin-hughes.com
< 1.3 > Wall-mount Installation - AP / NAP-W47
47” FHD LCD Display
P.4
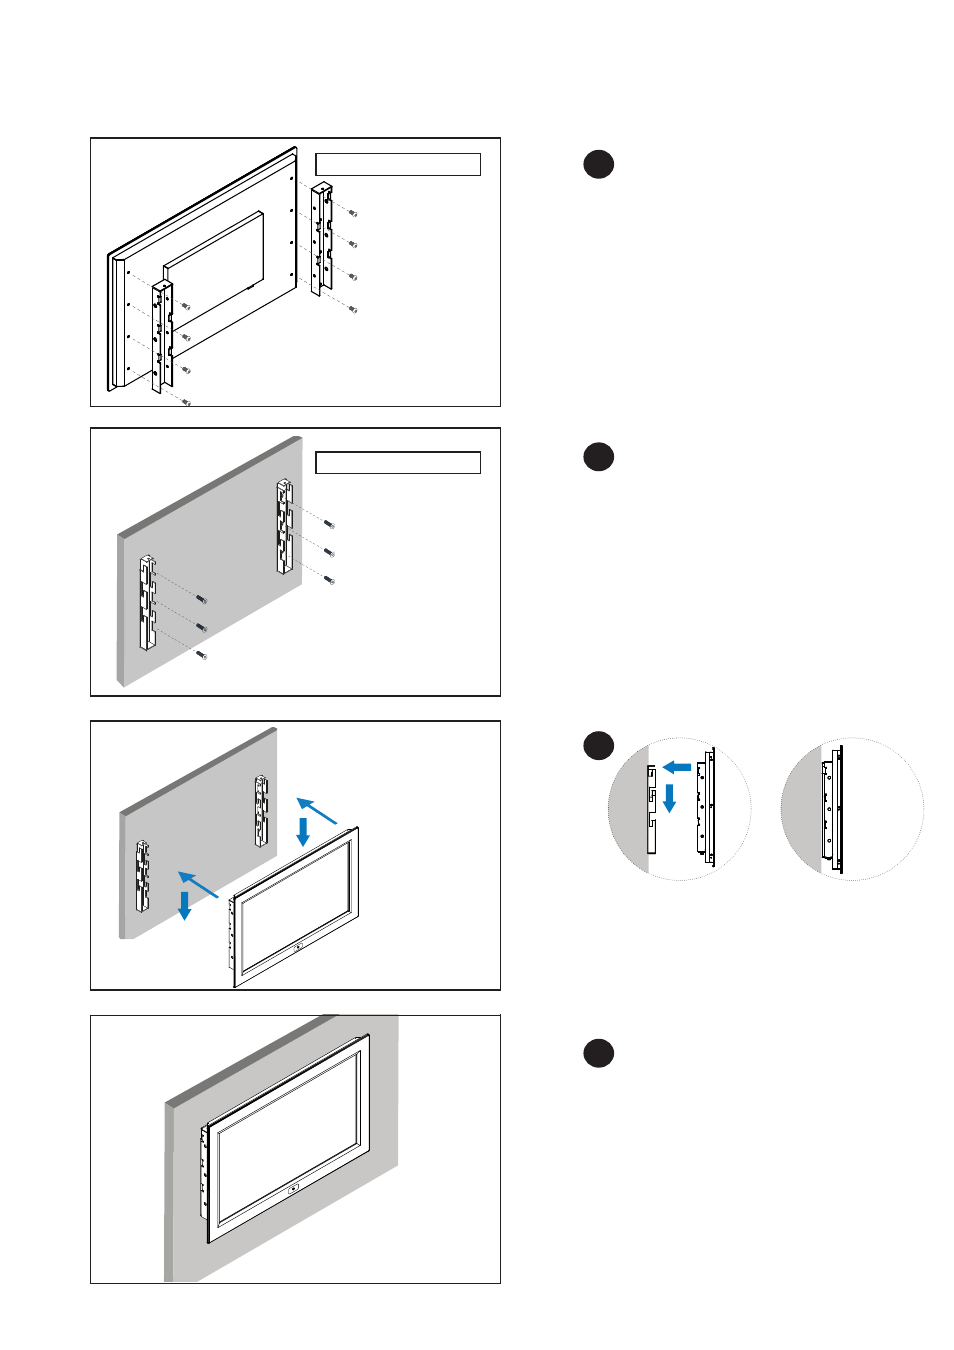
Step
■
Install left & right front wall-mount brackets at
the rear side of the LCD shown above.
■
M5 screw x 8 pcs included ( Left & right side ).
1
Front wall-mount bracket
Rear side
Step
■
Install left & right rear wall-mount brackets on
the wall shown above.
■
6 x M10 screws required ( Left & right side ).
M10 screw sets are not provided.
2
Rear wall-mount bracket
Wall
Step
■
Attach the LCD to the rear wall-mount brackets
on the wall.
3
Wall
Wall
Wall
LCD
Installation Completed.
Step
4
■
No VESA mount provided for 46" and 55”
models. Only wall-mount available.