Assembly, Tools required – Desa 28BN User Manual
Page 4
107396-01F
For more information, visit www.desatech.com
For more information, visit www.desatech.com
4
TOOLS REQUIRED
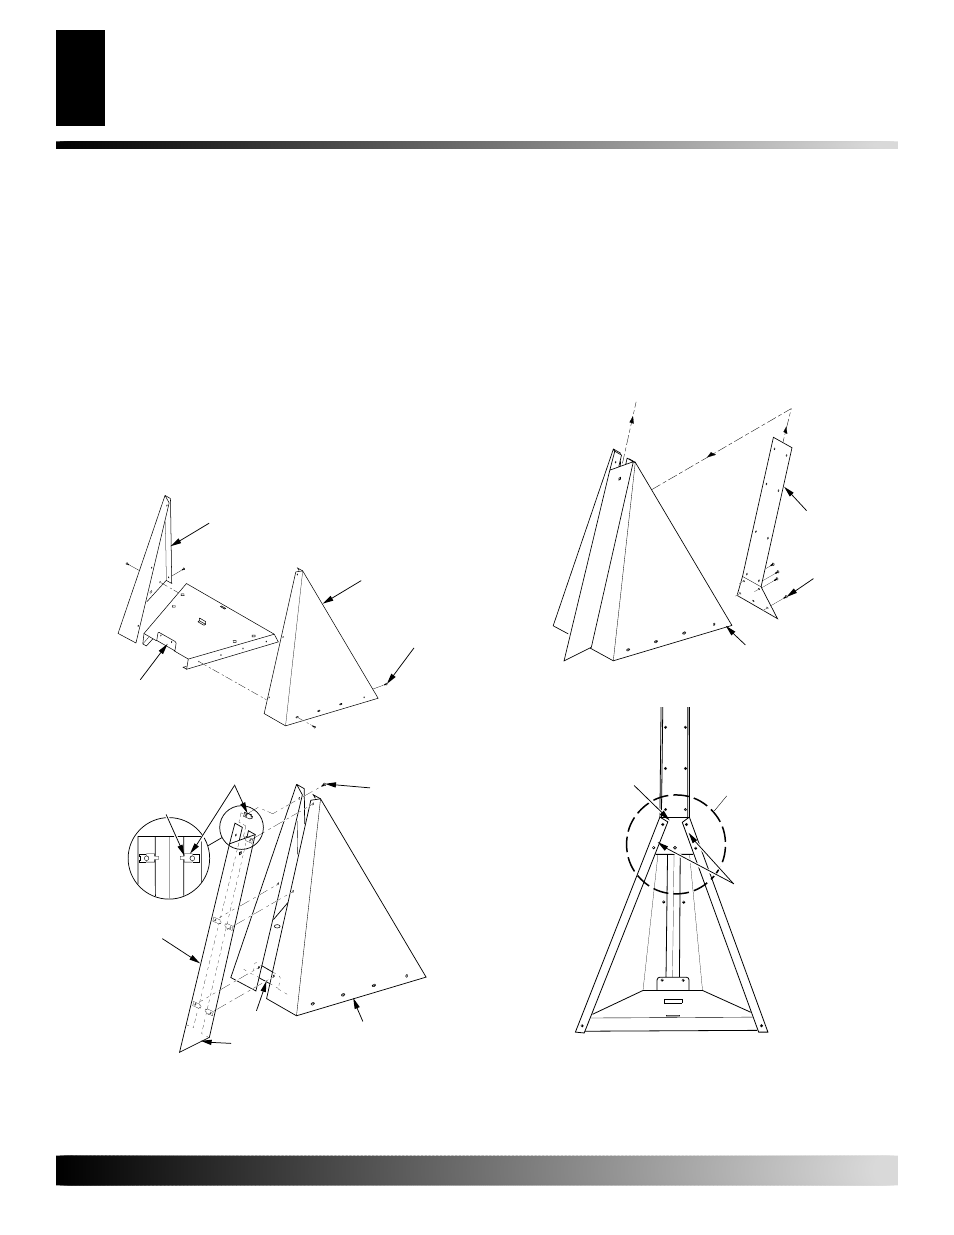
ASSEMBLY
Figure 4 - Attaching Back Plate
Back
Plate
Base/Wrapper
Assembly
Figure 5 - Back Plate Location
Back Plate Under
Wrapper Flanges
Wrapper
Flanges
Back Plate
Screw
4.
Align holes on center wrapper with holes on left and right wrap-
pers. Using screws provided, attach center wrapper to left and
right wrappers and base from inside the assembly (see Figure 4).
5.
Insert back plate up through the base and wrapper assembly
and attach to left and right wrappers with 4 screws provided
(see Figure 5). The back plate will be under the wrapper flanges
as shown in Figure 5.
ASSEMBLY
Assemble the heater in the approximate location it will be used to
minimize moving heater once assembled.
1.
Position base on floor with open side down.
2.
Locate right wrapper and left wrapper. Place one side to base
and secure using 5 screws provided. Repeat for other side (see
Figure 2).
3.
Locate center wrapper. The center wrapper is angled at the
bottom and has a hole on either side of the front at the top.
Slide J-clips over holes on open side of center wrapper with
short side to the outside of center wrapper (see Figure 3).
Base
(Front)
Right
Wrapper
Left
Wrapper
Figure 2 - Attaching Left and Right Wrappers to Base
J-Clips
Center
Wrapper
Figure 3 - Attaching Center Wrapper to Base Assembly
Base
Assembly
Base
Angled End
Short Leg of J-Clip
on Outside of Wrapper
Screw
Screw
TOOLS REQUIRED
• #2 Phillips screwdriver
• 9/16" Open end wrench