DeWalt N090451 User Manual
Page 7
5
CAUTION: Allow the tool to reach full speed before touching tool to the work
surface. Lift the tool from the work surface before turning the tool off.
To start the planer depress the trigger switch (A). To turn the planer off, release the
trigger switch.
Adjusting Planing Depth (Fig. 1)
WARNING: To reduce the risk of serious personal injury, turn tool off and
disconnect tool from power source before making any adjustments or removing/
installing attachments or accessories.
Planing depth is infinitely variable from 0 to 2.5 mm. To adjust the cutting depth,
rotate the depth adjustment knob/front handle (C) clockwise from the “0” position.
Each click of the adjustment knob represents approximately 0.1 mm of depth. The
cutting depth will increase from 0 to as much as 2.5 mm.
It is recom mended that test cuts be made in scrap wood after each re-adjustment to
make sure that the desired amount of wood is being removed by the planer. Several
shallow passes (rather than one deep one) will produce a smoother finish.
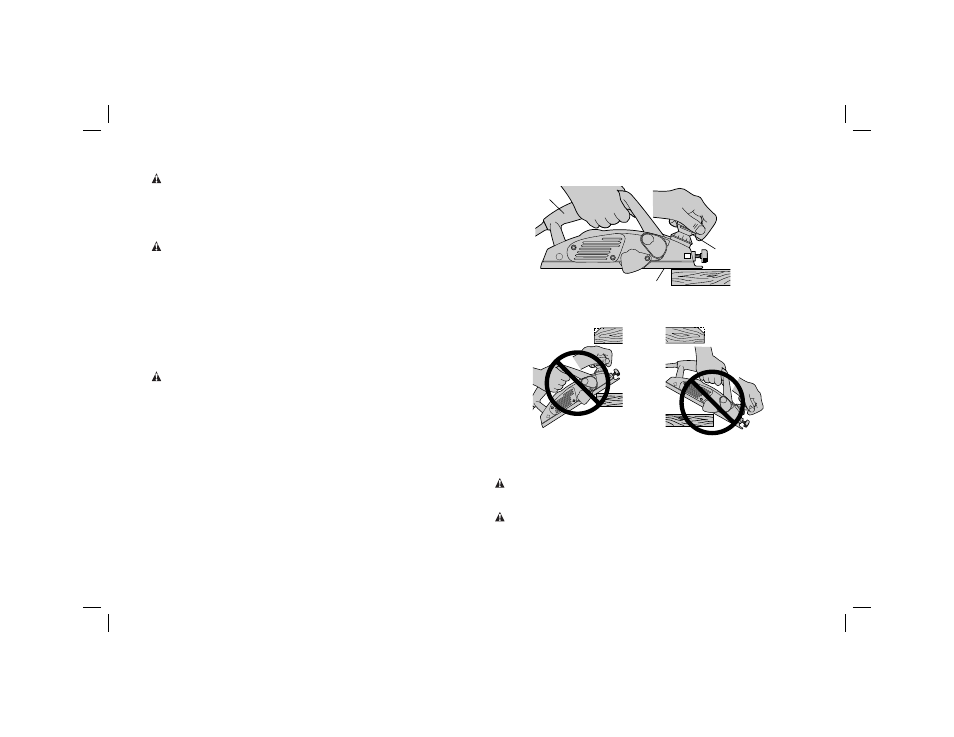
Planing (Fig. 2, 3, 4)
CAUTION: Allow the tool to reach full speed before touching tool to the work
surface. Lift the tool from the work surface before turning the tool off.
Hold the planer in the correct position with one hand on the front handle (C) and
the other hand on the switch handle (D) as shown in Figure 2. Place the front of the
shoe (E) on the surface to be planed, making certain that the cutting blades are not
touching the surface. Push down firmly on the front handle of the planer so that the
front shoe is ABSOLUTELY FLAT on the work surface. Squeeze the trigger switch
and allow the motor to reach full speed before touching the planer blades to the work
surface.
Move the tool slowly into the work and maintain downward pressure to keep the
planer flat. Be particularly careful to keep the tool flat at the beginning and the end of
the work surface (Figures 2, 3, 4).
Planing Tip: For a smoother appearance, fasten a piece of scrap wood to the end of
the piece you are planing. Don’t stop planing until the cutting blades of the planer are
past your workpiece and into the scrap material.
FIG. 3
INCORRECT
INCORRECT
FIG. 4
CORRECT
FIG. 2
E
D
C
Rabbet Fence (Fig. 5, 6)
WARNING: To reduce the risk of serious personal injury, turn tool off
and disconnect tool from power source before making any adjustments or
removing/installing attachments or accessories.
CAUTION: Allow the tool to reach full speed before touching tool to the work
surface. Lift the tool from the work surface before turning the tool off.
The rabbet fence can be installed on either side of your planer. The planer can
make rabbet cuts up to 12 mm.