Warning, Cleaning, Auger assembly – Cabela's Heavy Duty Meat Grinder 33-0101-C User Manual
Page 6
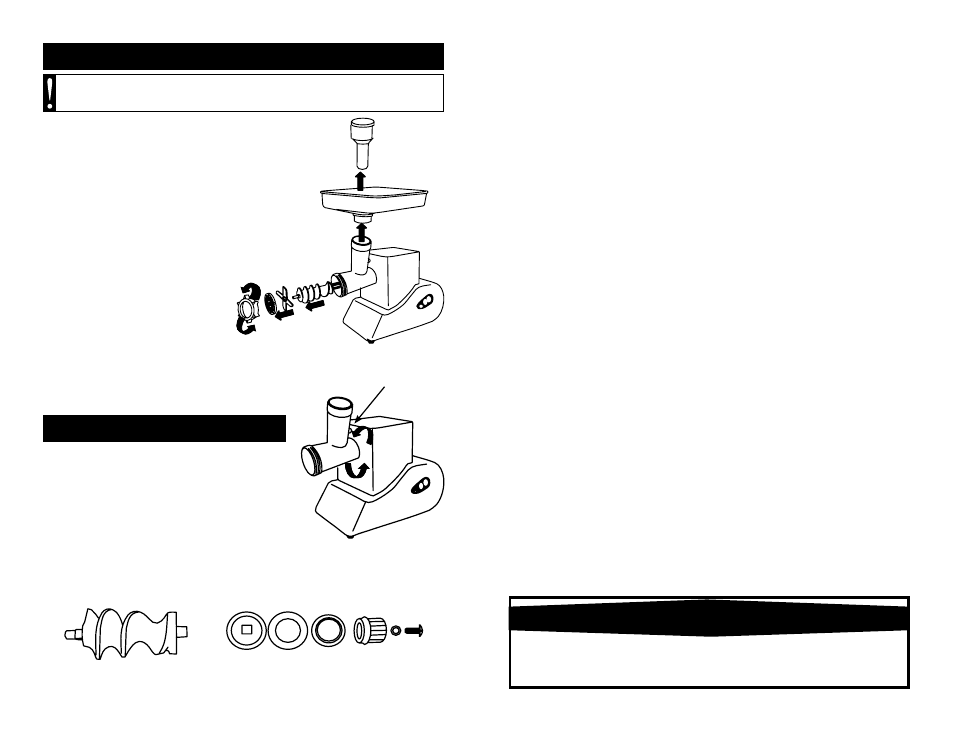
CLEANING
1. Unscrew the
Ring Nut and remove
all parts from the
Grinder Head
(Figure A).
2. To remove the
Grinder Head,
press the
Head Release Button and
turn the
Grinder Head clockwise
(Figure B).
3. Wash all parts that come in contact
with food in hot soapy water. Rinse
with clear water. Dry immediately.
The
Grinder parts are not dishwasher
safe. Do NOT use bleach.
4. Fully lubricate the
Grinder Head,
Grinding Plates and the Knife with
food grade silicone spray before and
after each use.
5. Clean the
Main Body with a soft
damp towel. Dry immediately. DO
NOT immerse the
Main Body of the
Grinder in water or other liquids.
-6-
-15-
WARNING!
Before cleaning, assembling or disassembling the Grinder,
make sure the PLUG IS REMOVED FROM THE OUTLET/POWER SOURCE!
ALWAYS unplug the Grinder when not in use.
NOTE: Special considerations must be made when using venison or other wild game,
since it can become heavily contaminated during field dressing. Venison is often held
at temperatures that could potentially allow bacteria to grow, such as when it is being
transported. Refer to the USDA Meat and Poultry Department for further questions or
information on meat and food safety.
NEVER operate Grinder without the Tray secured in place.
To avoid serious or fatal injury, NEVER reach into any Grinder inlet.
ALWAYS use the Stomper to push food into the Grinder Head.
Read & fully understand all instructions & warnings prior to use.
WARNING!
Figure B
Head Release
Button
Figure A
Grinder Head
AUGER ASSEMBLY
1. Place the
Plastic Square Washer onto the end
of the
Auger (Figure C).
2. Place the
White Plastic Washer, followed by
the
Metal Washer.
3. Place the
Auger Bearing* onto the assembly.
*A spare
Auger Bearing is included.
4. Secure the assembly with the
Small Washer
and the
Auger Screw.
Figure C
Plastic
Square
Washer
White
Plastic
Washer
Metal
Washer
Auger
Bearing
Small
Washer
Auger
Screw
Auger
Auger Driver Assembly