Assembly of hopper bag – Craftsman 486.242241 User Manual
Page 8
8
ASSEMBLY OF HOPPER BAG
STEP 14 - ASSEMBLE TUBES
•
Fit the ends of the two upper hopper tubes into the
ends of a rear hopper tube. Align the holes in the ends
of the tubes and secure them in place using two curved
head bolts (G) and nylock nuts (H). See figure 11.
• Fit the ends of the two lower hopper tubes into the
ends of a rear hopper tube. Align the holes in the ends
of the tubes and secure them in place using two curved
head bolts (G) and nylock nuts (H). See figure 11.
• Insert a clevis pin (O) from the outside into each lower
hopper tube and secure it with a hair cotter pin (S).
See figure 11.
NOTE: Either side of the rear hopper tube can face up.
FIGURE 11
FIGURE 12
UPPER
HOPPER
TUBE
HOPPER
BAG
BOTTOM
STITCHED SLEEVE
FIGURE 13
LOWER HOPPER TUBE
HOPPER BAG
BOTTOM
UPPER HOPPER
TUBE
CLEVIS PIN (N)
HAIR COTTER
PIN (S)
UPPER
HOPPER
TUBE
NYLOCK
NUT (H)
CURVED HEAD
BOLT (G)
REAR
HOPPER
TUBE
LOWER
HOPPER TUBE
REAR
HOPPER
TUBE
CLEVIS PIN (O)
HAIR COTTER PIN (S)
NYLOCK
NUT (H)
CURVED HEAD
BOLT (G)
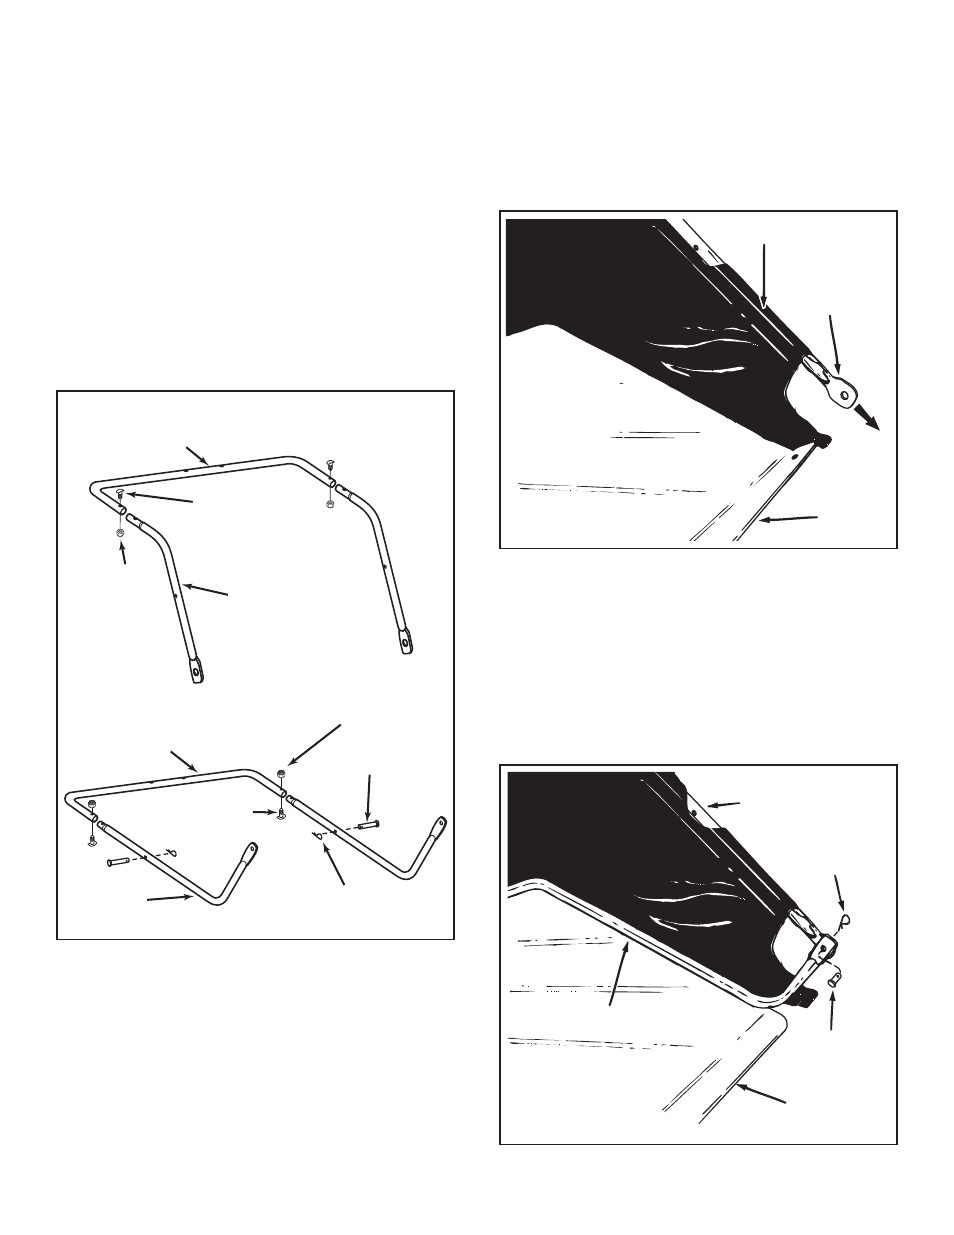
STEP 15 - ASSEMBLE TUBES TO BAG
• Unfold the hopper bag, reverse the fold of the mesh
wind screen and then lay the bag out flat with the wind
screen on top.
• Insert the ends of the assembled upper hopper tubes
down through the stitched sleeves in the sides of the
hopper bag and then slide the tubes back underneath
the wind screen. See figure 12.
• Place the assembled lower hopper tubes into the
bottom of the hopper bag and then slide the tubes to
the back of the bag. See figure 13.
• Attach the ends of the lower hopper tubes to the
inside of the upper hopper tubes using two clevis pins
(N) inserted from the inside, and two hair cotter pins
(S). See figure 13.