Advanced functions – Sekonic L-358 User Manual
Page 30
-26-
6. Advanced Functions
NOTE:
• Make compensation after a sufficient number of test in actual photographic conditions,
to suit your needs.
• Compensation effects every mode of the meter.
If recalibration has been made for specific purpose do not forget to return to original
zero settings.
• In Exposure compensation the
always appear on the LCD,while the
doesn’t appear
in Calibration compensation.
5.
Compensating function
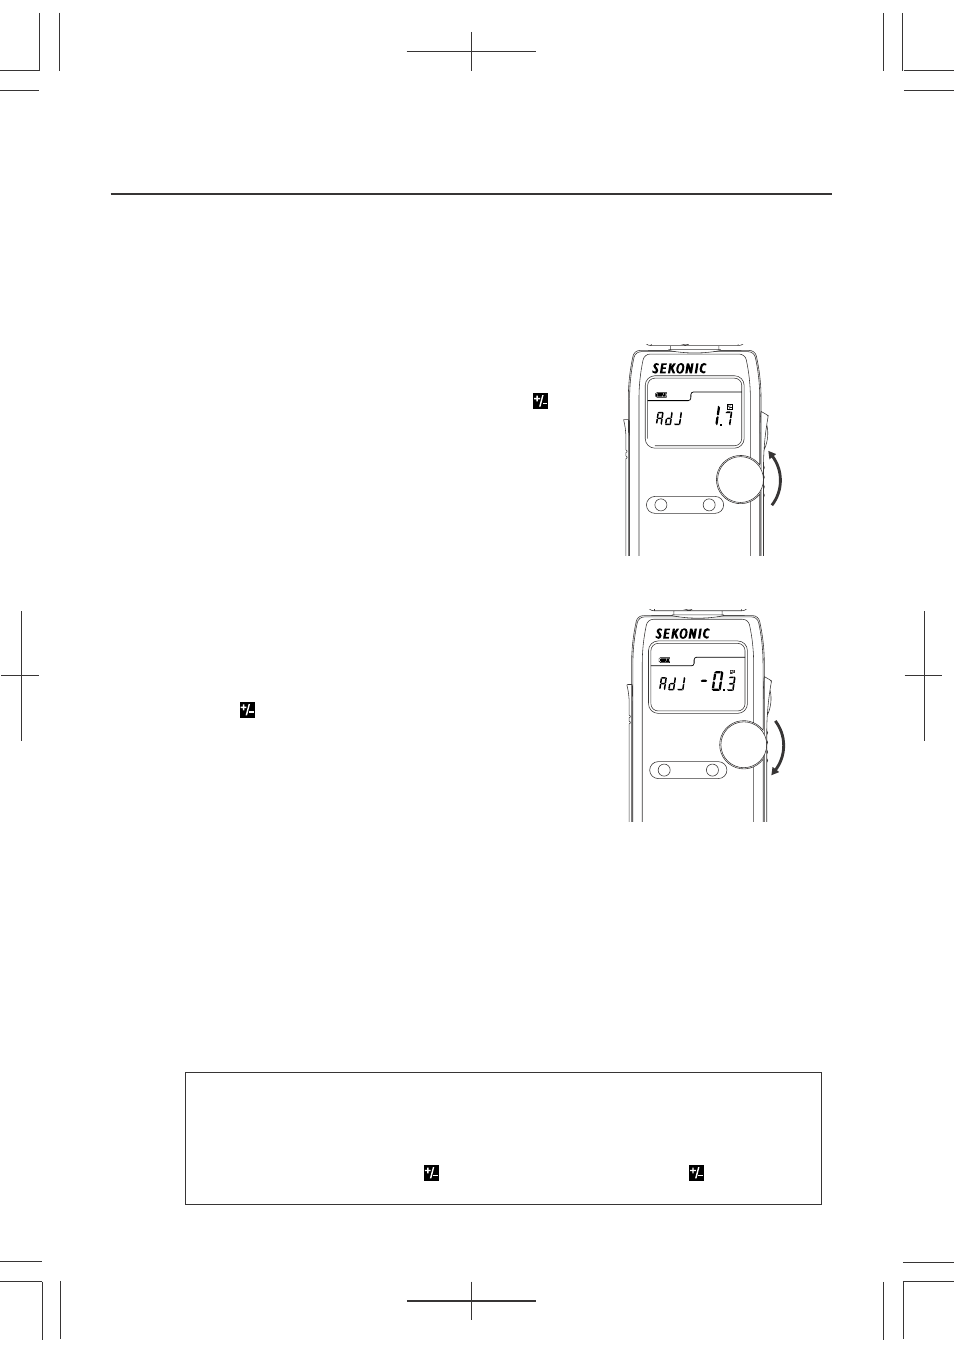
5-1 How to change Exposure compensation
Exposure compensation can be made in precise 1/10 step increments in a +/- 9.9 EV range.
Exposure compensation may be desired when requiring compensation for filters, bellows
extension, etc.
1. Making a plus compensation will result in
underexposing when taking a photograph. Hold
the ISO 1 button !1 and the ISO 2 button y and
turn the Jog wheel t counter clockwise. The
will appear on the upper right part of the LCD.
2. Making a minus compensation will result in
overexposing when taking a photograph, Hold the
ISO 1 button and the ISO 2 button and turn the
Jog wheel clockwise.
The
will appear on the upper right part of the
LCD.
ISO 1
ISO 2
ISO 1
ISO 2
5-1 How to change Calibration compensation
Calibration compensation may be desired to match specific requirements or calibration to other
light meters.
1. To enter the calibration setting of the meter it must first be turned off.
Press the power button on while holding down the ISO 1 and ISO 2 buttons simultaneously;
the screen will display CAL 0.0 (for calibration).
2. The calibration setting can be changed by rotating the Jog Wheel while pressing and holding
down the ISO 1 and ISO 2 button simultaneously. A range of ± 1.0 EV in 1/10 stop increments
is possible for calibration. The calibration setting is not displayed on the main screen once
it is set.