Section 2 getting ready to sew, Connecting the machine, Running the machine – SINGER 9113 User Manual
Page 9: Getting ready to sew, Cleaning the machine
Attention! The text in this document has been recognized automatically. To view the original document, you can use the "Original mode".
SECTION 2
GETTING READY TO SEW
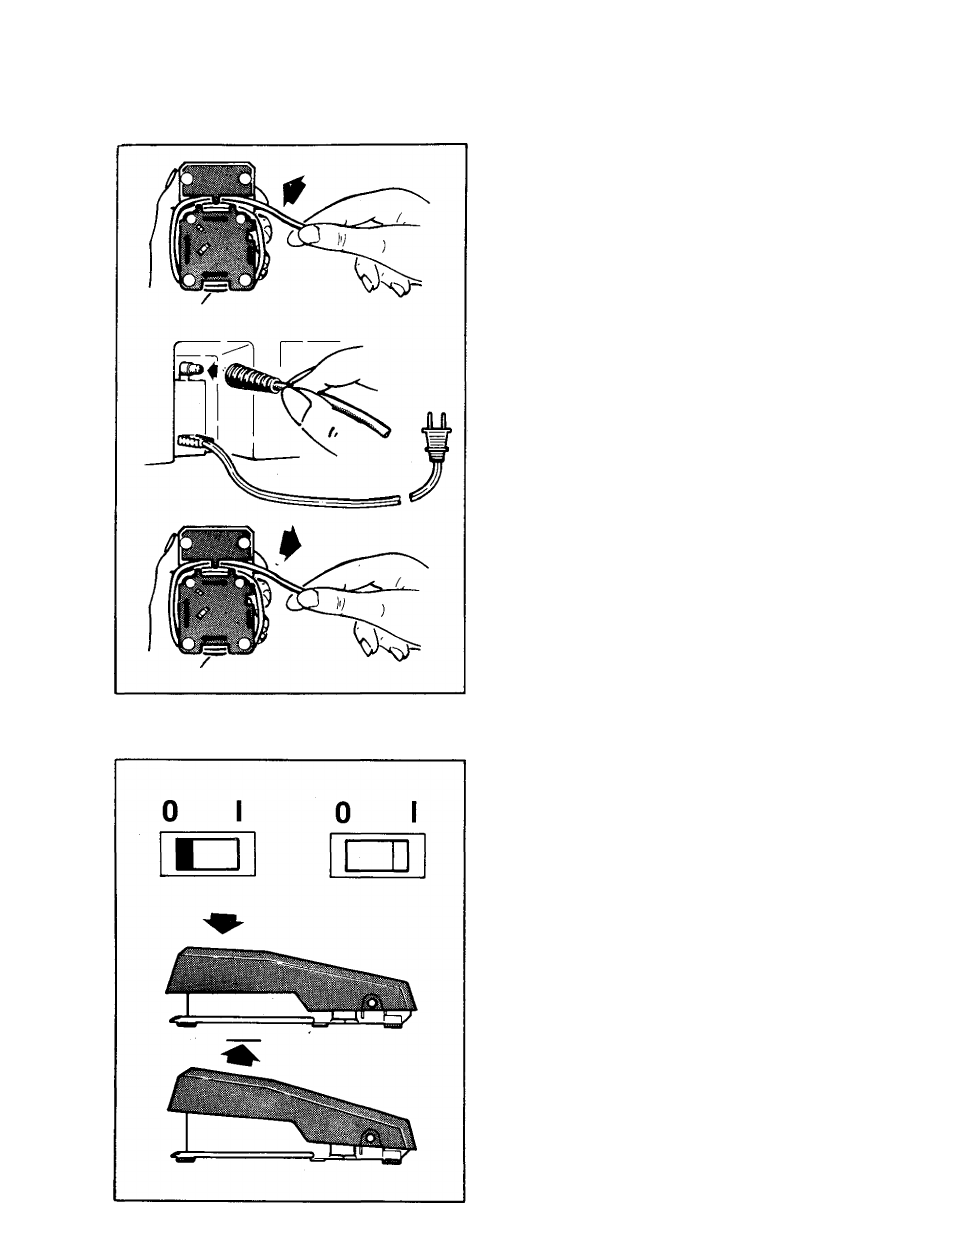
CONNECTING THE MACHINE
The solid state system assures constant speed as you maintain the same pressure
on the controller when sewing through various fabric thicknesses.
Unwind the air control hose from foot
operated speed controller.
Always be sure air hose is not blocked.
Pressing on the controller, you should
feel a slight air flow from the hose.
Plug this air hose onto the receptacle
above power cord, at the right end of the
machine.
Then connect the electrical power cord
plug to your electrical outlet.
NOTE: When not using the machine,
rewind air hose around speed controller
for storage, as shown.
Do not operate machine without
material under the presser foot as this
may damage the feed and the foot.
RUNNING THE MACHINE
The machine and the sewing light are turned on and off by the same power switch.
ROCKER SWITCH
To turn on machine and sewing light, press
power switch down at right side. To turn off
machine and light, press power switch
down at left side.
To run the machine, press the speed
controller. The harder you press, the fas
ter the machine will sew.
To
stop
the
machine
from
sewing,
remove pressure from speed controller.