Sewing curved seams, Darning, Free motion embroidery – SINGER 9113 User Manual
Page 21
Attention! The text in this document has been recognized automatically. To view the original document, you can use the "Original mode".
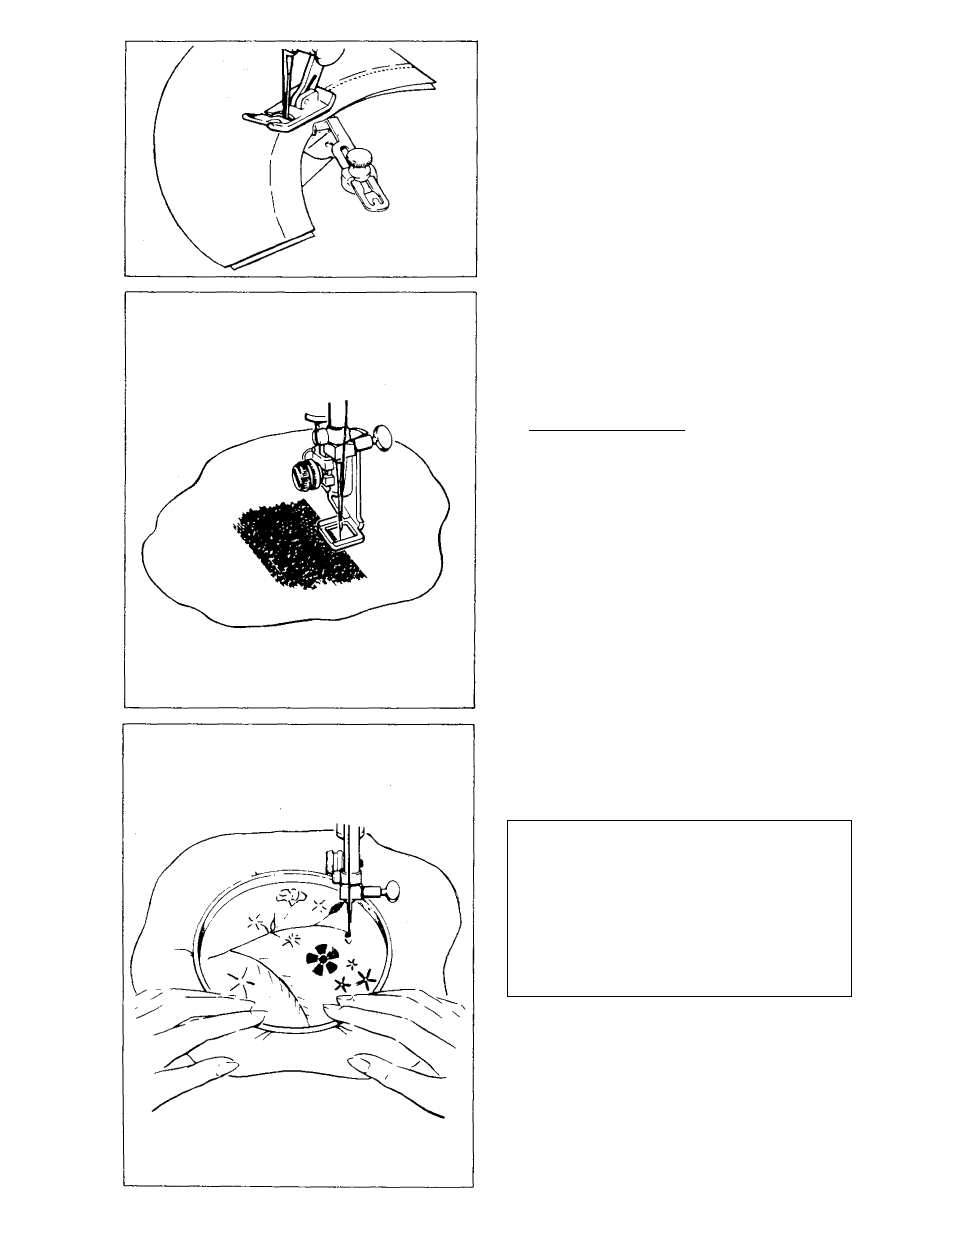
SEWING CURVED SEAMS
• Baste seam line.
•
Use a short stitch for elasticity and
strength.
• Guide fabric to follow curve.
•
The seam guide may also be used
when
sewing
curved
seams.
Attach
seam guide at an angle so that the
edge closer to the needle acts as a
guide.
DARNING
(Not included on 10 stitch sewing machine.
See page. 35)
Mend worn or torn areas using the
Darning and Embroidery Foot.
• Trim ragged edges and baste a backing
on wrong side of tear.________________
RECOMMENDED SETTINGS
Stitch Selection:
Straight Stitch
Stitch Width:
0
Stitch Length:
Foot:
Darning and Embroidery (G)
Needle Plate:
General Purpose (A)
• Attach Feed Cover.
• Place area to be darned, right side up,
under presser foot; lower foot.
• Stitch, guiding fabric back and forth,
FREE MOTION EMBROIDERY
in free motion embroidery, you sew without
a presser foot, and control the fabric with
an embroidery hoop.
RECOMMENDED SETTINGS
Stitch Selection
: Straight Stitch
or Zig-Zag
Stitch Width:
:l| ;,|
Stitch Length:
0
Foot:
Remove foot with shank
Needle Plate:
General Purpose (A)
• Attach Feed Cover.
• Be sure to lower presser foot lifter.
•
When embroidering, as shown, use
straight stitches for stems, and zig-zag
stitches, at varying widths, for leaves
and petals. Lengthen stitches by mov
ing the hoop faster or slower.
NOTE: The Darning and Embroidery
Foot may be used to help control fabric.
19