Selecting a pattern, Section 3 straight stitching, Adjusting stitch length – SINGER 9113 User Manual
Page 17: Straight stitching, Control panel, Recommended settings
Attention! The text in this document has been recognized automatically. To view the original document, you can use the "Original mode".
SELECTING A PATTERN
Control panel
Pattern
Pattern selector
dial
Select a pattern
For example
5
:>
L
1
<
^ III
%
i
C
/ < « III »
7 8
9
10 11 12 13/14
15
16 IT
10
&
13
Turn the
selector dial
and align the
number on the
dial with the
above dot.
To sew a zig
zag stitch
align no.6
with the dot.
' 2
3
4
5
6
7
8 9/10
11 12
13
o O ' « r
n .
■ 1..1
o c
t
(
1)
10
&
13
Turn the
selector dial
until indicator
appears under
desired pattern.
To sew a zig
zag stitch,
you would
turn selector
dial until
the indicator
appears as in (1).
SECTION 3
STRAIGHT STITCHING
Before beginning a sewing project, check the Fabric, Thread and Needle Table on page
36 for the best needle and thread combination for your fabric.
RECOMMENDED SETTINGS
Stitch Selection:
Straight Stitch
Stitch Width:
II ip
\ \
I
t W
55 "
Stitch Length:
1-1/2 to 4
Foot:
General Purpose
(B)
Needle Plate:
General Purpose
(A)
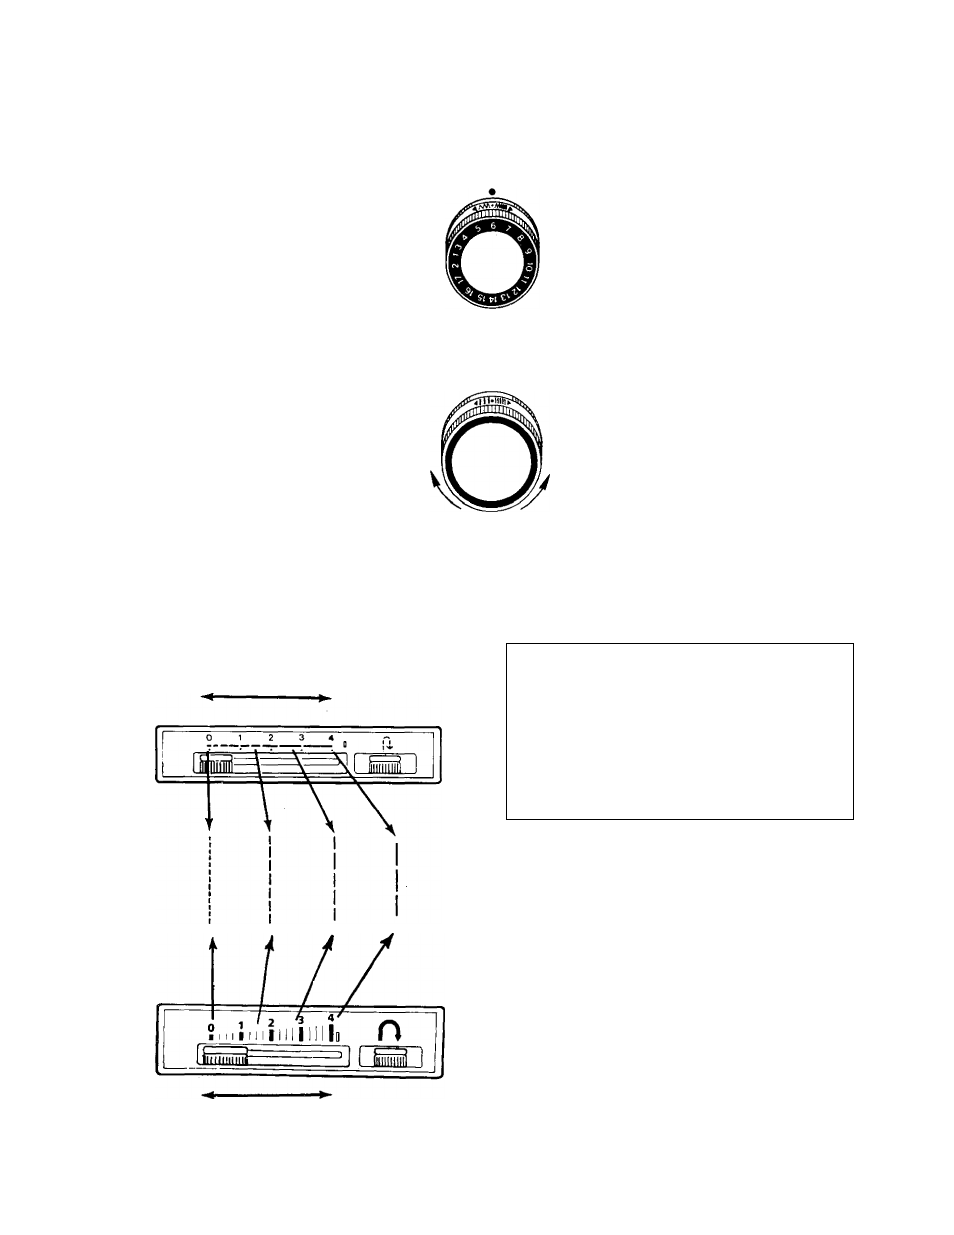
ADJUSTING STITCH LENGTH
The stitch length indicator is numbered
0 - 4 . The lower numbers are shorter
stitches. Shorter stitches are best for light
weight fabrics; longer ones for heavy
fabrics. To adjust the length of your
stitches, slide the stitch length lever to
the left or right.
15