Amana 495P3 User Manual
Page 3
Attention! The text in this document has been recognized automatically. To view the original document, you can use the "Original mode".
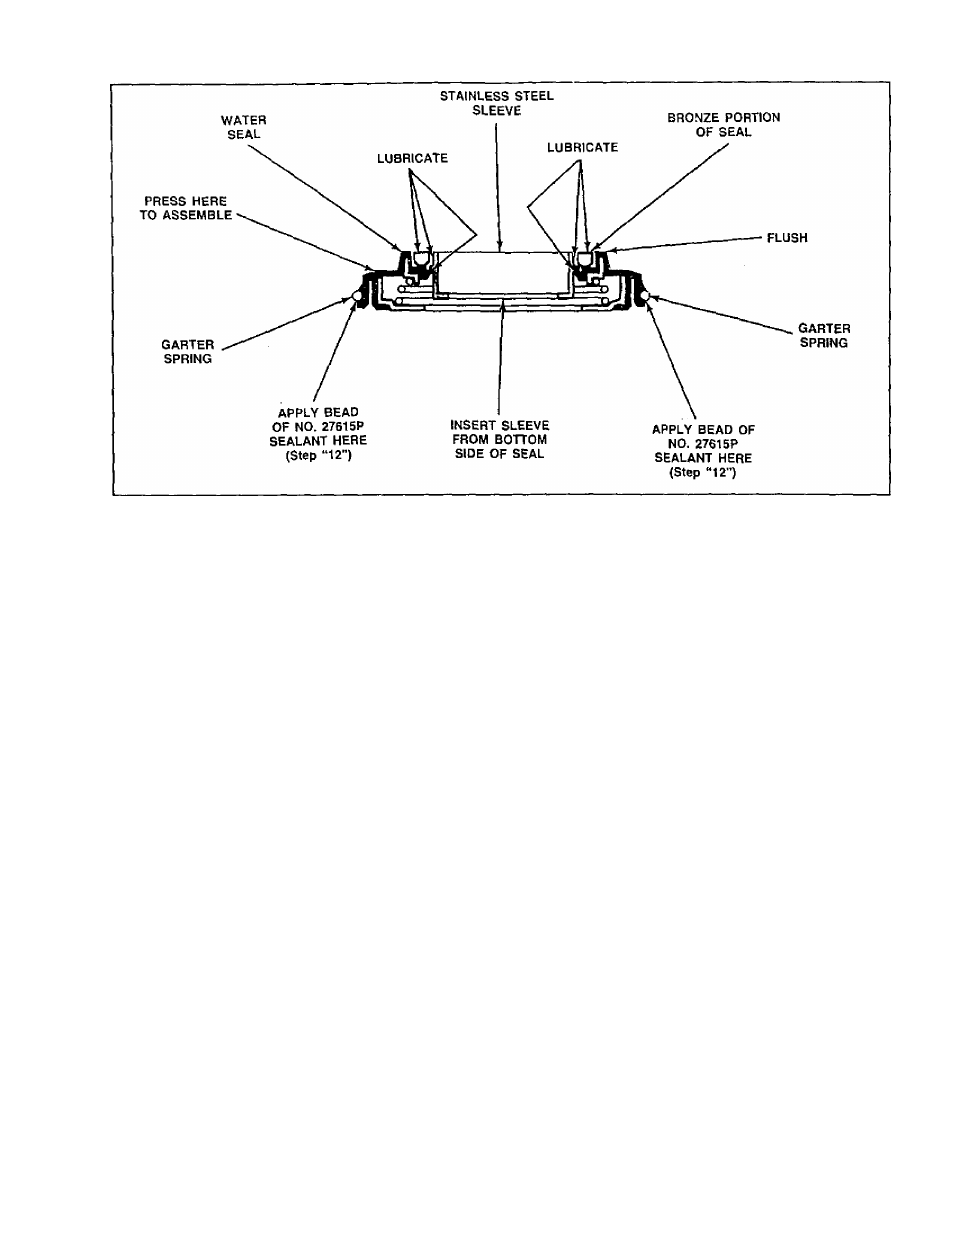
Figure 3
9.
Apply a light film of non-staining petroleum jelly
^ (such as Vaseline®) to the bronze portion of the
’ water seal and to the outer surface of the
stainless steel sleeve, Figure 3.
IMPORTANT: Do not over lubricate!
10. Insert the stainless steel sleeve into the water
seal from the bottom side of the seal, Figure 3,
until the sleeve is flush with the bronze portion
of the seal.
11. Leave the garter spring on the seal. Place the
new' seal over the outer flange (with the seal lip
on outside of tub flange). Then press the seal
into the tub flange opening using moderate finger
pressure.
12. Carefully apply a small amount of No. 27615P
Sealant (supplied in kit) around the outer edge of
seal and tub. (The area located just below the
garter spring, Figure 3.)
IMPORTANT: Do not allow sealant to get in
contact with the sealing surface of the water seal
as it will cause a water leak.
13. Lubricate the inner splines of the new hub
assembly (supplied in kit) with No. 27604P
Anti-Seize compound.
14. Carefully place the new hub assembly on the
splined transmission tube.
IMPORTANT: Firmly push hub down against the
outer tub seal and hold in this position.
15. While holding the hub down, place the spline
insert onto the transmission tube until it bottoms
against the hub. Then place the hex nut on the
transmission tube (with the larger inside bevel on
the nut toward the spline insert), then tighten the
nut.
IMPORTANT: Torque the hex nut down between
40 to 70 foot pounds (54.23 to 94.91 N-m). If
torque wrench is not available, tap hex wrench
with a hammer until hub turns or until nut will no
longer tighten.
NOTE: If a lint filter was originally used between
the washtub and hub, then the lint filter must be
used again when installing the washtub. Then
continue on with step 16.
If a gasket was originally used between the
washtub and hub, then use the new gasket
(supplied in kit) and install the gasket as follows:
a. Apply a small amount of non-staining
petroleum jelly (such as Vaseline®) to each of
the sealing surfaces where washtub gasket
will contact hub and the bottom of the
washtub.
b. Carefully place the new washtub gasket.
No, 27125, (supplied in kit) on hub.