Heat-anticipation, Calibration adjustment – White Rodgers 1E30-373 User Manual
Page 2
Attention! The text in this document has been recognized automatically. To view the original document, you can use the "Original mode".
All wiring should be done according to local and national electrical codes and ordinances.
Because of the many possible uses of these room
thermostats, no wiring diagrams are presented. Use the
wiring diagram that is shown on the instruction sheet that is
packed with the primary controi, or the one that is supplied
by the manufacturer of the heating equipment.
HEAT-ANTICIPATION
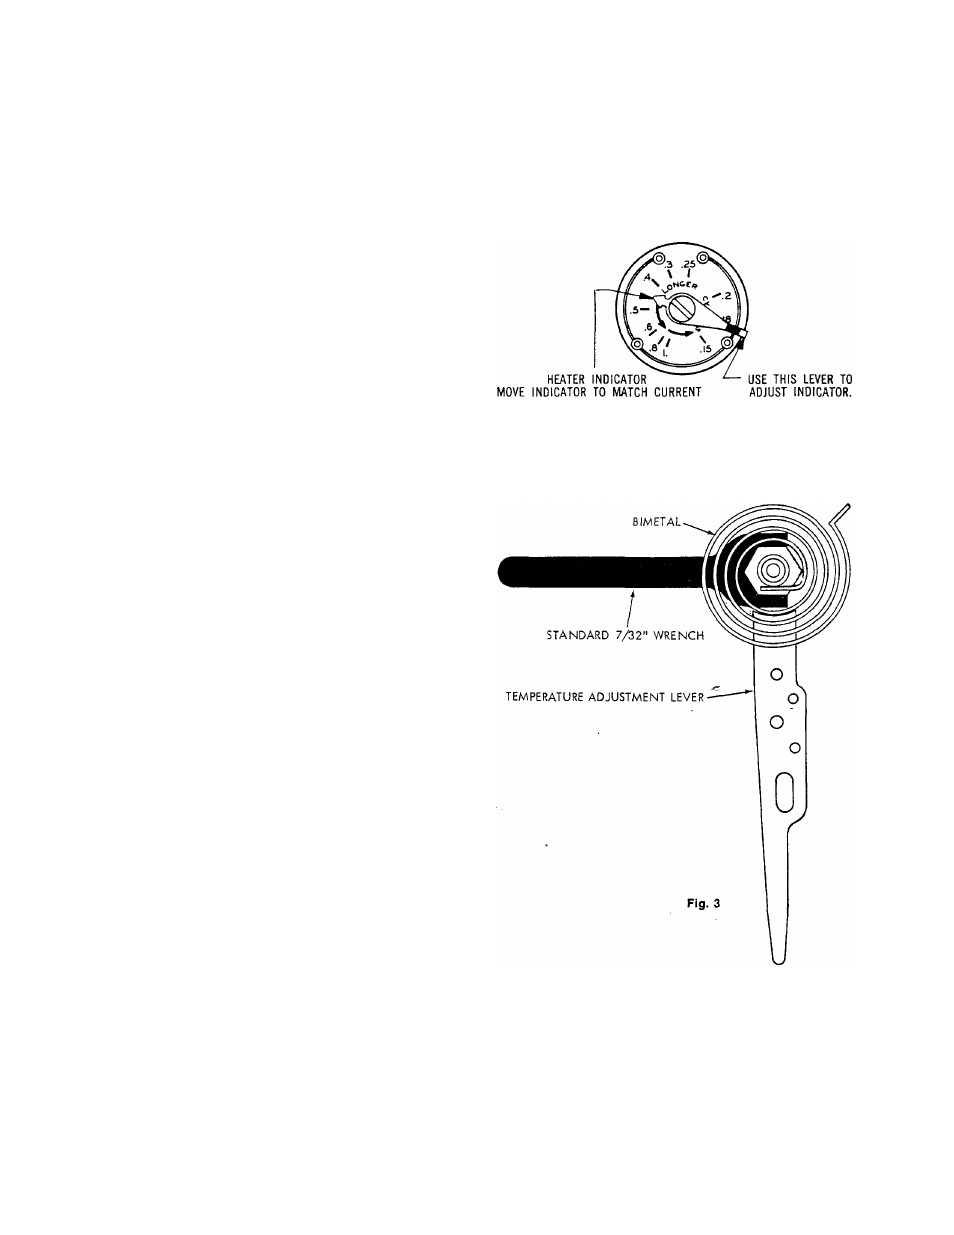
This thermostat is equipped with an adjustable heater. Set
heater indicator to match the current rating of the primary
control. The heater may be adjusted for current ratings from
.15 to 1.0 Amps. (fig. 2)
Adjustments
Cycles too long — Set adjustable heater to a slightly lower
dial setting (1/2 division).
Cycles too short — Set adjustable heater to a slightly
higher dial setting (1/2 division).
RATING OF PRIMARY CONTROL)
Fig. 2
CALIBRATION ADJUSTMENT
These thermostats have been carefully adjusted at the
factory and should not require re-calibration.
A few degrees difference between theindicatorsetting of the
thermostat and actual room temperature is not considered
too important. If the disagreement is much greater, however,
first make sure that the thermostat is properly located and
leveled. Then, if re-caiibration still seems necessary,
proceed as follows:
1. Move temperature adjustment lever to a setting about 5°
above room temperature.
2. Remove thermostat cover. Slip standard 7/32” wrench
onto hex nut beneath bimetal, and, holdirtg temperature
adjustment lever stationary, turn hex nut clockwise until
mercury shifts to right end of tube. (fig. 3)
3. Move temperature adjustment lever to lowest setting.
4. Replace thermostat cover. Wait 10 minutes for bimetal
temperature to stabilize. Don’t stand near thermostat
during this period as your breath and body heat will affect
temperature of bimetal.
5. Move temperature adjustment lever to correspond to
actual room temperature. Then remove thermostat cover.
6. Slip 7/32” wrench onto hex nut, holding temperature
adjustment lever stationary, turn hex nut counterclock
wise until mercury just barely shifts to left end of tube.
Then replace cover and set thermostat to desired
temperature.