Charging your battery outside the vehicle – Sears DieHard 200.71460 User Manual
Page 11
Attention! The text in this document has been recognized automatically. To view the original document, you can use the "Original mode".
11. When the battery is fully charged, first unplug the
charger's power cord. Next, turn the timer switch
to the OFF position. Then, standing away from
the battery, remove the charger clamps in this
order:
(1) from the chassis connection and,
(2) from the battery post.
12. Clean and store the battery charger in a dry
location.
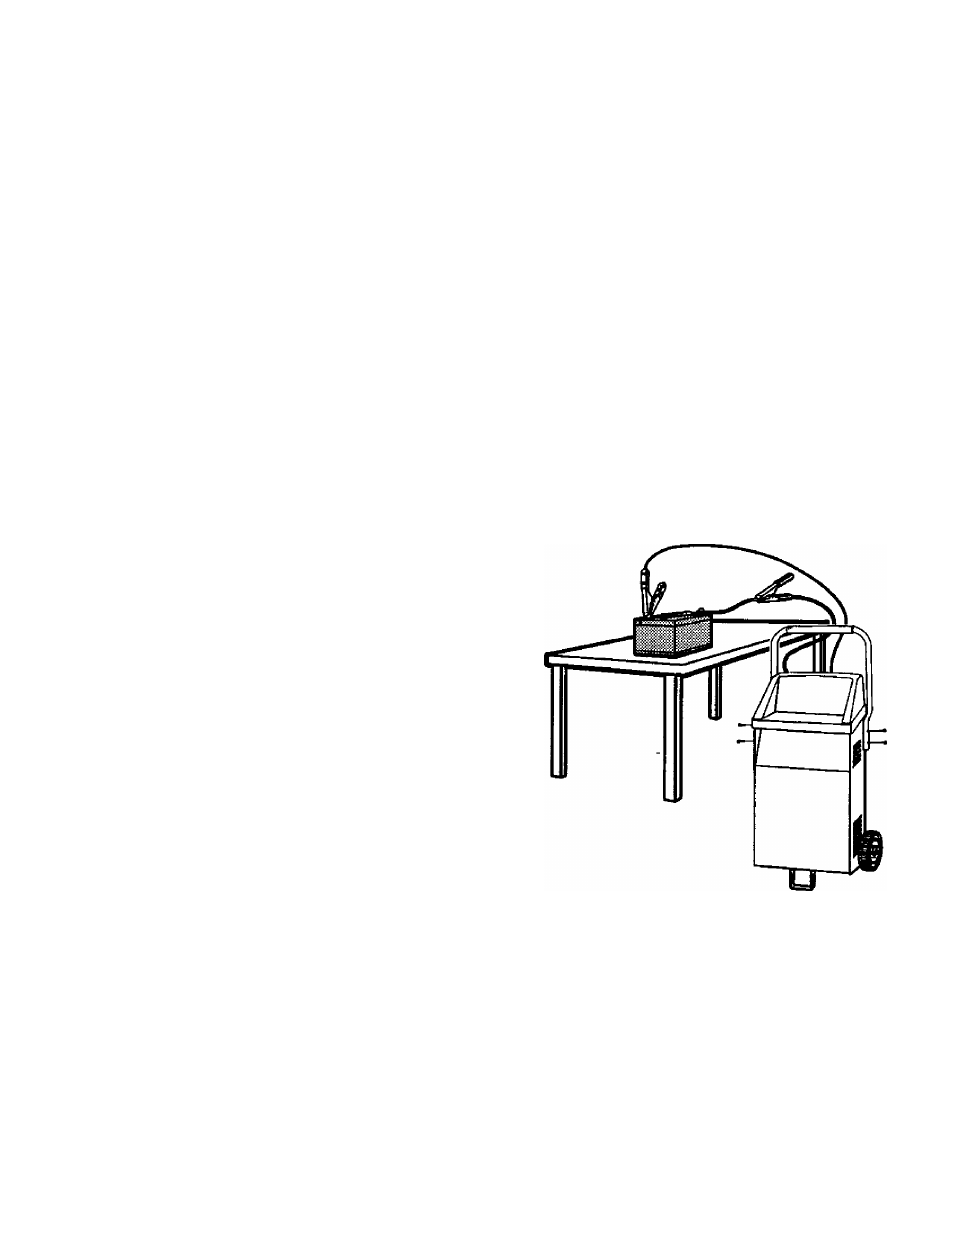
Charging your battery outside the vehicle;
1. Remove the battery from vehicle, making sure to
disconnect grounded terminal first with all accesso
ries and lights turned off in the vehicle.
2. Check the polarity of the battery posts as indicated
on the battery case: POSITIVE (POS, P, -I-) and
NEGATIVE (NEG, N, -).
NOTE: On top-post batteries, the positive battery
terminal usually has a larger diameter post than the
negative one.
3. Connect the red (POSITIVE) charger clamp to the
POSITIVE post of the battery. Be sure to rock the
clip back and forth to make a solid connection.
4. Attach a 6-gauge (AWG) ora 4-gauge (SAE) insu
lated battery cable of at least 24-inches in length to
the NEGATIVE battery post. This cable will provide a
safer connection because arcing and sparking will
occur away from the battery. (The battery cable is
not provided with the charger, but may be pur
chased at most automotive accessory outlets.)
5. Take the other end of the 6-gauge (AWG) ora 4-
gauge (SAE) insulated 24-inch cable and, standing
as far away from the battery as possible, connect the
black (NEGATIVE) charger clamp to the free end of
the cable. Be sure to rock the clamp back and forth
to make a solid connection. IMPORTANT; Wear
safety glasses and face away from the battery while
you are making this final connection.
6. Make sure your charger’s VOLT/AMP SELECTOR
and timer switches are in the OFF position. Next
plug the charger's power cord into a grounded AC
outlet.
7. Set the VOLT/AMP SELECTOR switch to the
desired charge time, from 30 to 135 minutes, If
more than 135 minutes of charging time is needed,
the HOLD position can be used. Wien using
HOLD, the battery being charged must be moni
tored closely to avoid over charging.
8. Set the TIMER to the desired charge position. (See 10
“Setting the Controls" on pages 7 and 8, and
“Calculating Charge Time” on page 11 for correct
settings.)
9. When the battery is fully charged in the MANUAL 11.
mode, the AMMETER pointer will fall to about half
the selected charge rate. The BATTERY TEST will
be in the green area of the meter, For specific
positions, see the “Setting the Controls" section on 12.
1 0
pages 7 and 8.
When the battery is fully charged, first unplug the
charger power cord before attempting to discon
nect charger clamps. Next, set the right-hand
switch to the OFF position.
Standing away from the battery, remove the
charger leads. First remove the clamp from the
24-inch extension cable. Then remove the clamp
from the battery post or terminal.
Clean and store the battery charger in a dry
location.