Float/cage assembly – Sears 113.177571 User Manual
Page 5
Attention! The text in this document has been recognized automatically. To view the original document, you can use the "Original mode".
Float/Cage Assembly •
WARNING: For your own safety,
never connect plug to power source
outlet until all assembly steps are
complete and you have read and
understood the safety and operation
instructions. Do not operate vac with
any parts damaged or missing.
NOTE: Your Wet/Dry Vac is shipped
unassembied. Read the foiiowing assem-
biy instructions carefuiiy.
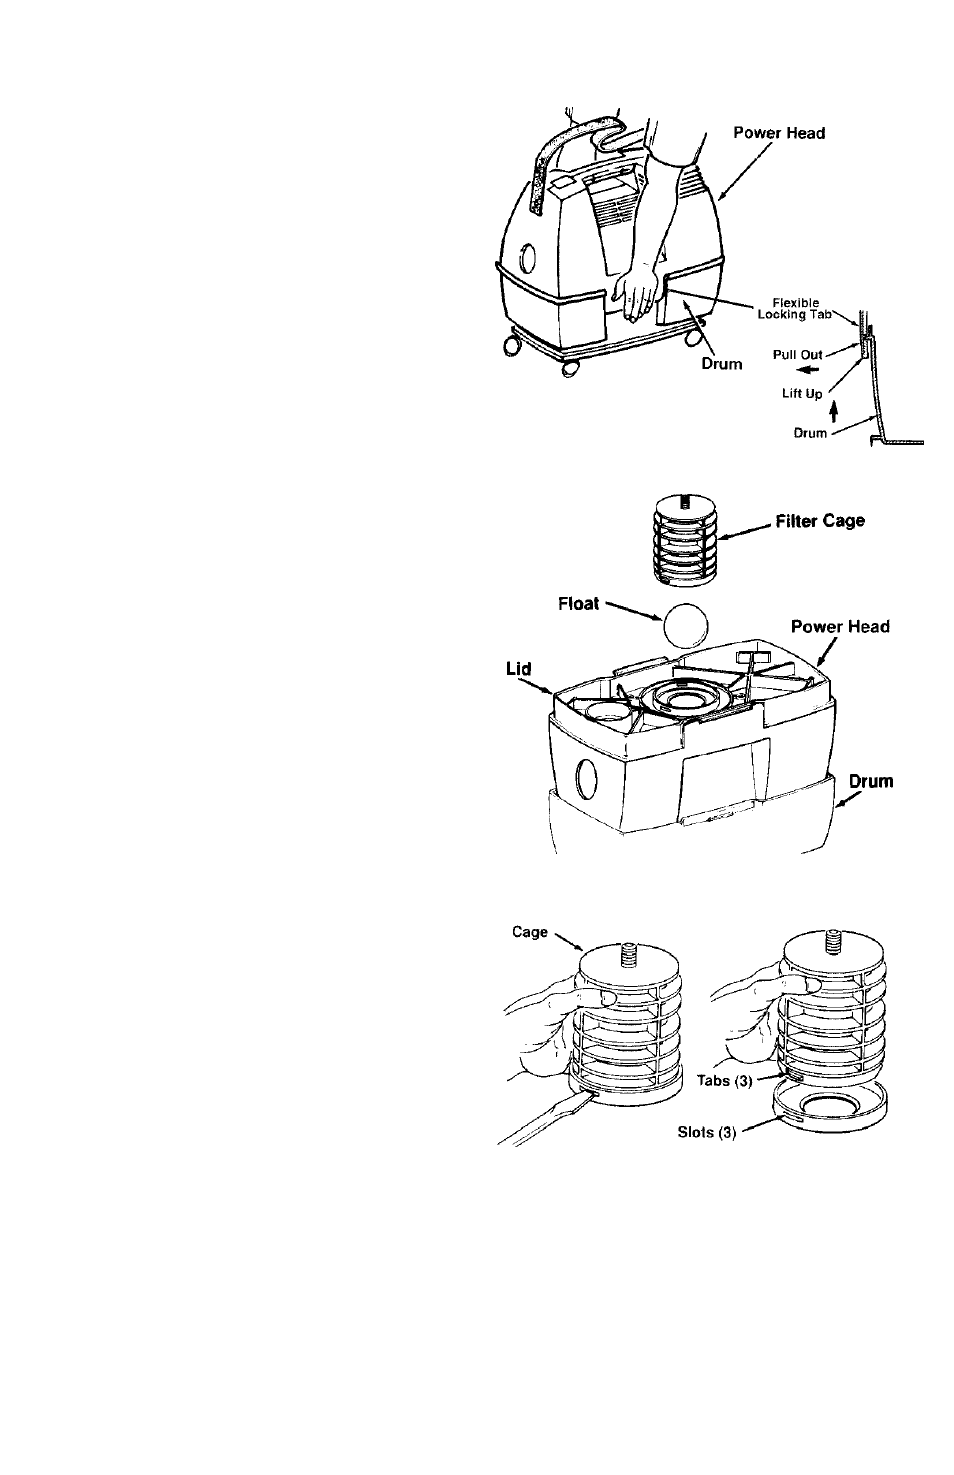
1. Grasp tabs on both the right and ieft
side of the power head. Siowiy puii
tabs away from drum and iift the power
head off the drum. Flip the power head
and place it in the drum.
2. Locate the float. Place the float over
the opening in the center of the lid.
WARNING: To avoid personai injury
or damage to vac be sure to keep
hands, fingers, or any other foreign
objects out of the center opening
when assembiing the fioat.
3. Line up filter cage tabs with the slots in
the center ring of the lid.
4. Push on the filter cage until the tabs
snap into the slots for a secure fit. (One
tab at a time)
NOTE: If the filter cage needs to be
removed, use a slotted screwdriver and
insert the blade near one of the tabs
between the filter cage and the center
ring of the lid. Pry the tab out of the slot.
Tilt the filter cage and lift slightly away
from the lid. To replace, follow float/cage
assembly instructions.