Operation, Operation -11, Know your chipper-vacuuwi – Sears 247.79964 User Manual
Page 8
Attention! The text in this document has been recognized automatically. To view the original document, you can use the "Original mode".
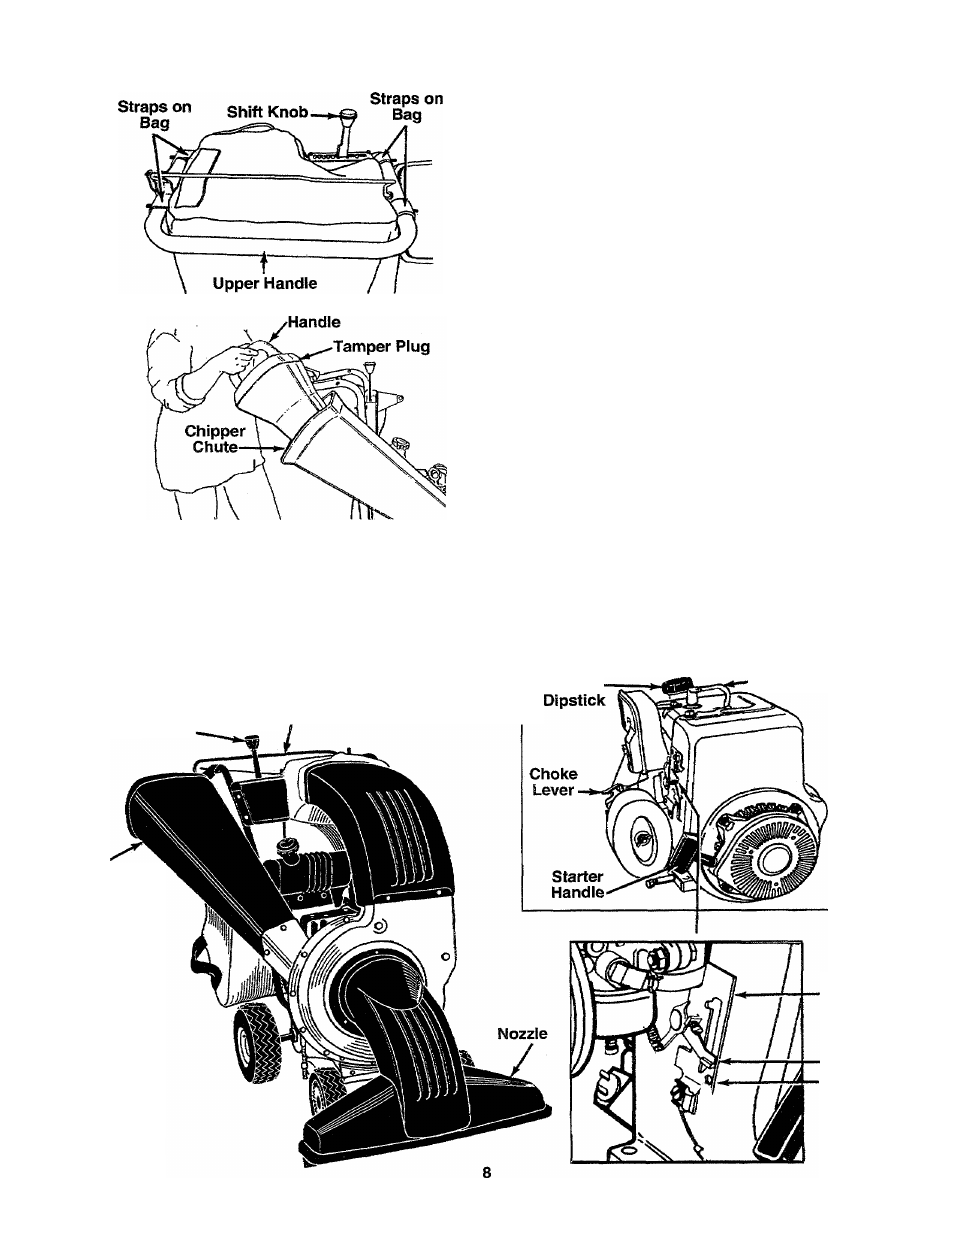
FIGURE 7.
FIGURE 8.
ATTACHING THE BAG
•
Place bag inside of handle assembly. Slip the
opening on the bag over the discharge chute, mak
ing certain it is over the rib on the discharge chute.
See figure 6.
• Place the four straps on the top of the bag over
upper handle, hooking them on studs. See figure 7.
NOTE:
Be sure the bag goes under the drive clutch
handle.
• Squeeze the clamp on the drawstring, and pull the
drawstring tight. Release the clamp.
INSTALLING THE SHIFT KNOB
Remove the cardboard protecting the threads. Thread
the shift knob onto the end of the shift lever.
TAMPER PLUG
The handle on the tamper plug must be in the vertical
position as shown in figure 8. To determine which
side of the tamper plug is up, match the angle of the
tamper plug to the angle of the chipper chute.
Insert the tamper plug into the chipper chute. Tamper
plug should remain in the chipper chute whenever the
chipper chute is not in use.
OPERATION
KNOW YOUR CHIPPER-VACUUWI
READ THIS OWNER’S MANUAL AND SAFETY RULES BEFORE OPERATING YOUR CHIPPER-VACUUM.
Compare the illustrations with your chipper-vacuum to familiarize yourself with the location of various controls and
adjustments. Save this manual for future reference.
Shift
Lever ■
Drive Clutch
Handle
Chipper
Chute
Oil Fill
Spark Plug
‘Wire and Boot
Fast
■Throttle
Stop
FIGURE 9.