Dangert, Operating procedures – Sears Craftsman 919.153110 User Manual
Page 8
Attention! The text in this document has been recognized automatically. To view the original document, you can use the "Original mode".
Grounding Instructions
WARNING
1
IMPROPER GROUNDING CAN RESULT IN
ELECTRICAL SHOCK. IN THE EVENT OF A
SHORT CIRCUIT, GROUNDING REDUCES
THE RISK OF SHOCK BY PROVIDING AN
ESCAPE WIRE FOR THE ELECTRIC CUR
RENT. THIS AIR COMPRESSOR MUST BE
PROPERLY GROUNDED.
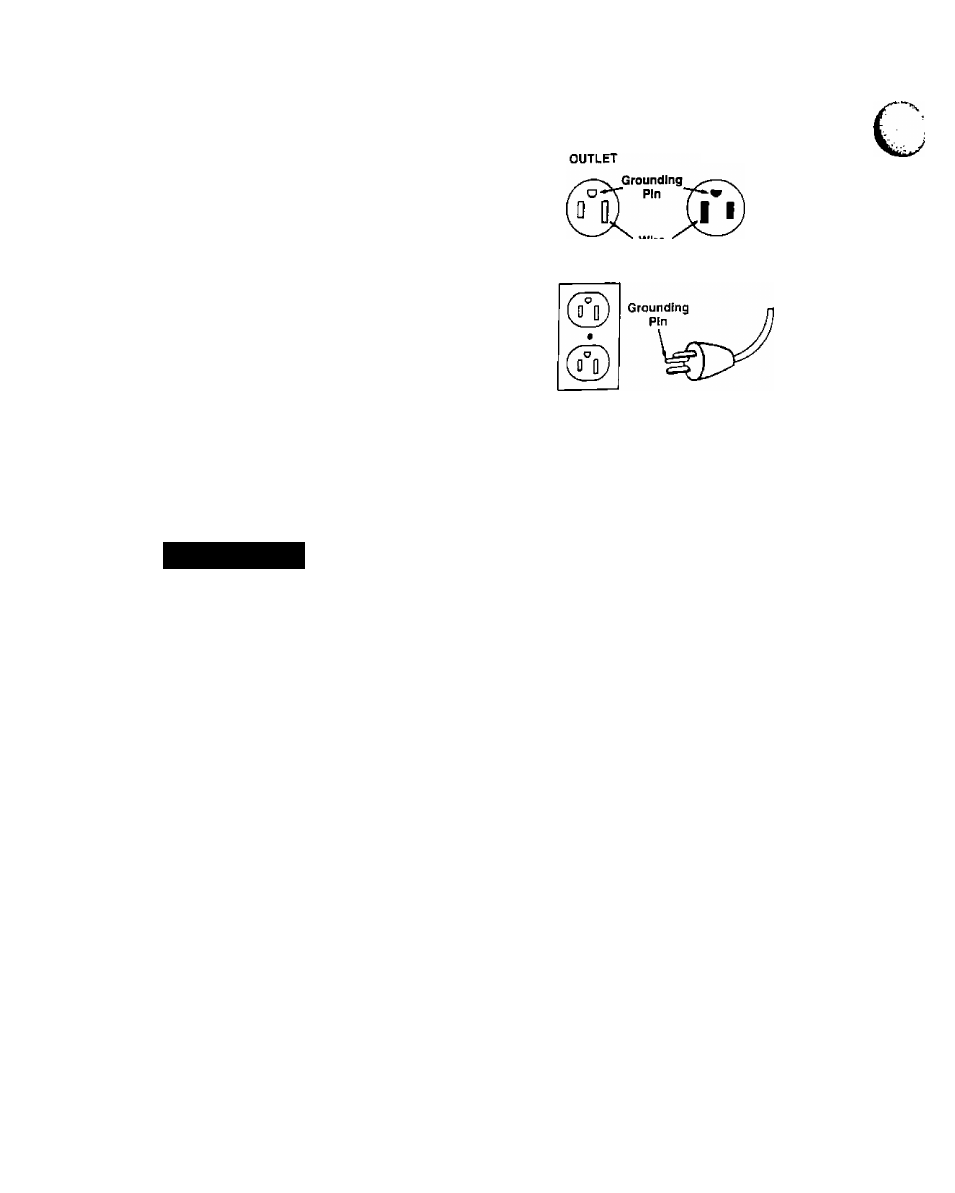
1. The air compressor is equipped with a cord having a
grounding wire with an appropriate grounding plug.
The plug must be used with an outlet that has been
installed and grounded in accordance with all local
codes and ordinances. The outlet must have the
same configuration as the plug. DO NOT USE AN
ADAPTER.
If these grounding instructions are not completely under
stood, or if in doubt as to whether the compressor is
properly grounded, have the installation checked by a
qualified electrician.
PLUG
White
Wire
Terminal
2. Do not modify the plug that has been provided. If it
does not fit the available outlet, the correct outlet
should be installed by a qualified electrician.
3. Inspect the plug and cord before each use. Do not use
if there are signs of damage.
^DANGERT
RISK OF ELECTRICAL SHOCK. IF REPAIR
ING OR REPLACING CORD OR PLUG, THE
GROUNDING WIRE MUST BE KEPT SEPA
RATE
FROM
THE
CURRENT-CARRYING
WIRES. NEVER CONNECT THE GROUND
ING WIRE TO A FLAT BLADE PLUG TER
MINAL.
(THE
GROUNDING
WIRE
HAS
INSULATION WITH AN OUTER SURFACE
THAT IS GREEN - WITH OR WITHOUT YEL
LOW STRIPES.)
Break-In Procedures
This procedure is required only once, before the air com
pressor is put into service.
1. Set the pressure switch OFF/AUTO lever to the “OFF”
position.
2. Plug the power cord into the correct branch circuit
receptacle.
3. Turn the regulator clockwise, opening it fully, to pre
vent air pressure build-up in the tank.
4. Move the OFF/AUTO lever to “AUTO”. The compres
sor will start.
5. Run the compressor for 15 minutes. Make sure the
regulator is open and there is no tank pressure build
up.
6. After 15 minutes, close the regulator by turning it
counter-clockwise. The air tank will fill to cut-out pres
sure and then the motor will stop.
Refer to Operating Procedures.
OPERATING PROCEDURES
1. Before attaching air hose or accessories, make sure
the OFF/AUTO lever is set to “OFF” and the air
regulator is closed. (Close it by turning it counter
clockwise.)
2. Attach hose and accessories.
WARNING
]
TOO MUCH AIR PRESSURE CREATES A
HAZARDOUS RISK OF BURSTING. CARE
FULLY FOLLOW STEPS 3 AND 5 EACH TIME
THE CC.MPOESSCR IS USED.
3. Check the manufacturer's maximum pressure rating
for air tools and accessories. The regulator outlet
pressure must never exceed the maximum pressure
rating.
4. Turn the OFF/AUTO lever to “AUTO” and allow tank
pressure to build. Motor will stop when tank pressure
reaches “cut-out” pressure.
5. Open the regulator by turning it clockwise. Adjust the
regulator to the correct pressure setting. Your com
pressor is ready for use.