X2 cotter pins, Rod guide supporf, Assembly – Homelite 32" Snow Thrower User Manual
Page 3
Attention! The text in this document has been recognized automatically. To view the original document, you can use the "Original mode".
ASSEMBLY
1.
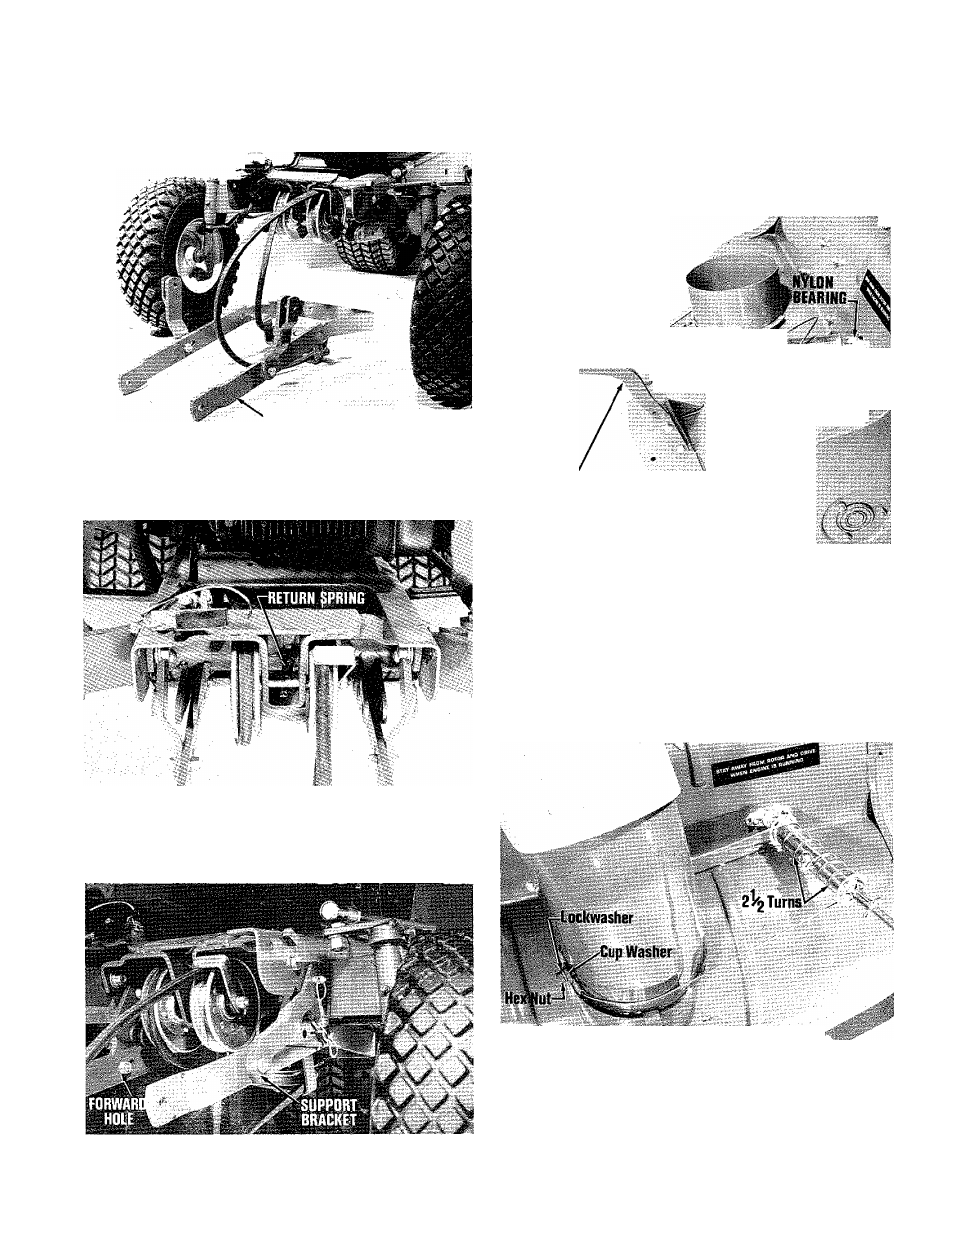
Disconnect the return spring between PTO idler pulleys.
Place belt around rotor drivepulley on the hitch assem
bly. Position hitch assembly under tractor (see photo).
■ c,
HITCH ASSEMBLY
Pass the belt over PTO idle pulleys through cutout in
crossmember and around lower engine pulley. Replace
the return spring previously removed and pull forward
all slack to left side of unit (see photo).
2. Secure hitch to tractor using clevis pins and quick pins.
Be sure to mount rear of hitch to the rear most holes in
the hitch support brackets. Check to insure support arm
assembly is mounted in the foward holes in hitch assem
bly (see photo).
3. Attach skidshoes to bodyusing the3/8-16 x 3/4carriage
bolts, 3/8" flat washers, 3/8" lockwashers and 3/8" full
hex nuts.
4.
Secure rod guide support to body using the 3/8-16 x 1
hex head bolts, 3/8" lockwashers, and 3/8-16 hex nuts
supplied. Insert spout control rod into spout control
tube and secure with 1" cotter pin. Now insert spout
control rod assembly into nylon bearing on right side of
body and secure with two 3/4" cotter pins. Attach rod
guide and nylon liner to control rod and secure to rod
guide support arm with the hex head bolt, lockwasher and
hex nut (see photo).
Si
ROD GUIDE and
NYLDNLINER
4.
X2 COTTER PINS
ROD GUIDE
SUPPORf
5.
Lower spout over neck of discharge spout on body and
line up with slot in rear of spout neck. Rotate spout until
it faces forward and connect spout extension with carriage
bolt, hex cup washer and wing nut. Position -control rod
tube so that cable clamp faces side of discharge spout.
Loop wire cable on most forward part 2-1/2 coils counter
clockwise passing over the top of guide tube and secure
to stud on spout. Coil 2-1/2 times on rear of tube clock
wise passing under tube to spout and secure with special
cup washer, lockwasher and hex nut (sec photo).
NOTE: HOOD REMOVED FOR
PHOTOGRAPHIC PURPOSES