Carrier 49BG User Manual
Page 5
Attention! The text in this document has been recognized automatically. To view the original document, you can use the "Original mode".
7.
8
.
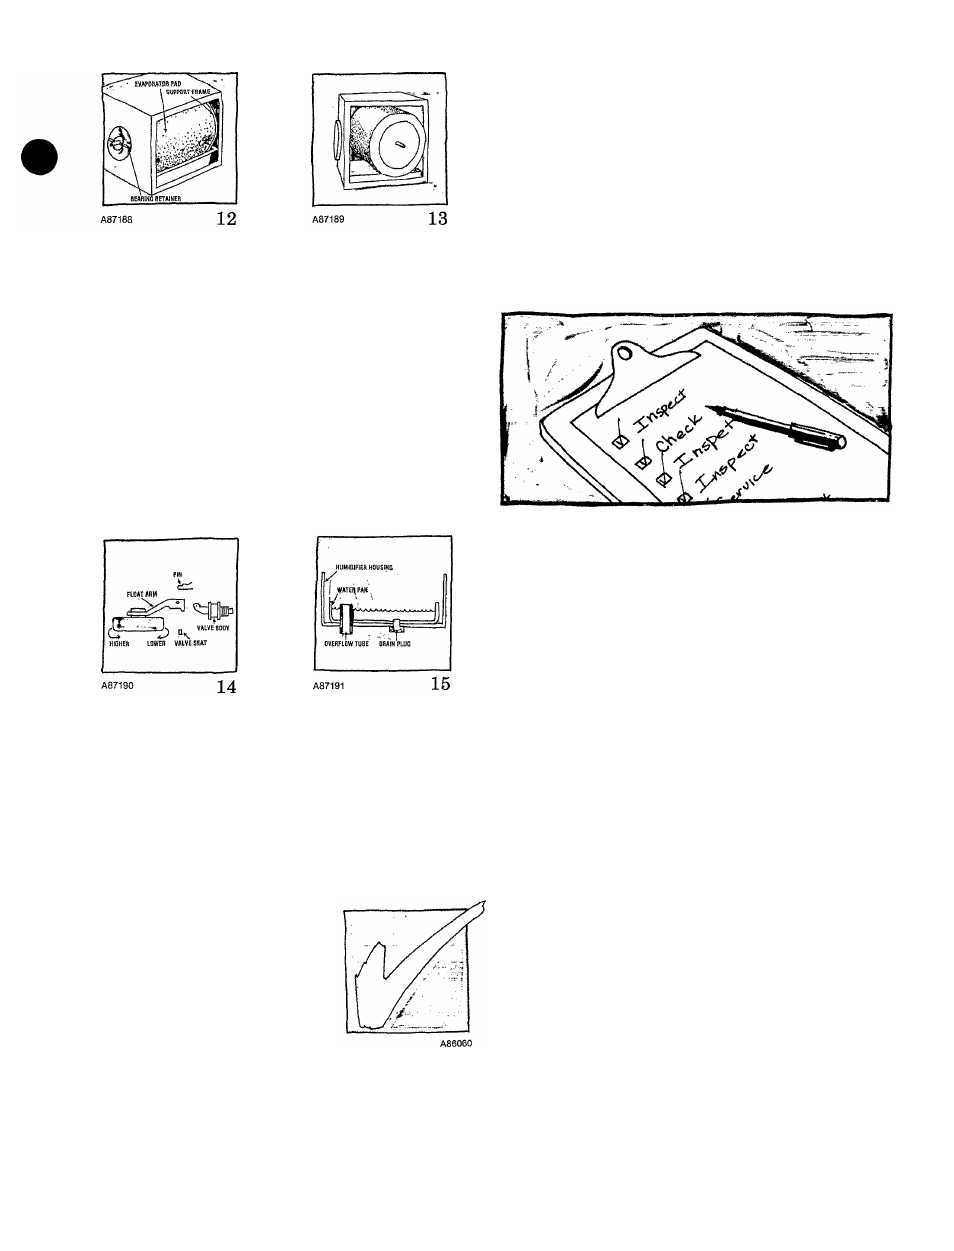
Clean the water pan and unit cabinet. Tilt the water
pan and lift it from the unit. Wash the pan with warm,
soapy water. Flex the pan to loosen accumulated scale.
Wash the unit interior, removing any accumulated
deposits. Inspect the overflow line to ensure that no
blockage has occurred. Clean as required. See Fig. 15.
Reassemble your Model 49WS Humidifier. Reinsert
the water pan and drain plug. Ensure that the overflow
tube is inserted into the hole at the bottom of the cabi
net. Attach the float arm to the valve body by aligning
the holes on both parts and reinserting the pin. Do not
force or bend the pin. The float arm should have free
up-and-down movement. Install the evaporator pad
assembly. Ensure that the square shaft engages the
motor coupling and that the bearing washer is located
inside the bearing retainer. Turn the water ON. Adjust
float by rotating until water covers inside of foam
drum. Attach the access door and turn the latches.
9. Turn ON electrical power supplies. Refer to startup
procedures listed on pages 2 and 3.
BEFORE YOU REQUEST A “SERVICE CALL”
BEFORE YOU CALL FOR SERVICE, CHECK FOR THESE
EASILY SOLVED PROBLEMS:
•
Check the main power discon
nect switch. Verify that the circuit
breakers are ON or that fuses have
not blown. If you must reset break
ers or replace fuses, do so only
once. Contact your servicing dealer
for assistance if the breakers trip or
the fuses blow a second time.
•
If the humidity level is too low, check the humidistat
setting. Check that the saddle valve is turned ON. Check
the evaporator pad, and clean or replace the pad as neces
sary. Check water level in 49WS.
•
Check for sufficient airflow. Check the furnace filter or
electronic ear cleaner for excessive accumulations of dirt.
Check for blocked return- or supply-air grilles. Be sure
grilles are open and unobstructed.
• If water drips from the humidifier, check the drain hose
for kinks or obstructions. If your unit is a Model 49WS,
dripping
may
indicate
that
the
float
valve
needs
adjustment.
If your humidifier fails to operate properly, contact your
servicing dealer for troubleshooting and repairs. State the
model and serial numbers of your equipment (these numbers
should be recorded on page 6 of this booklet.) Specify the
apparent problem. With this information, your dealer may
be able to offer helpful suggestions over the phone, or save
valuable time through knowledgeable preparation for the
service call.
A87192
16
REGULAR DEALER MAINTENANCE
In addition to the routine maintenance that you perform,
your humidifier should be inspected regularly by a properly
trained service technician. The inspection (preferably each
year, but at least every other year) should include the
following:
•
Routine inspection of the humidifier, deeming, if neces
sary. Cleaning or replacement of the evaporator pad as
required.
• A check of all electrical wiring and connections.
• A check of water connections to the unit.
•
Operational check of the complete comfort system to
determine actual working condition. NecessEiry repedr and/
or adjustment should be performed at this time.
Your servicing dealer may offer an economical service con
tract that covers seasoned inspections. Ask for further
details.