Centro G51208 User Manual
Page 10
16
17
ASSEMBLY INSTRUCTIONS
17
18
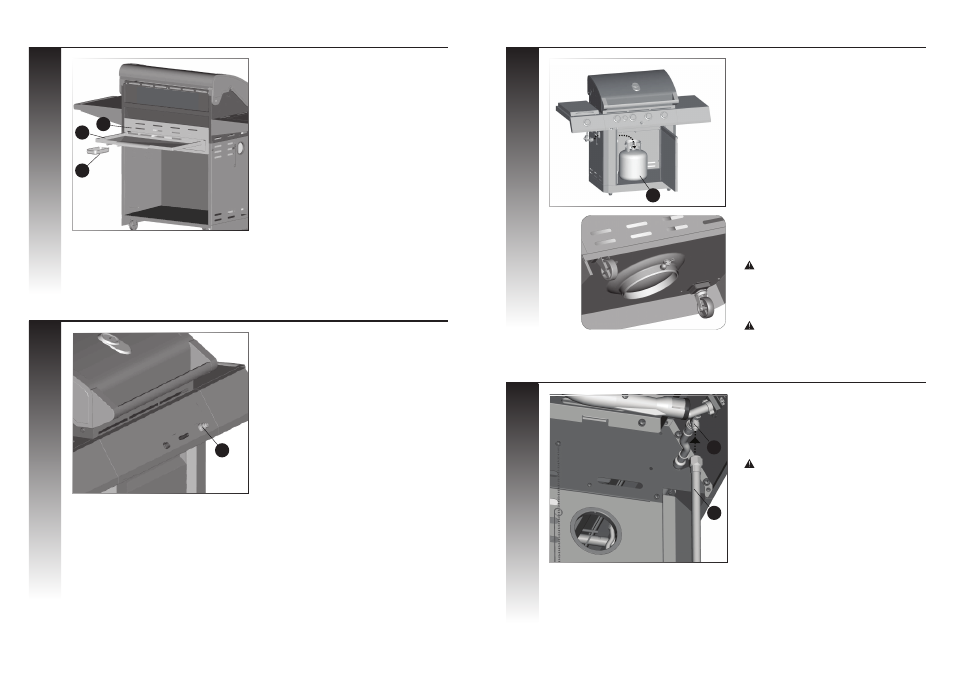
a. Insert the grease tray (CM) into the opening
in the upper back panel (CO), making sure to
engage tracks located under burner box.
b. Place the grease cup (CN) onto the tracks, lo-
cated on the underside of the grease tray (CM).
CM
CN
CO
Unscrew the electronic ignitor button (CF2) and
insert one AA battery into the electronic igniter
battery compartment, with the positive end facing
outward.
* Battery not included.
CF2
ASSEMBLY INSTRUCTIONS
19
20
FOR PROPANE MODEL ONLY.
For natural gas model, follow step 20.
a. Position the 20 lb propane tank onto the
bottom shelf (EG), and secure using the bolt
(already attached) located on the underside of
the bottom shelf, as shown in fi gure B.
b. Attach the regulator coupling nut to the LP
cylinder valve.
ATTENTION: For your families safety, do not
attempt to light this BBQ until you have reviewed
pages 4-7 of the CENTRO Safety & Care Manual.
All Safety and Leak test MUST BE PERFORMED BY
THE END USER, prior to lighting this BBQ.
B
WARNING
Do not store extra propane tanks within BBQ
cart.
FOR NATURAL GAS MODEL ONLY.
Attach the natural gas hose (CB) to the side burner
valve (CC) as shown.
ATTENTION: In order to complete installa-
tion of your Natural Gas BBQ a 1/2” or 3/8”
adapter may be required to connect your
BBQ’s Natural Gas hose to your home gas
supply. Contact your Natural Gas supplier to
purchase the necessary part.
CB
CC
A
EG