Toa SP-1100 User Manual
Page 2
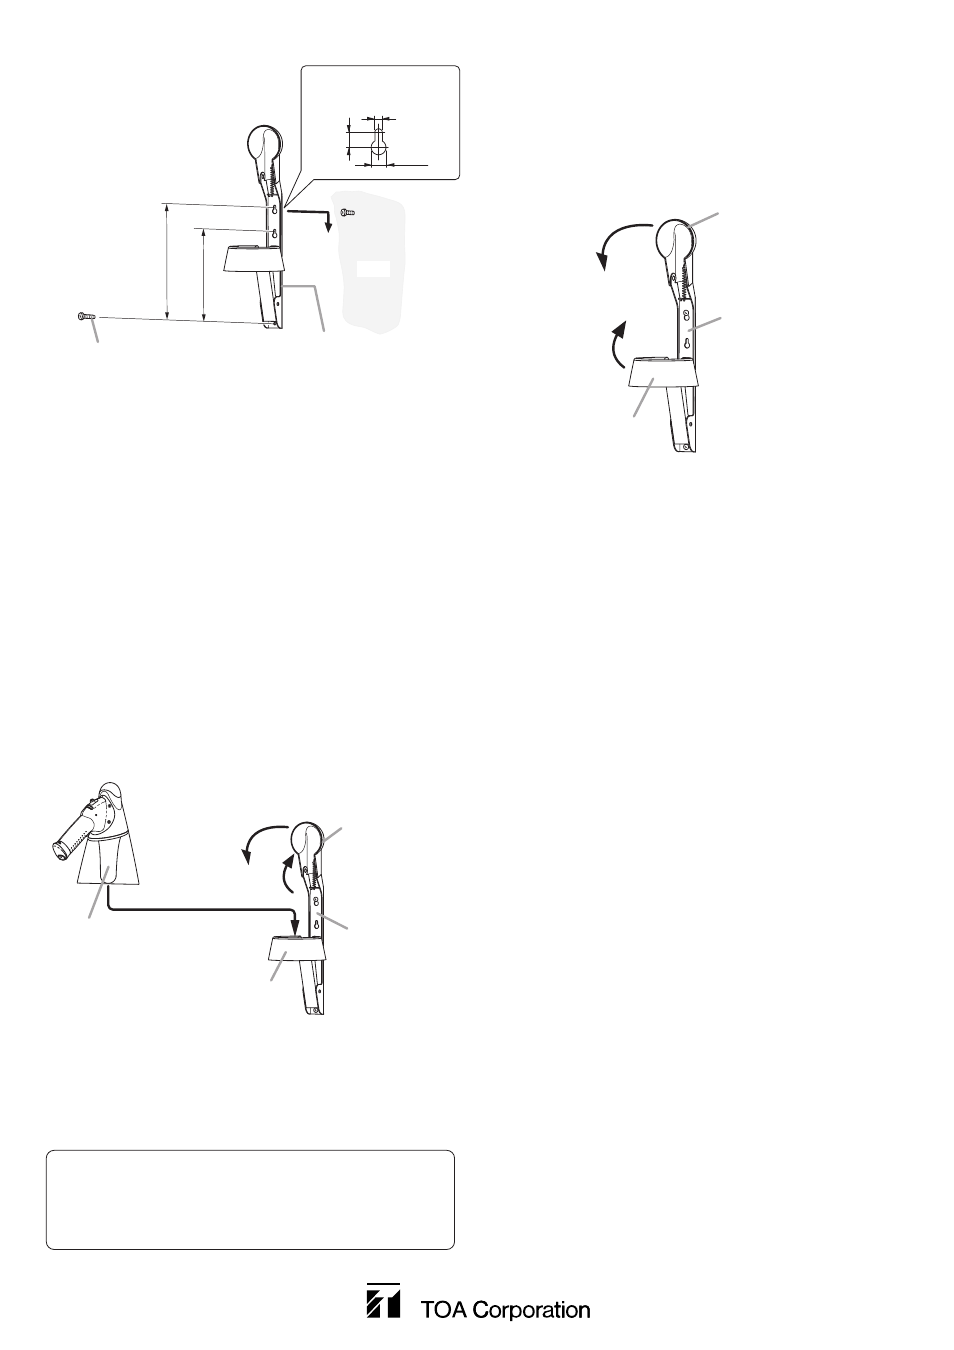
Wall
242.5 mm
192.5 mm
4 x 16 self-tappimg screws (supplied)
Stay
1
2
3
(mm)
Slotted hole dimensions
5
ø10
10
Step 1. Install a self-tapping screw temporarily into the
wall.
Notes
• Use the screw that is appropriate for the
construction of the wall.
• Two 4 x 16 self-tapping screws are supplied
with the SP-1100 bracket.
Step 2. Hook the bracket's slotted hole over the screw
head. Slide the bracket down in the direction
indicated by the arrow.
Step 3. Align the bracket vertically, then fix the bottom part
of the bracket with another self-tapping screw.
Step 4. Tighten both the top and bottom screws to
securely mount the bracket to the wall.
5. INSTALLATION
Two mounting pitches are
made available for selection:
192.5 mm or 242.5 mm.
7. FOLDING THE BRACKET
The holder and dustproof cover can fold if the megaphone
is removed.
Fold the holder first, and then the dustproof cover.
When mounting the megaphone, open the dustproof
cover first, and then the holder.
1
2
Holder
SP-1100
Dustproof cover
Step 1. Raise the bracket's dustproof cover.
Step 2. Place the megaphone on the holder with its front
down.
Step 3. Lower the dustproof cover of the bracket.
6. MOUNTING THE MEGAPHONE
1
3
2
Inner horn
Holder
SP-1100
Dustproof cover
When detaching the megaphone from the bracket,
reverse the above procedures.
Note: Lift the megaphone to detach. The dustproof
cover opens if the megaphone is lifted.
Printed in Indonesia
533-03-028-80