Warning, Subwoofer – Toa BS-301W User Manual
Page 6
6
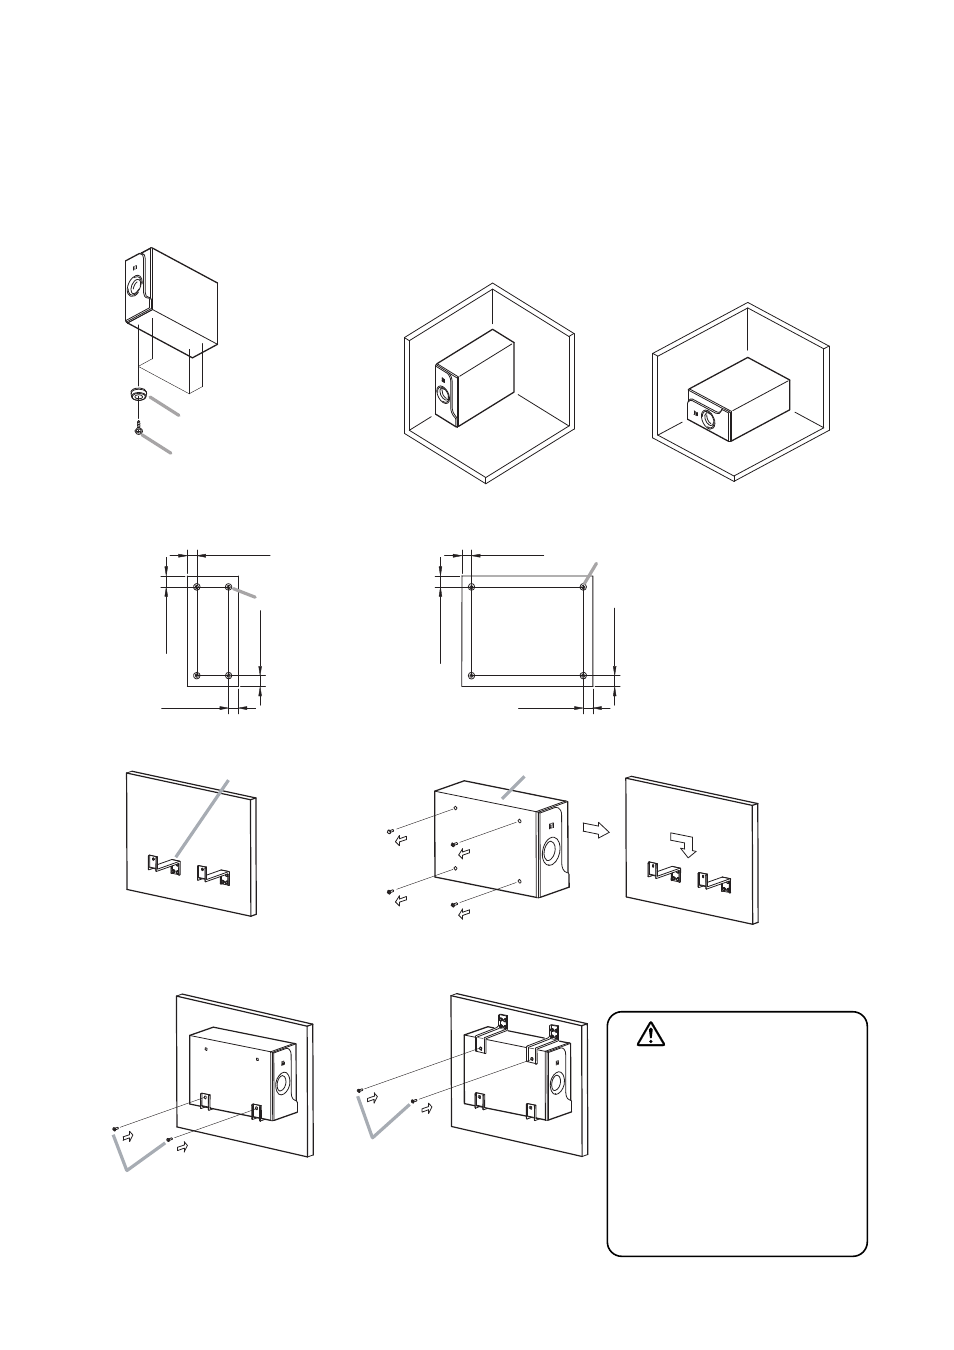
5.2. Subwoofer
The sound generated by the subwoofer may differ depending on the installation position. It is recommended to
place the subwoofer at the corner of the room for better sound (especially bass).
5.2.1. Installation on floor
Use the rubber feet to install the subwoofer on the floor. Ensure that the floor is even and flat so the
subwoofer will not move. Install the rubber feet on the side facing the floor.
Unit: mm (in)
40 (1.57)
40 (1.57)
50 (1.97)
50 (1.97)
50 (1.97)
50 (1.97)
50 (1.97)
50 (1.97)
Rubber feet
(4 pieces)
(accessory)
Rubber foot
Tapping screws 3 x 14 (4 pieces)
(accessory)
Floor
Wall
Floor
Wall
[Rubber feet mounting dimension]
• When installing the unit vertically
• When installing the unit horizontally
[Vertical position]
[Horizontal position]
Rubber foot
5.2.2. Wall mounting
Screws for mounting the bracket
to the wall are not supplied.
Use screws that are appropriate
for the wall's structure and
composition.
Failure to do so may cause the
speaker to fall, resulting in
material damage and possible
personal injury.
WARNING
Mount 2 subwoofer
mounting brackets
to the wall.
Step 1.
Remove 4 screws on the
subwoofer's side panel.
Step 2.
Secure the subwoofer to
the mounting brackets using
the 2 supplied screws.
Step 4.
Mount 2 subwoofer
mounting brackets to
the speaker's upper
side as well.
Step 5.
Place the subwoofer onto
the mounting brackets.
Step 3.
Note: The removed screws are not used.