Mounting hardware installation – Toa F-122CU2 User Manual
Page 5
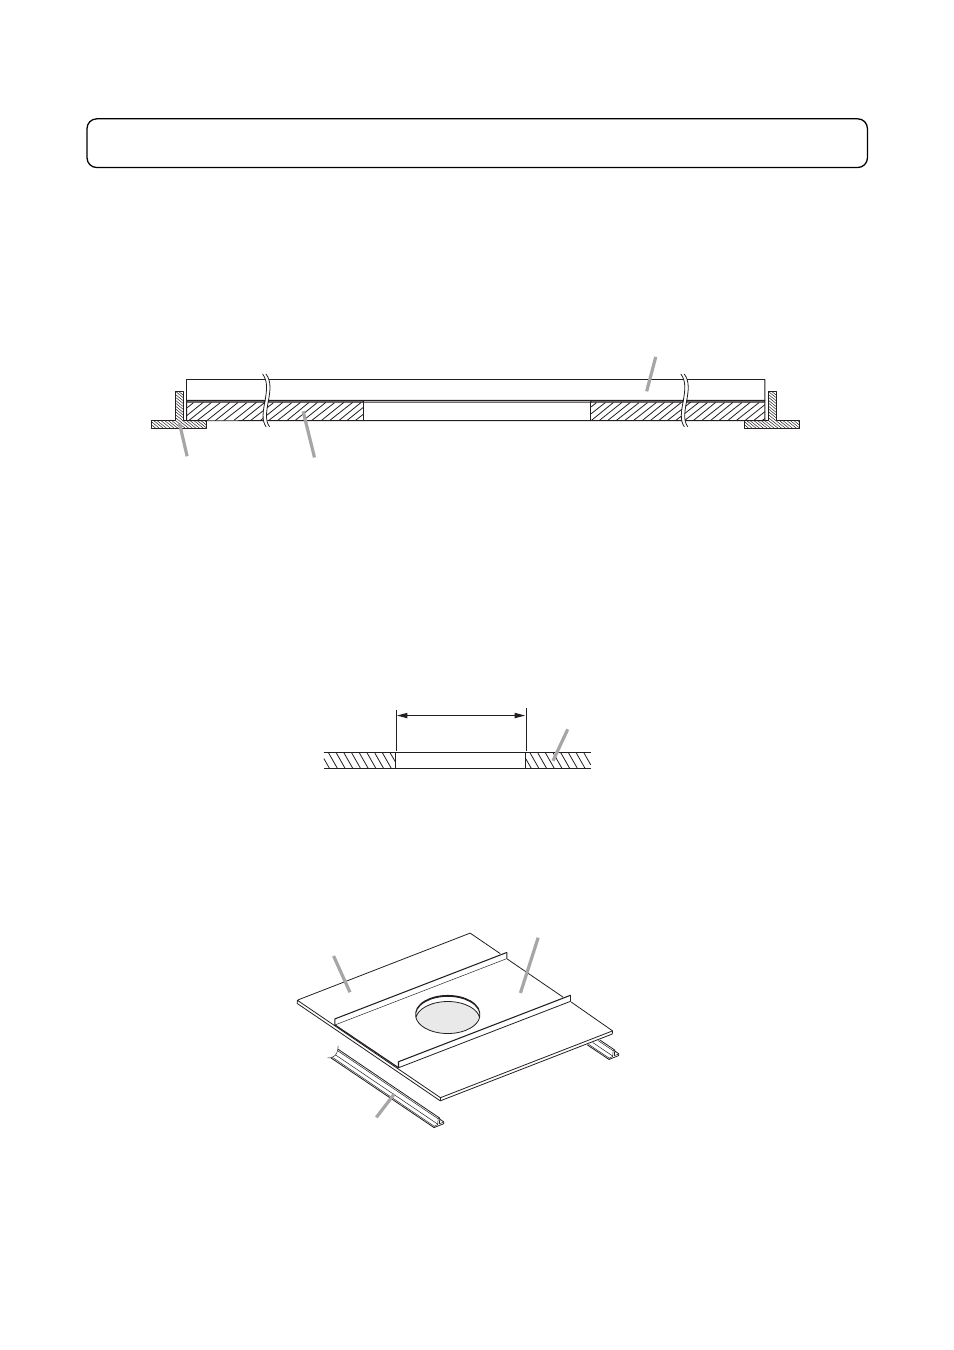
Before mounting the speaker, check the ceiling structure is of drop ceiling with 2-foot standard ceiling tiles.
5
5. MOUNTING HARDWARE INSTALLATION
[Installation view on Drop Ceilings]
Caution
Set the tile bridge so that both ends fit securely into the T-grids, even if the ceiling tile accidentally falls off.
Ceiling tile
T-grid
Tile bridge (accessory)
Ceiling tile
ø200 ±5 mm (7
7
/
8
±
13
/
64
")
[Installation procedures]
Step 1. Cut a ø200 mm (7
7
/
8
") hole in the ceiling.
Use the supplied paper pattern to position and trace the hole.
Step 2. Place the supplied tile bridge on the 2-foot tile as shown below.
T-grid
2-foot tile
Tile bridge (accessory)
See also other documents in the category Toa Equipment:
- D-2000 Series Installation (84 pages)
- DD-2000 Series Manual (24 pages)
- D-2000 Series Read Me First (12 pages)
- D-2012AS (2 pages)
- D-2012C (4 pages)
- D-901 (96 pages)
- CR-273 (20 pages)
- CR-413-6 (20 pages)
- EV-20R (20 pages)
- MP-1216 (8 pages)
- MB-WT3 (2 pages)
- MT-251H (1 page)
- F-2322C (12 pages)
- F-2852C (12 pages)
- SC-630 (2 pages)
- ES-0851 (4 pages)
- ES-C0651 (4 pages)
- F-1000B (18 pages)
- F-122C (12 pages)
- F-122CU (20 pages)
- F-1300B (18 pages)
- F-1522SC (8 pages)
- AN-9001 (1 page)
- C-AL80 (16 pages)
- DP-K1 (28 pages)
- DP-K1 (102 pages)
- DP-L2 v.2.00 (28 pages)
- DP-SP3 Protocol (14 pages)
- DP-SP3 (24 pages)
- DP-SP3 (75 pages)
- E-232 (8 pages)
- AT-063AP (4 pages)
- BS-1015BSB (8 pages)
- BS-1030B (4 pages)
- BS-634 (4 pages)
- BS-1034EN (8 pages)
- BS-1110W (4 pages)
- BS-301B (8 pages)
- BS-301B AS (4 pages)
- MB-WT1 (1 page)
- S-D7300 (16 pages)
- VX-200SP-2 (24 pages)
- YA-1000A (1 page)
- ZM-9001 (2 pages)