Toa ES-C0651 User Manual
Page 3
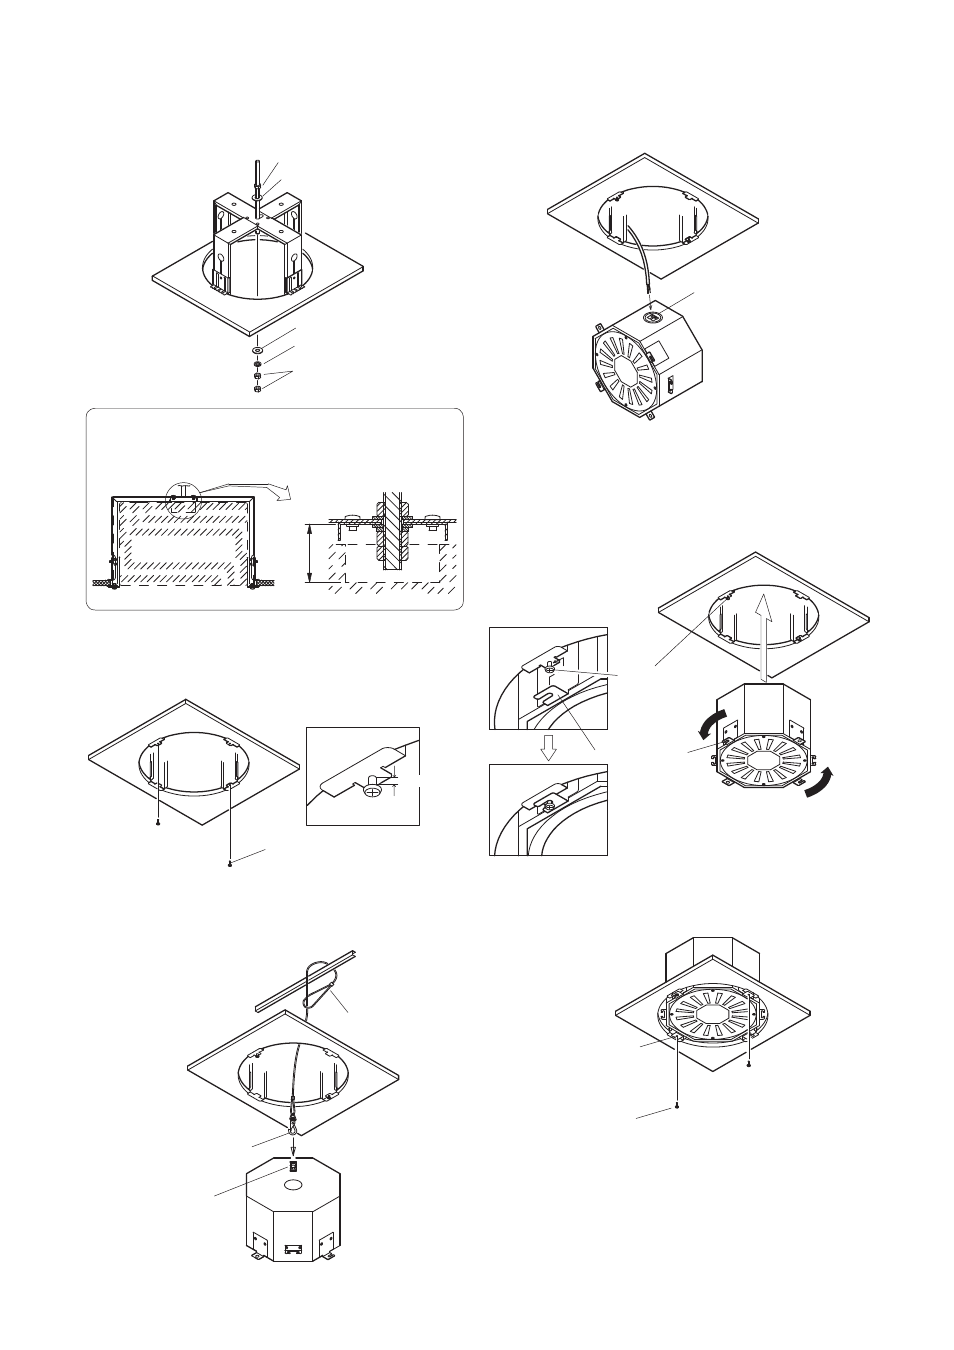
5. Slide a plain washer and a spring washer onto the end
of the anchor bolt, then thread on two nuts. Secure by
clamping the anchor bracket tightly between the bolt’s
upper and lower nuts.
8. Connect the speaker cables to the push-in terminals
located on the side of the speaker. The terminals can
also be used for bridge connection (parallel connection)
of multiple speakers.
9. Push the speaker up in the ceiling hole and rotate it
counter-clockwise to catch the speaker’s mounting tabs
A on the speaker mounting screws, as shown in the
figure below. Then secure by tightening the mounting
screws.
10. Secure two mounting tabs B as well by tightening the
supplied mounting screws (M4x12).
Rotate the speaker until the mounting
screws completely fit into the notches
of Mounting tabs A.
6. Screw the supplied mounting screws (M4 x 12) into the
bases of the anchor brackets with their heads sticking
out approximately 3 mm.
7. Wrap a safety wire round a heavy-duty ceiling beam or
C channel, then connect the snap ring to the safety wire
mounting bracket.
Nut
Plain washer
Plain washer
Spring washer
Nuts (2)
Note
Take care that the anchor bolt does not protrude more
than 32 mm from the inside of the anchor bracket.
Speaker unit
Less than 32 mm
Mounting screw
About 3 mm
Safety wire
Safety wire
mounting bracket
Snap ring
Push-in terminals
Mounting screw
Mounting tab A
Mounting screw
Mounting tab B