Santec 7097..-TM User Manual
Page 3
(*Illustrations may not depict actual products)
0 3
INSTALLATION INSTRUCTIONS
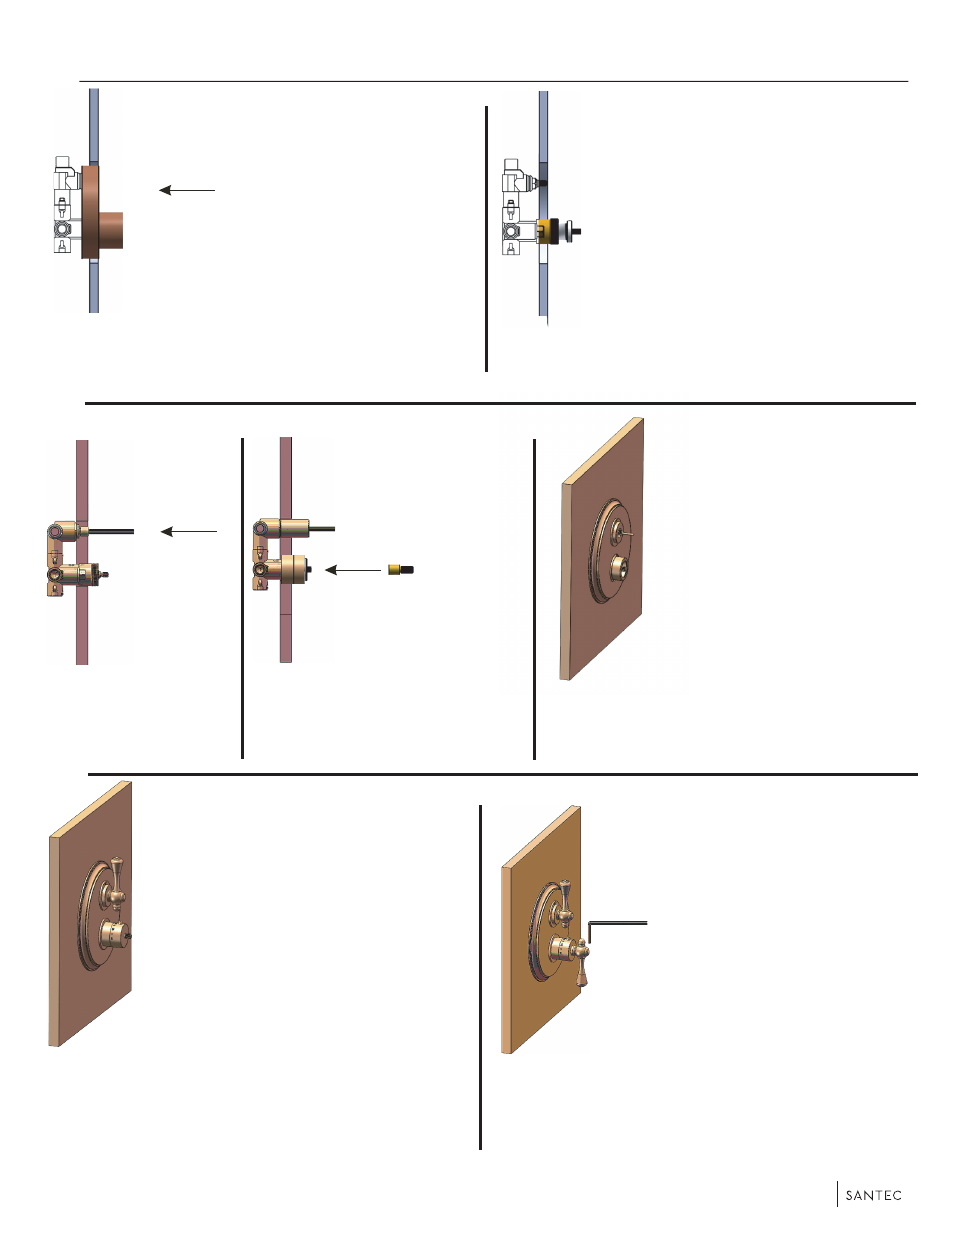
7095/7097 _ _
-
Remove the plastic mud guard (2)
-
Rough in the valve, orienting the mud guard flush
with the finish wall.(you can recess up to .250”)
-
Put the broach
extension (5) onto
the on/off valve
-
Place the two holes of the
plate over the valve, push
back to set orientation against
the wall
-
Push the diverter ring (6)
over the upper hole of the plate
with the off sign on top
-
Place the On/Off handle assembly
(7) over the diverter broach extension
(5);
m
ark-off excess, remove the all
thread extension and diverter broach
extension then cut broach and thread
extension (4,5) length to fit.
-
Replace the plate (3) and diverter ring (6)
-
Replace the newly cut diverter broach
extension and all thread extension back onto
the valve
-
Hand tighten the thermostatic flange
(12) to the threaded sleeve (11)
-
Place the On/Off handle assembly(7) onto
the diverter broach extension (5) and hand-
tighten. Make sure lever is oriented up
towards the 12’oclock position
-
Assemble the thermostatic handle (16) onto
the thermostatic dial (14) and tighten with the the
set screw
-
Screw the all thread
extension (4) onto the on/off
valve until it stops
-
Screw on the thermostatic
threaded sleeve (11) then put
the extension broach (10)
onto the thermosatatic stem
0
A
B
C
D
E
F
G
-
Put on the thermostatic dial (14) with the
100 mark oriented upwards to the 12’oclock
position, secure with the provided
long screw (15) and cut excess length
to fit