Installation instructions – Santec 7094TX User Manual
Page 3
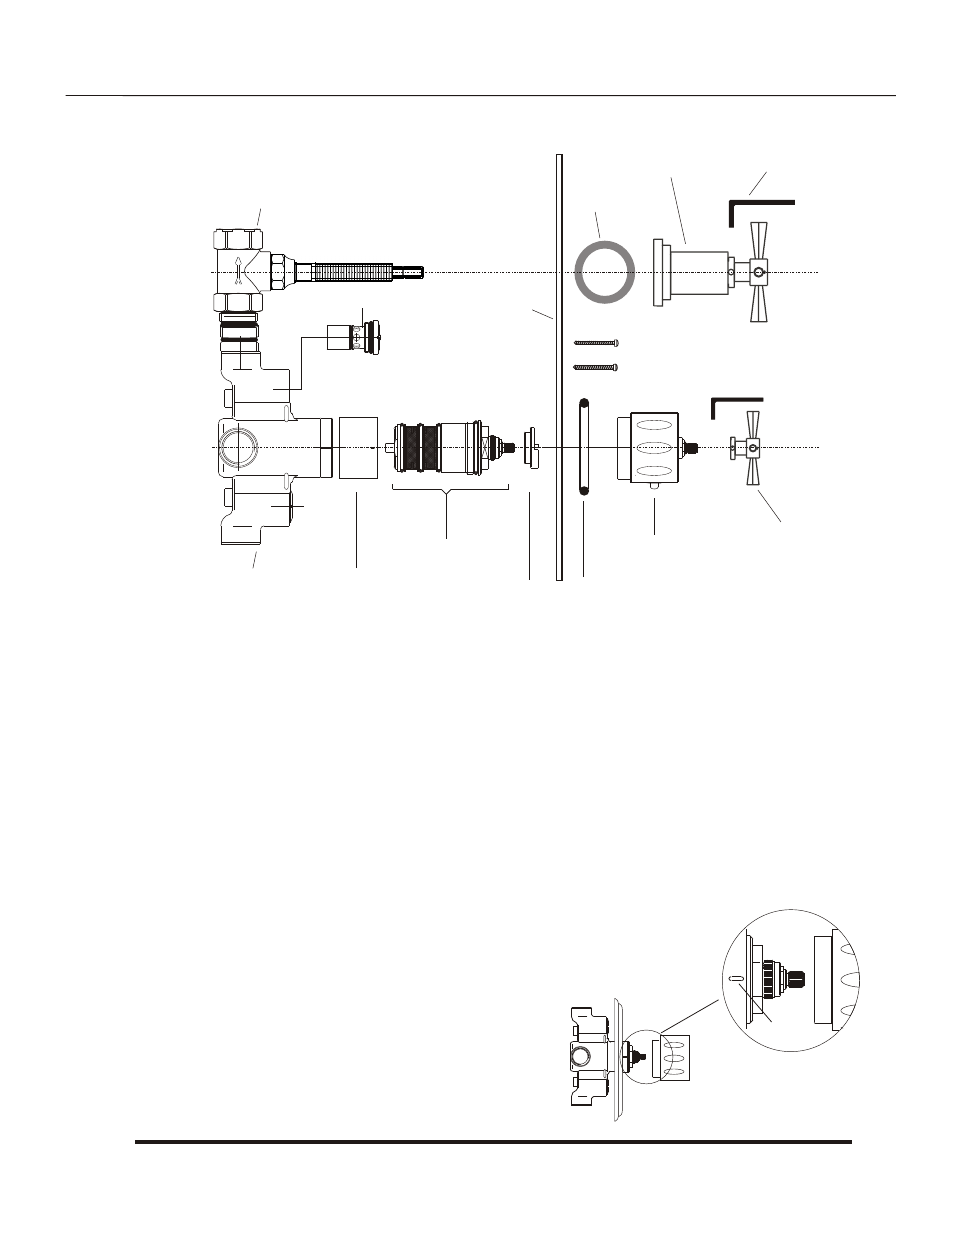
- After the plaster guard is taken off. Insert the valve cylinder into the valve.
Align it in to the proper slot.
Place silicone caulk around the valve cylinder and valve to secure.
- Slip the trim plate with the o-ring, which is placed inside the groove in the trim plate.
- Make sure the plate goes on the valve cylinder smoothly till the end.
- Put on handle trim base on the top of it, aligning the spline grooves.
- Put on the two screw son the trim plate to secure it against the wall.
- Put on the handle in the splined groove and secure it with a set screw.
- Align the 100F on the handle base against the blue line drawn on the valve.
- Screw the handle cap onto the handle base.
- Put on the rubber wahser flange under the TX handle base. Put on ‘TX’ handle on the splined stem,
and tighten it on the splined stem with allen wrench.
- If the actual water temperaturediffers from what is shown on the temperature dial.
1- Take the handle off.
2- Turn the water on through the volume control, measure the actual water
3- Turn the dial until the thermometer shows 100F
.
4- Remove the dial handle from the valve.
5- Align the 100F with the center mark
of the valve cylinder.
6- Insert the handle into the cartridge
7- Tighten the screw and insert the cap.
CENTER MARK
1
1
0
1
1
0
1
0
0
1
0
0
9
0
9
0
1
1
0
1
1
0
1
0
0
1
0
0
9
0
9
0
2.
INSTALLATION INSTRUCTIONS
PAGE 03
7094TX _ _
1
0
5
1
0
5
1
0
0
1
0
0
9
5
9
5
Valve Body
SASTOP valve
Rubber washer,
flange
“TX’ Style Cross handle
sub assembly
Valve Cylinder
Valve Cartridge
Temperature Li miter
O-ring
Handle Trim Base
Trim Plate
Trim Plate screws
Allen Wrench, Medium
“TX” Style Handle