Handle trim installation – Santec 6529VO-TM User Manual
Page 2
0 3
0 4
Handle Trim Installation
NOTE: FOR ROUGH-IN SPECIFICATIONS AND MEASUREMENTS PLEASE
SEE SA-CORNER VALVE INSTALLATION INSTRUCTIONS.
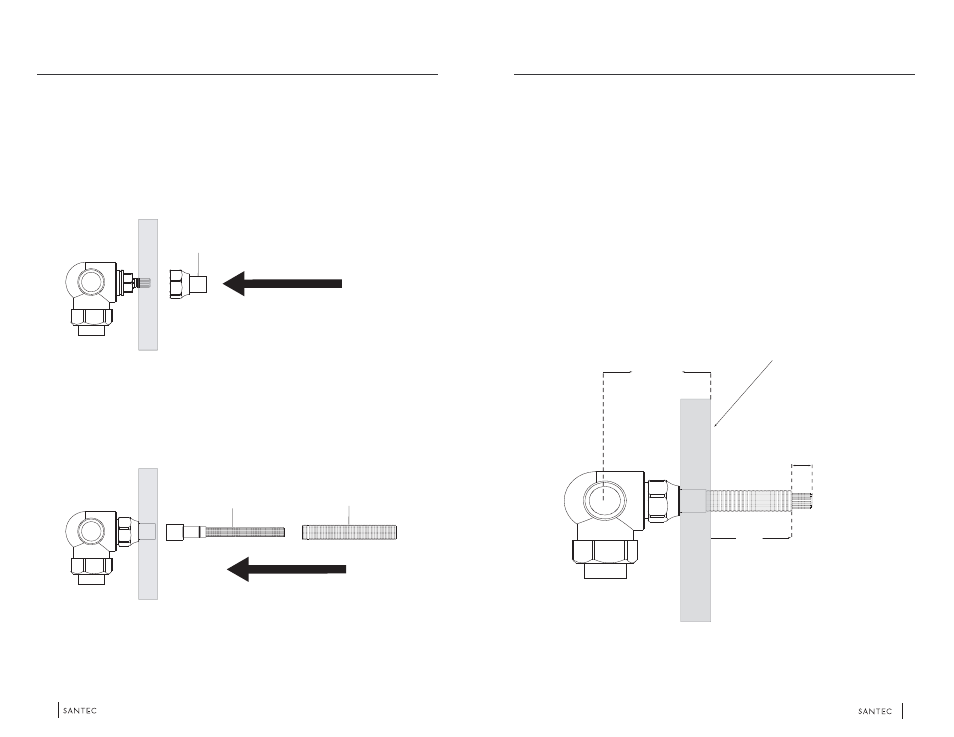
Screw the nut onto the valve and lightly tighten using a 1” plumber’s socket.
Insert the broach into the valve. Then fit the all thread over the broach and hand tighten
it into the nut until it bottoms out.
Nut
Handle Trim Installation
Make a mark on the all thread past the finish wall where the all thread should be cut,
according to the your handle style. See “Frontset” measurement chart on Page 5.
Un-thread the nut, all thread, and broach from the valve and then remove the broach
from the all thread.
Cut the excess at the mark on the all thread. Re-insert the broach into the all thread.
From the end of the newly cut all thread measure a distance of 1/2” on the broach and
make a mark. Cut the excess at the mark on the broach. See diagram below.
Re-thread the nut, all thread and broach back onto the valve and lightly tighten
assembly with a 1” plumber’s socket wrench.
Broach
All Thread
2-1/8” - 4”
Backset
Finished Wall
F
Past
Finish
Wall
1/2”
Broach
Past All Thread
HANDLE TRIM (1)
HANDLE TRIM (2)