Installation instruction, Compression fitting ½” flexible hoses – Santec 1322MA User Manual
Page 2
INSTALLATION INSTRUCTION
FLUSH BOTH SUPPLY LINES BEFORE INSTALLATION
.
AFTER FLUSHING , SHUT OFF BOTH SUPPLY LINES.
MINIMUM HOLE SIZE FOR THE SPOUT AND HANDLE TRIM IS 1
1/8
” AND MAXIMUM OF 1
½
”
INSTALLATION
1.
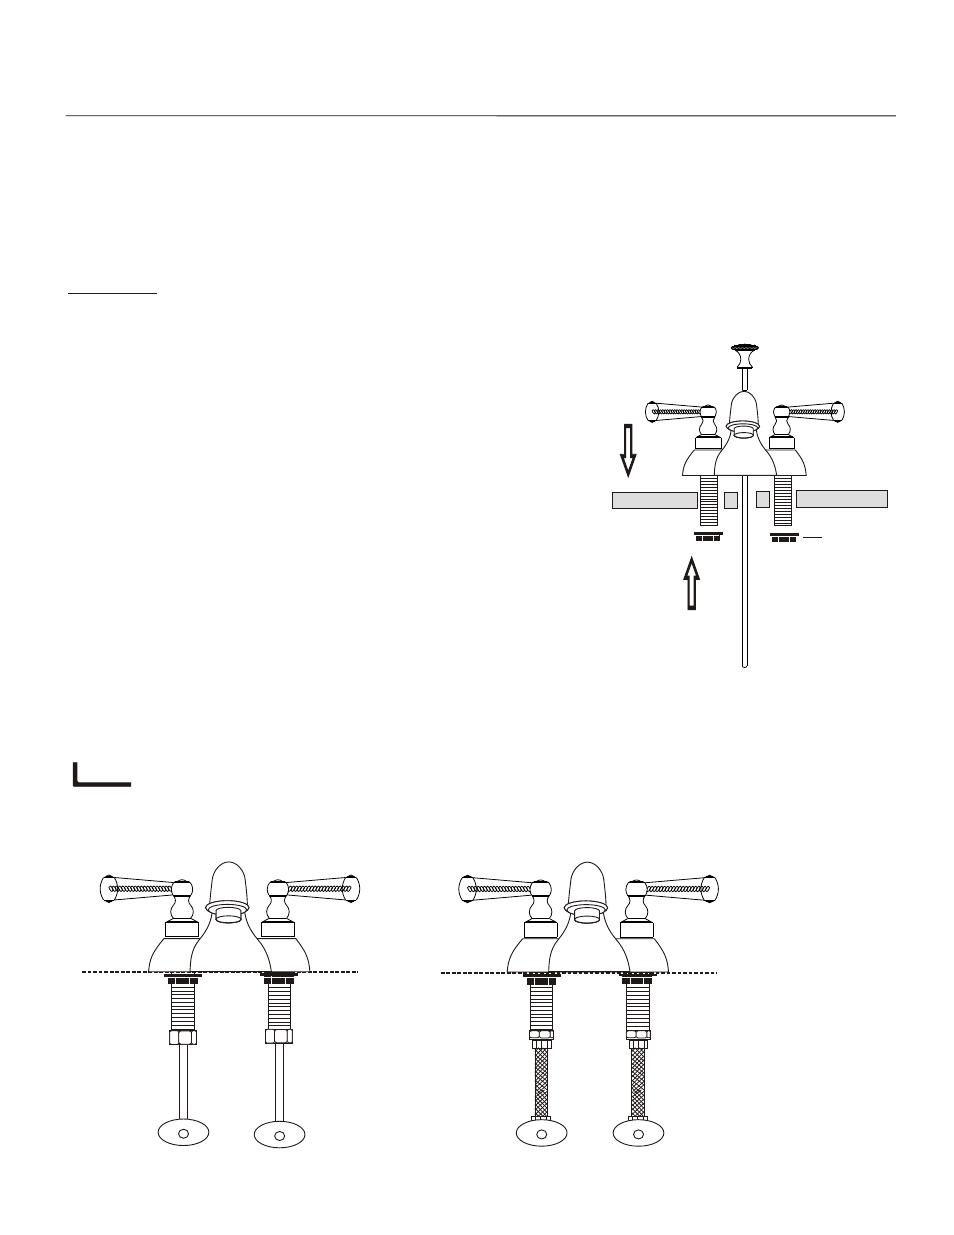
- Remove optional compression fitting mounting hardware (9) and shank lock nuts(8)
from the centerset spout’s shanks.
Apply a ring of silicon caulking around the 3 holes on the top of the sink.
Do not use plumbers' putty which can damage the finish of the faucet.
- From the top of the deck, insert the spout's threaded shanks through the
designated holes on the sink.
2.
- Slip the shank lock nuts (8) back onto the spout. Tighten the lock nuts firmly.
- Place the pop-up lift rod with the knob (10) through the back hole in the spout.
The lift rod will be connected to the pop-up after the trim installation is completed.
3.
- The supply lines can be connected using ½” female flexible hoses (13) supplied
by Santec or compression fitting copper pipes. The enclosed compression fitting
mounting hardware (9) can be used for latter option. (See diagram bellow).
4.
- After the connections have been made, turn on the water supply and check for
leakages at all joints. If water leaks from any of the connections tighten the
connection until the leakage stops.
- If no leakage, turn the handles to the full open position and let the water flush for
45 second. This can prevent damages to the ceramic cartridges caused by debris
in the supply line.
* Enclosed Allen Key can be used when replacing cartridges or when the handles
are required to be disassembled for maintenance.
Shank lock nut
COLD SUPPLY LINE
HOT SUPPLY LINE
COLD SUPPLY LINE
HOT SUPPLY LINE
COMPRESSION FITTING ½” FLEXIBLE HOSES
1322MA _ _
PAGE 02