PULSE ShowerSpas 1018 Navajo User Manual
Page 2
2
ShowerSpa Assembly
1.
Shower Arm
: Align two mounts with pre-drilled holes in ShowerSpa.
To align top mount loosen allen set screw (#19) inside mount and
adjust accordingly to fit top hole. Insert threaded mount through holes in
ShowerSpa and secure with soft washer (#10) and nut (#11) supplied.
Tighten set screw (#19) inside mount. CAUTION: Do NOT over tighten
set screw. Attach shower head supply line to the lower shower arm mount.
Make sure rubber washer is inserted inside fitting. Install shower head onto
shower arm.
2.
Glass Shelf:
Position glass shelf into slotted mounts. Secure allen
set screws (#18) on the under side of mounts. Do NOT over-tighten
screws.
3.
Hand Held Hose and Wand:
Attach hexagon nut end of hose (#9) to
hand held hose outlet (#20). NOTE: Make sure rubber washers are inserted
in each end of hose. Attach tapered end of hose (#8) to hand held wand (#3).
7
Navajo Model # 1018
PLEASE READ THE FOLLOWING INSTRUCTIONS
COMPLETELY BEFORE BEGINNING!
Our goal is to ensure your installation goes smoothly and safely. Please read these safety
instructions carefully and follow recommendations for plumbing and mounting. If, after reading
instruction manual, you determine you do not have the necessary skills and/or tools, we
then recommend a licensed plumbing contractor complete the installation.
If you encounter any problems during installation call Technical Support toll
free at 888-785-7320 before returning item to store.
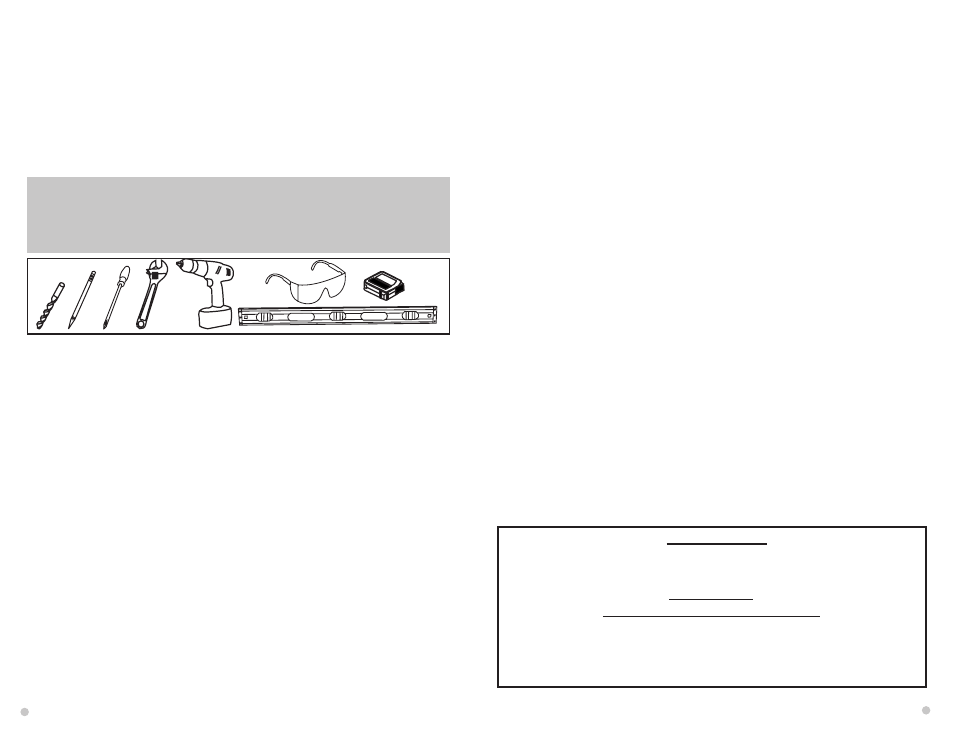
You will need the following tools:
Level
Tape Measure
Soft pencil or felt pen to mark tile
Drill (Preferably cordless)
A Reciprocating Saw w/metal cutting blade (Sawzall®)
Channel Locks or adjustable wrench
¼" Masonry Drill Bit
3. Remove the handle(s) and trim cover(s) of your existing valve exposing the valve body in the wall.
4. Locate the hot and cold supply lines entering the valve. Using a reciprocating saw with sharp metal
saw blade, cut the existing valve out, preserving the threads of the supply lines entering the valve.
(Note: you should also cut the riser within the wall supplying the existing shower head.) Carefully
twist and remove the valve.
5. Unscrew the old shower head from the arm and then unscrew the arm.
6. It is recommended to extend the water supply lines outside the wall cavity parallel to the finished
wall surface. Attach a 1/2” 90° male threaded fitting³ to each supply line, maintaining 1/4”- 1/2”
space between the male threaded fittings and the finished wall. The open end of the male fitting
should point down.
7. Make certain the location (height/width) of the stub-outs and connecting to them does not interfere
with the desired mounting height of the ShowerSpa.
8. Mark the location of the holes for the mounting bracket making sure the bracket is level. For a
person 5’8” – 6’2” tall, we recommend 53” from finished floor height�. Before drilling holes for the
bracket, make certain the ShowerSpa will rest flat against finished wall surface at the desired
mounting height with the supply lines connected.
9. Drill 1/4” holes through the wall surface using a masonry bit. Drill slowly through wall surface to
avoid cracking and chipping. Insert anchors and securely screw bracket to wall. Before connecting
the hot and cold supply lines, mount the ShowerSpa on the wall, checking the height, and making
sure the ShowerSpa feels secure.
10. Connect hot and cold water supply lines to male threaded pipe, do not over-tighten. Before you
mount the ShowerSpa, check the fittings to make sure they are secure. Turn on water and check
for leaks. When fittings are leak-free mount ShowerSpa on wall.
11. Hold hand held mount to desired height, making sure flexible hose reaches mount. Recommended
4” to 6” from ShowerSpa on the right side of the unit, so you can easily remove hand held wand.
Position mount flat on surface make two marks with pencil. Carefully drill ¼” holes through the wall
surface using masonry bit. Insert anchors and securely screw mount to wall.
12. Optional: Seal around the body of ShowerSpa with a bead of silicone.
³ 1/2” 90° fittings not included. Additional fittings may be necessary depending on specific situation.
� This height can vary depending on several factors (i.e. location of supply lines, old valve access
area, personal preference, etc).
ATTENTION
ONCE YOUR UNITS IS INSTALLED, IF YOU HEAR A KNOCKING SOUND WITHIN THE UNIT
WHICH SOUNDS LIKE IT IS COMING FROM INSIDE THE WALL, WE HAVE A CHECK VALVE
THAT WILL ELIMINATE THIS KNOCKING. PLEASE CONTACT PULSE SHOWER SPAS AT
1-888-785-7320
We will send you a check valve free of charge.
PULSE uses a cUPC certified pressure balanced valve which is designed to prevent scalding
and maintain a consistent water temperature. If there is a sudden drop in water pressure, (i.e.
flushing toilet, turning on a faucet, etc.) the valve will compensate for the drop in water pressure
by knocking to maintain the flow rate. By installing the check valve, the pressure is maintained
within the valve eliminating the knocking sound.