Philips USB Accessories User Manual
Usb hub setup guide, For philips lcd monitor)
Attention! The text in this document has been recognized automatically. To view the original document, you can use the "Original mode".
USB Hub Setup Guide
(For PHILIPS LCD monitor)
1. About this product
1.1 Package Contents
Each package should include the following parts:
• 1 USB 4-port Clip-On HUB
• 1 USB cable
• 1 Switching AC Adapter
• 1 Owner's manual
1.2 Features
’ Fulfill the USB-IF Specification Revision 1.1 and
HID Class Definition Rev.1.0
• Support up to 127 USB devices simultaneously.
• Stand-alone or clip-on to Philips monitor range.
• Support for realtime dynamic insertion and
removal.
• 1 Upstream port and 4 Downstream ports.
• Over current protection on all downstream ports.
• Self-powered by using the supplied AC Adapter
or Bus-powered through USB bus.
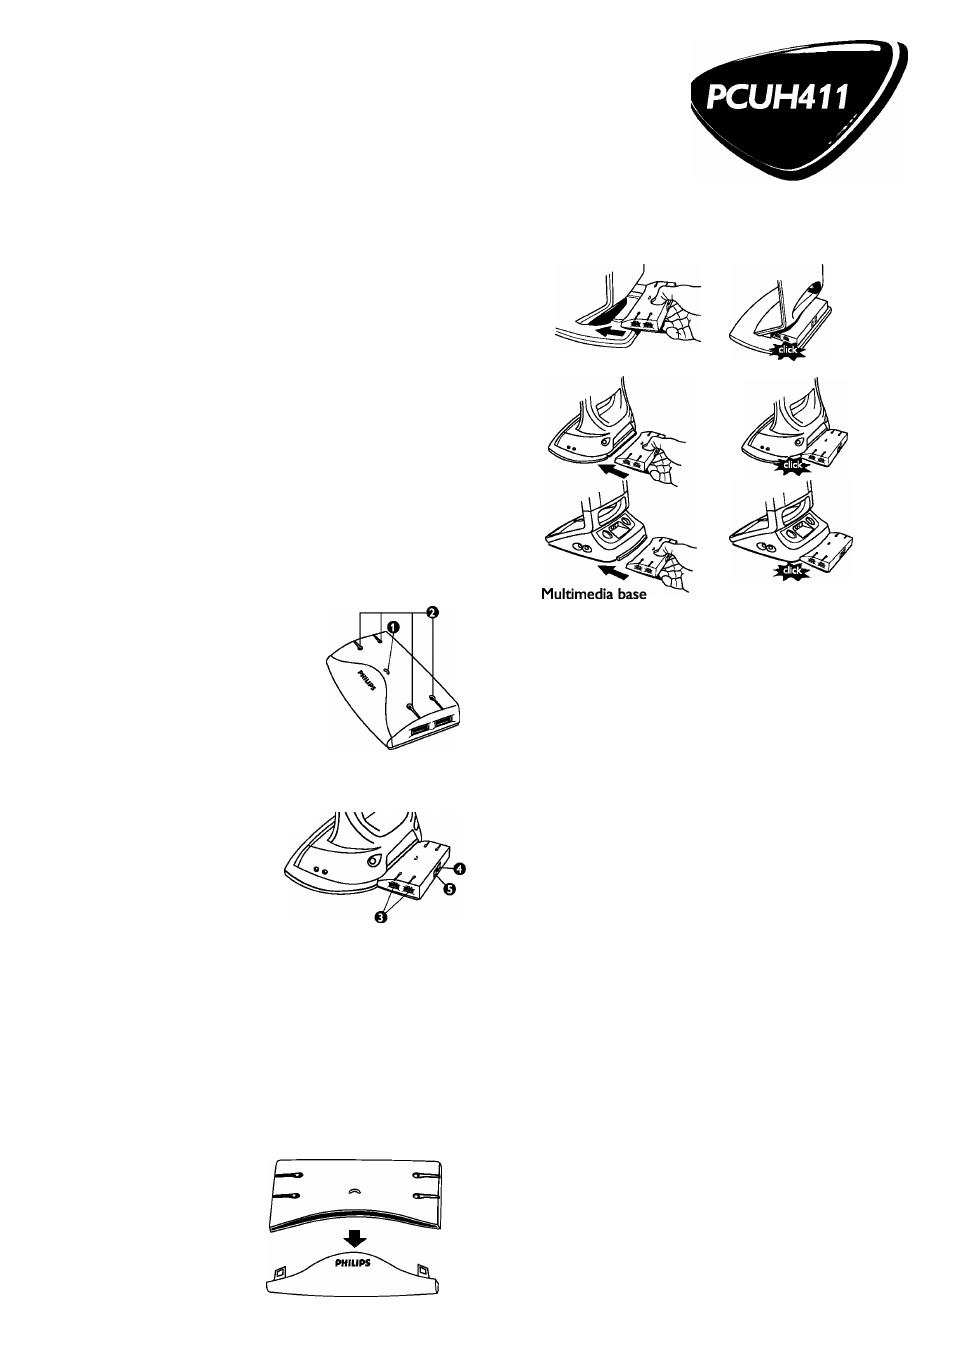
1.3 Identification
O
Power LED: Red light is lit when
power is supplied.
O LEDs: Green light is lit for
each of the ports when they
are connected and active.
O Down Stream Ports: 4 USB
A-type receptacles on both
sides connect to USB devices.
O Up Stream Port: 1 USB
B-type receptacle to
connect to the PC.
0 Power Socket: For the
supplied AC Adapter jack
to connect to.
2.
Installation
This Hub consists of two parts: functional and
aesthetic.The aesthetic element is a removable cover.
A slot for this Hub to install in can be found in the
back of the LCD monitor base
2.1 To remove the cover, simply by pulling it
apart from the Hub body.
2.2 Insert the straight into the slot until a click
sound is heard
Standard/ Ergo base
2.3 Power connection
* It is recommended that the AC adapter be
plugged into the electrical outlet before the hub.
* It is recommended that the AC adapter is used at
all time for high-speed devices and multiple
devices may cause a power shortage in the hub.
* It is recommended that the AC adapter be used
whenever multiple hubs in a stacking
configuration.
* Do not remove the AC adapter while the hubs is
working.
2.4 USB connection
* USB devices
This hub can be connected or disconnected to
your PC when the computers up and running
programs, by using any USB port on your
computer.
This product allows your computer to interface
with various USB devices.
* A & B type connector
Insert A connector into the down stream port on
the PC or this hub.
Insert B connector into the up stream port of
this hub or other USB devices.
Make sure that those all the way into the socket
and is firmly connected.
2.5 Setup
* When connecting this hub for the first time, a
message of "Searching for unknown hardware
device, searching software for installation" will
appear.
* Your computer will then start up the Device
Driver Wizard, and install the hub.
* Once the setup has finished the installation, you
can connect USB devices to it.