Vermont Casting 4322 User Manual
Page 3
3
2003144
paper all around the perimeter of the damper opening.
With the damper closed and locked, it should not be
possible to pull the papers out without resistance. The
more easily the paper pulls out, the less secure the seal
is at that spot.
1. To adjust the damper seal, loosen the locking hex nut
on the adjusting allen screw. (Fig. 5) Turn the screw
clockwise with a hex wrench, in half-turn increments,
until the damper grips the paper slips securely when
you test the damper’s operation. When you have
achieved a snug seal, fasten the locking nut against
the face of the damper. The seal should not be tight
since the metal parts will expand slightly under heat.
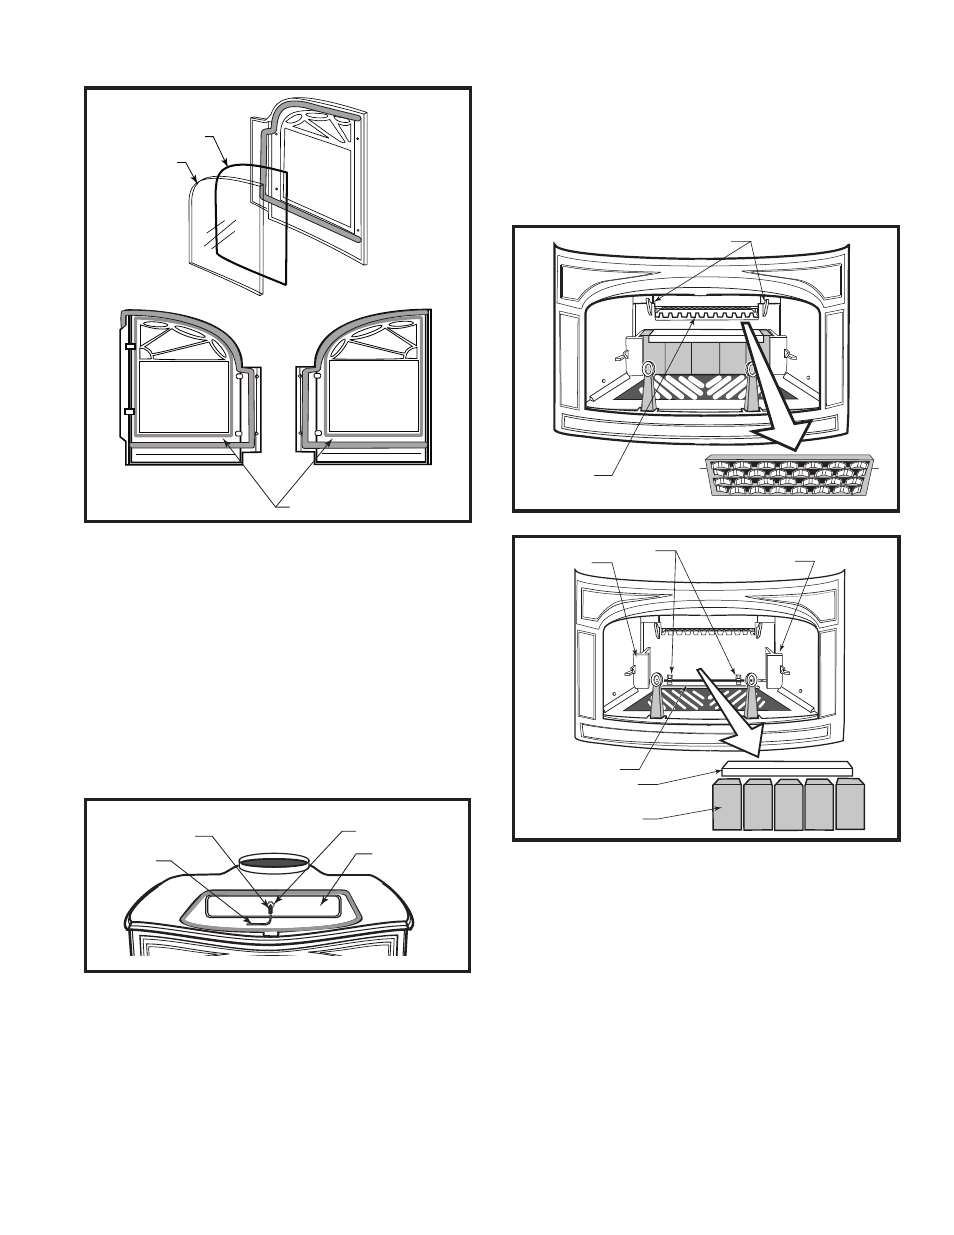
3. Open the front doors of the stove and remove the
ashes. If necessary, empty the ashpan, and rake the
ashes left and right in the firebox till they fall through
the slots in the grate, and into the ashpan.
4. Lift the baffle off its support brackets. Remove it from
the stove and set it down on a protected surface.
(Fig. 6)
ST555
Inspect
Catalytic element
11/00
Baffle Support Brackets
Catalytic
Element
ST555
Fig. 6 Remove the baffle.
St556
inspect
catalytic element
2
11/00
Right Wedge
Alignment Notches
Left Wedge
Brick Guide
Brick Clip
Bricks
ST556
Fig. 7 Remove the bricks and brick retainer.
5. Remove the firebricks. Lift off the steel clip and re-
move the firebricks individually. (Fig. 7)
6. Tap the left and right wedges upward with a rubber
mallet or a hammer and block of wood to protect the
cast iron. (Fig. 7) Remove the wedges and remove
the lower fireback by pulling its top edge toward
yourself. (Fig. 8) Lift the lower fireback out of the fire-
box and set it on a shielded surface.
7. Four hex head bolts pass through the stove’s outer
back to fasten the upper fireback in place. Remove
these bolts. If the stove has a rear heat shield in
place, you may find it easier to remove the shield
first, and then the upper fireback bolts. You can
leave the heat shield spacers in place.
2. It is possible, but awkward, to replace the damper
gasket without removing the upper fireback panel
which locates and supports the damper. To remove
the upper fireback assembly, open the damper. Use
an allen wrench to remove the damper handle from
the damper rod on the left side of the stove.
KT317
Glass gasket
8/19/02 djt
Rope Gasket
Glass Panel
Replacement Glass Gasket
KT317
Fig. 4 Glass gasket.
ST554
Damper adjustment
11/00
Pressure Ad-
justing Screw
Allen
Wrench
Lock Nut
Damper
ST554
Fig. 5 Damper adjustment.