O.S. Engines 91HZ User Manual
Page 10
18
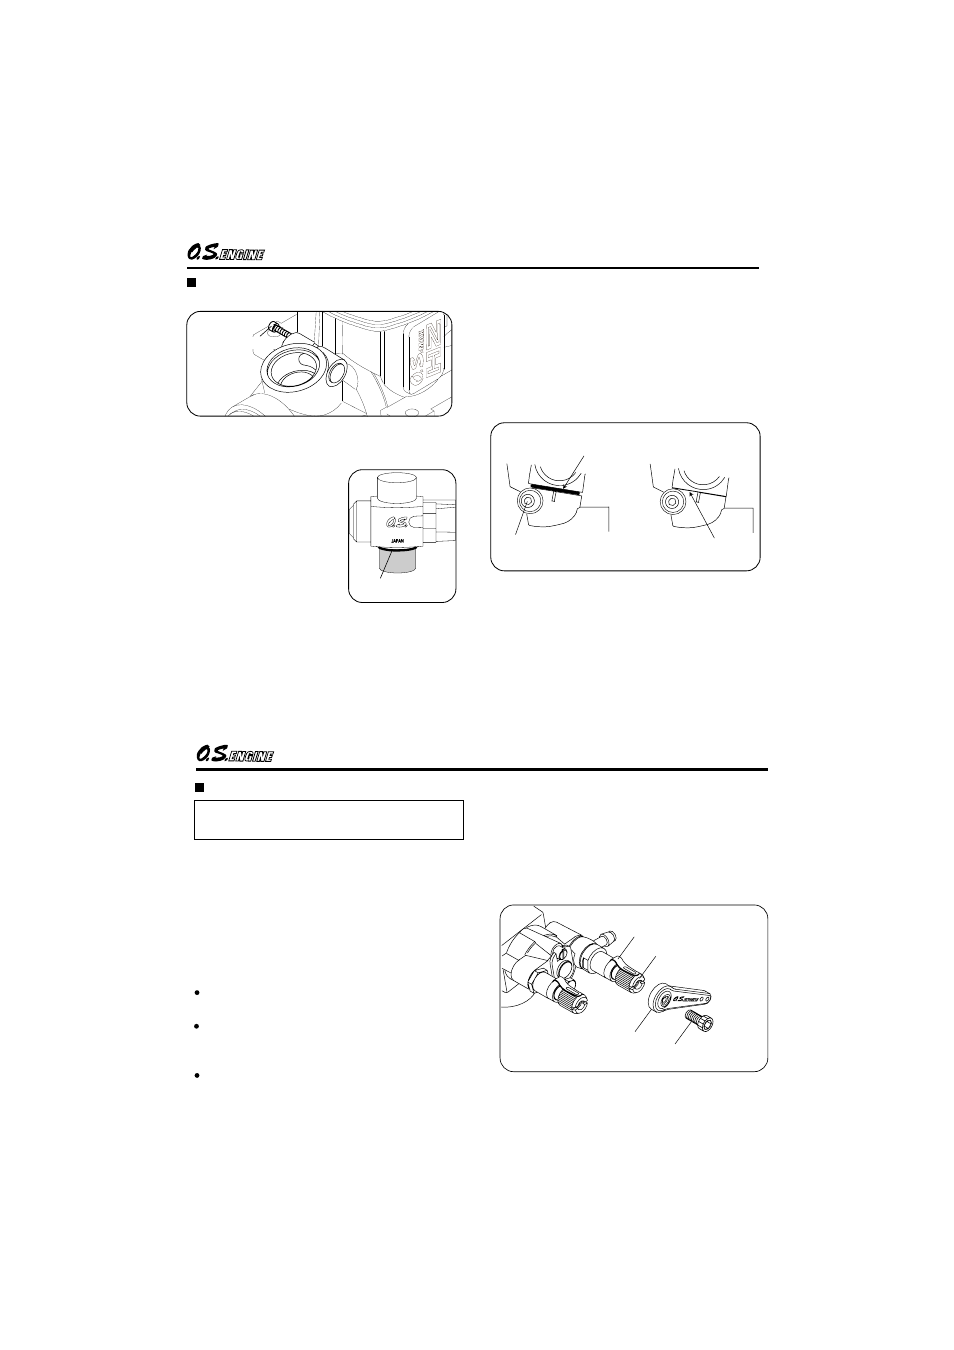
INSTALLATION OF THE CARBURETOR
1.
2.
Retainer screw
Carburetor Rubber
Gasket
0.2mm gap
Carburetor Rubber
Gasket
Insert the carburetor rubber gasket on the
carburetor body securely.
Then, insert the carburetor in the crankcase.
Note: In case it is hard to insert the carburetor in
the crankcase, apply oil on the Thurmo Insulater.
Do not force it, or damage to the Thermo Insulater
and/or crankcase can occur.
Rotate the retainer screw gently until it stops, then
tighten a further 90-120 degrees.
Do not over-tighten the screw as this will damage
the Thermo Insulater.
3.
Loosen carburetor retainer screw a little.
Retainer screw
19
1.
2.
The Needle Control Arm enables the pilot to make
the necessary needle adjustment by means of one of
the auxiliary levers on his transmitter while the
helicopter is in flight. Then the following useful
corrections can be made.
Needle can be adjusted to optimum setting while the
helicopter is in flight.
When the needle is set too rich or too lean during a
performance at a competition, the needle can be
adjusted via transmitter in flight.
When the r.p.m. increase as the fuel tank changes
from full to almost empty, the situation can be
corrected by opening the needle.
Note:
In order to use this Needle Control Arm , an
additional servo and a linkage rod are required.
Features:
ABOUT THE NEEDLE CONTROL ARM
Cap Screw
Ratchet Spring
Needle Control Arm
High Speed Needle Valve
It is not always necessary to install
the needle control arm
How to install
Remove the high speed needle taking care not to
damage it’s point.
Install the control arm on the needle with a M2.6x5
bolt supplied.