Kuzma STOGI REF 90630 User Manual
Page 18
18
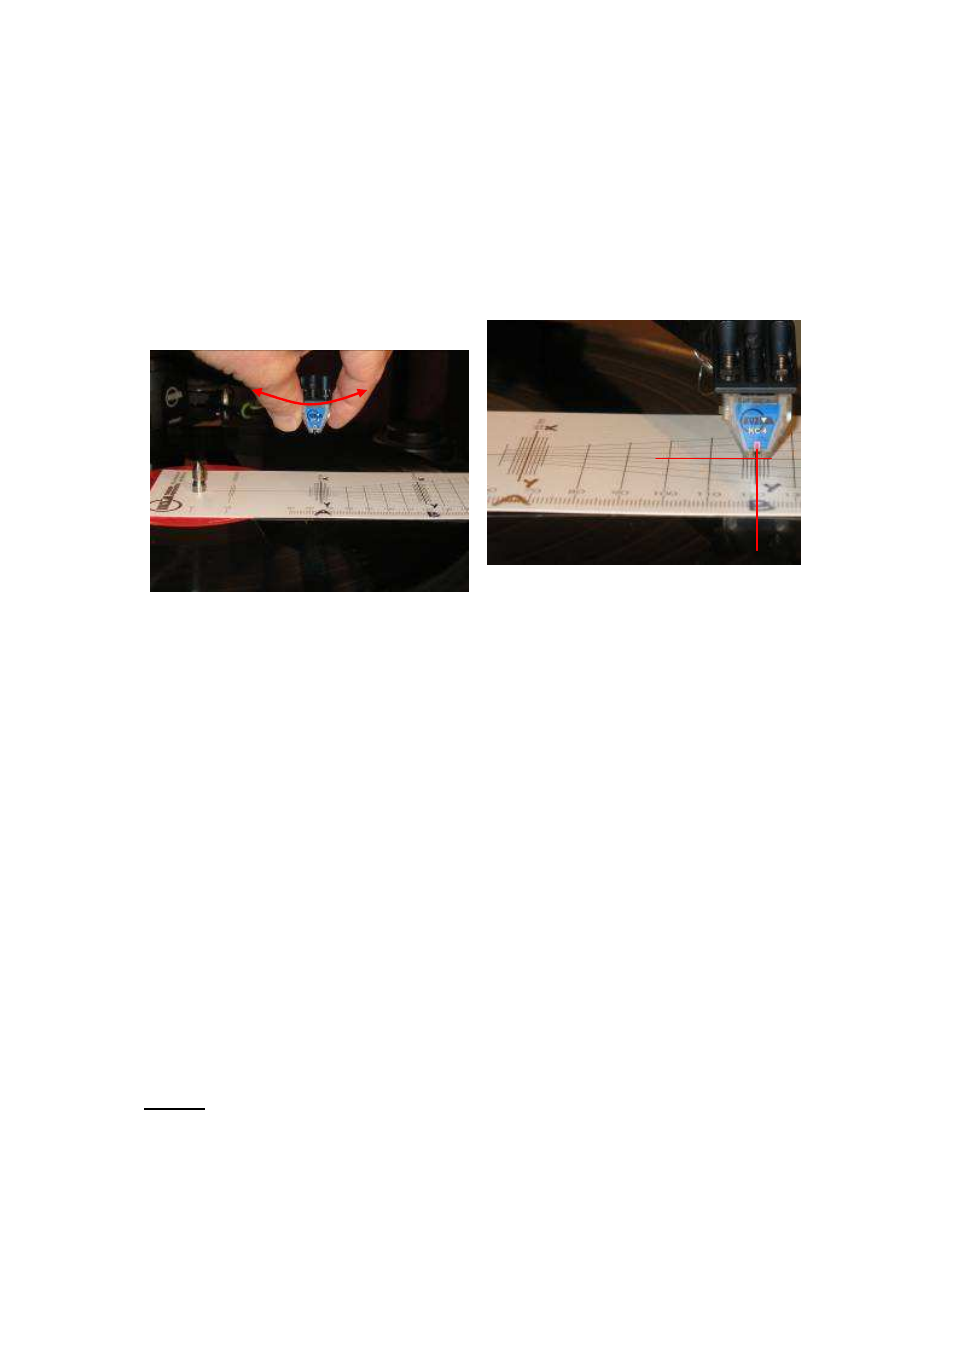
10. Now rotate protractor and again position stylus at zero point A as described in 5
and 6
above, ensuring that the position of the cartridge in the slots alongside is not changed
but only rotated for alignment of the cantilever in zero point A. (Fig.17)
11. Recheck alignment of the cantilever at zero point B. If cantilever is not aligned
here, rotate protractor to find where on line “x- y” the cantilever is aligned again.
(Fig.18&15)
Fig.17 Rotation at A Fig.18 Along axis “X-Y”alignment at B
If the stylus is still in front of zero point B on the line “x-y” as before, but nearer to
point B, then again pull cartridge slightly forward for distance “S” and repeat the
whole process by aligning at zero point A until the stylus will be at zero point B.
If stylus ends up behind the zero point B on line “x-y” then move cartridge in opposite
direction to before, backwards and realign it at zero point A.
If stylus is still behind the B point, the cartridge should be pushed back and realign at
zero point A and realigned again at zero point B.
12. Continue until the stylus is in alignment at both points.
REMEMBER STEPS:
a) Put stylus at zero point A and by rotation align cantilever along XY line.
b) Align cantilever along XY line at zero point B by rotating protractor and see where
stylus is on the line XY- in front or behind zero point B.
c) Move cartridge along (not rotating it) for the same distance as stylus is overhanging
zero point B for the same distance to increase the overhang.
d) Repeating these steps (a,b,c,a,b,c,…) will ensure that stylus& cantilever are in
alignment at both zero points A&B.
NOTE: Ensure that cantilever is not twisted due to bias force.