Installation, 3 installation – IC Realtime 1.3 Megapixel 720P Weather-proof IR HD-AVS Camera User Manual
Page 9
4
3 Installation
Important
Before the installation, please make sure the installation surface can sustain at
least 3X weight of the bracket and the camera.
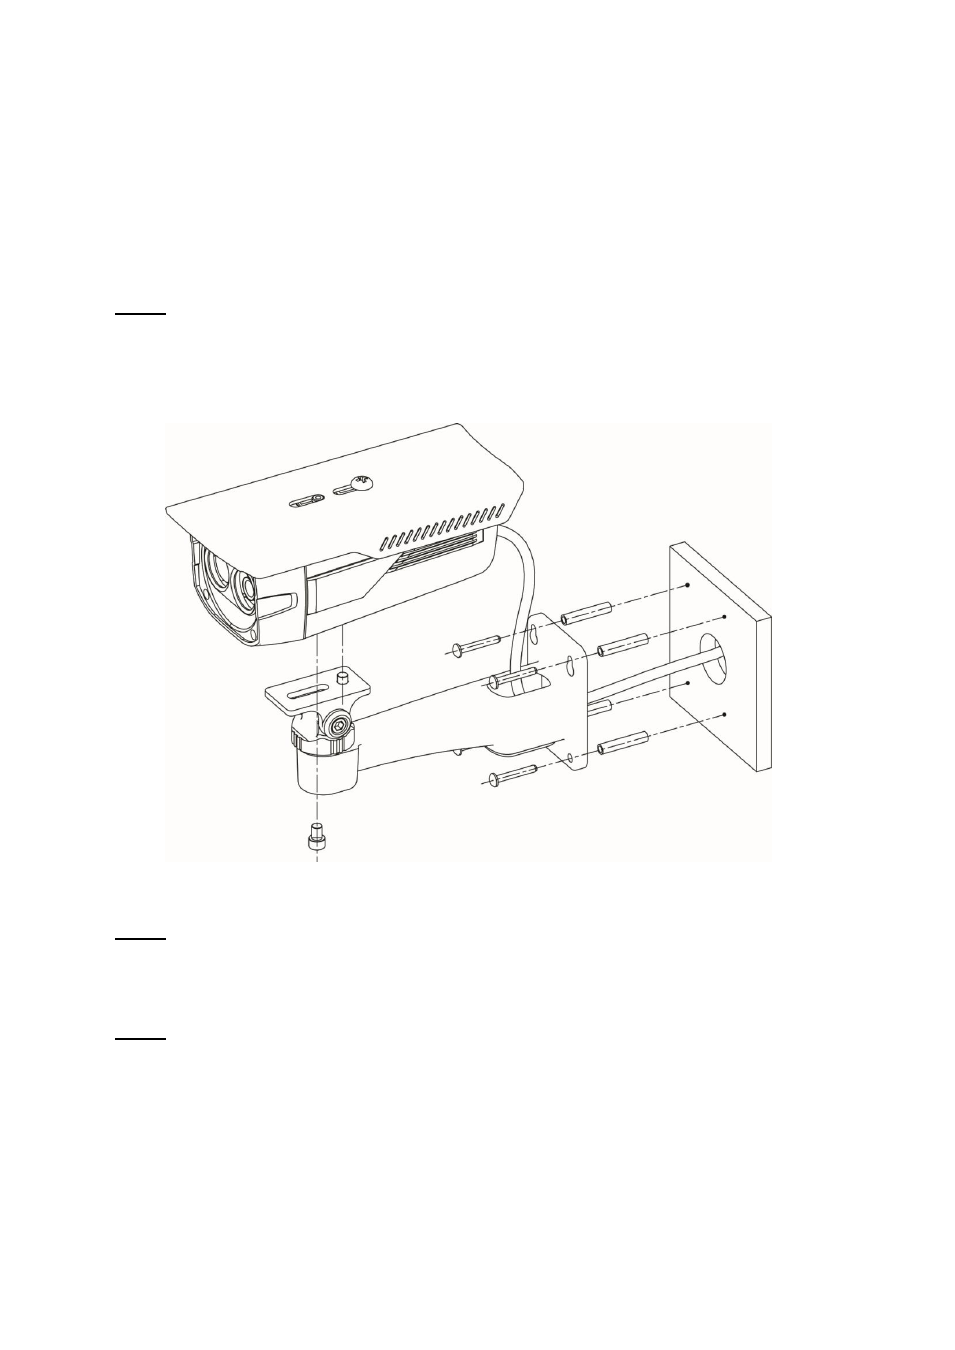
This series product supports wall-mount. Please refer to the steps listed below for installation
information. See Figure 3-1. The follow figure is for reference only.
Step 1
Install the camera bracket. Please install the expansion bolt if you want to install in the cement
wall (Please make sure the installation holes of the expansion bolts are the same with the
bracket.) Then you can install the bracket. If you want to install in the wood surface, please
skip the first step and then use the self-tapping screws to install the bracket directly.
Figure 3-1
Step 2
Install the camera. Use the screws to install the camera to the bracket via the installation
pedestal of the bottom of the camera.
Step 3
Adjust the camera to the proper monitor area and then secure the button of the bracket to
fasten the camera.
Please note the above installation figure is based on the HAC-HFW2100BP/N series product.
The HAC-HFW2100DP/N series product has the same installation steps.