Heckler&Koch MR762A1 User Manual
Page 14
26
27
b. Insert the small tip of the disassembly tool into the spring loaded detent located in
the center of the rear takedown pin. Push the disassembly tool from left to right until
the takedown pin reaches its limit of lateral travel (Fig. 35, 36).
Fig. 35 – Takedown Pins Fig. 36 – Takedown Pin Detail
WARNING: Always use the disassembly tool to disengage the detents on both the
rear takedown pin and the front pivot pin. Attempting to remove the pins without
disengaging the detents could lead to damaging the lower receiver. Both the rear
takedown pin and the front pivot pin are captive pins and will therefore remain
attached to the lower receiver. Attempting to completely remove the takedown and
pivot pins could lead to damaging the lower receiver.
3. Bolt Assembly:
a. Remove the upper receiver from the lower receiver (Fig. 37), depress the catch
on the charging handle and withdraw the bolt assembly from the rear (Fig. 38).
Continue to pull the charging handle to the rear until resistance is encountered.
Lift up on the charging handle and separate the charging handle from the upper
receiver.
Fig. 37 – Removing the upper receiver Fig. 38 – Removing Bolt & Charging Handle
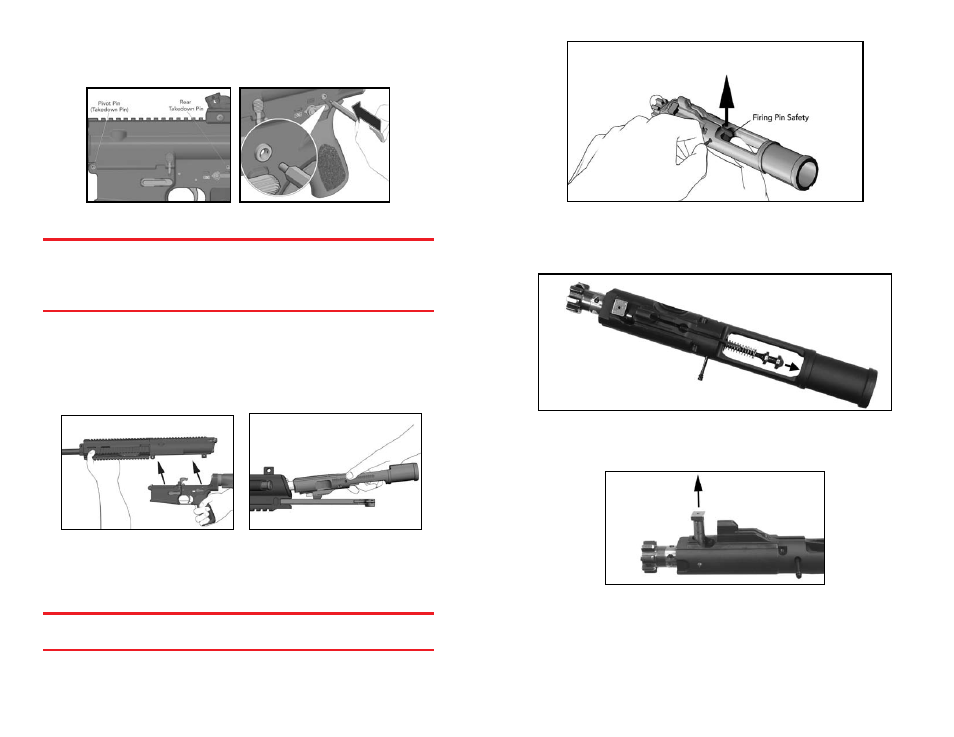
b. Insert the small tip of the disassembly tool into the right hand side of the firing pin
retaining pin and drift the firing pin retaining pin from right to left until the firing pin
retaining pin reaches its limit of lateral travel (Fig. 39).
WARNING: The firing pin retaining pin is a captive pin and will therefore remain
attached to the bolt carrier. Attempting to completely remove the firing pin retaining
pin could lead to damage of the bolt assembly.
Fig. 39 – Drift out the Firing Pin Retaining Pin and lift up on the Drop Safety
d. Lift up on the spring-loaded drop safety (firing pin safety) and remove the firing pin
and firing pin spring (Fig. 39 and Fig. 40).
Fig. 40 – Removing the Firing Pin and Firing Pin Spring from the Bolt Assembly
e. Lift up and remove the cam pin from the shaft of the bolt head (Fig. 41).
Fig. 41 – Remove the Cam Pin
f. Slide the bolt head from the front of the bolt carrier (Fig. 42).