Set the control throws, Channel radio setup – Great Planes Yard Stik ARF - GPMA1100 User Manual
Page 11
❏
3. If you haven’t already done so, plug the receiver crystal
into the receiver. Be certain the crystal matches the band
(high or low) for the receiver you are using.
❏
4. Make certain the throttle control on the transmitter is all
the way down. Connect the servos and speed controller to the
receiver. Turn on the transmitter, and then connect the battery
to the receiver. Center the trims on the transmitter. If the servo
arms aren’t already centered, take the arms off the servos
and center the arms. Remount the arms with the screws.
❏
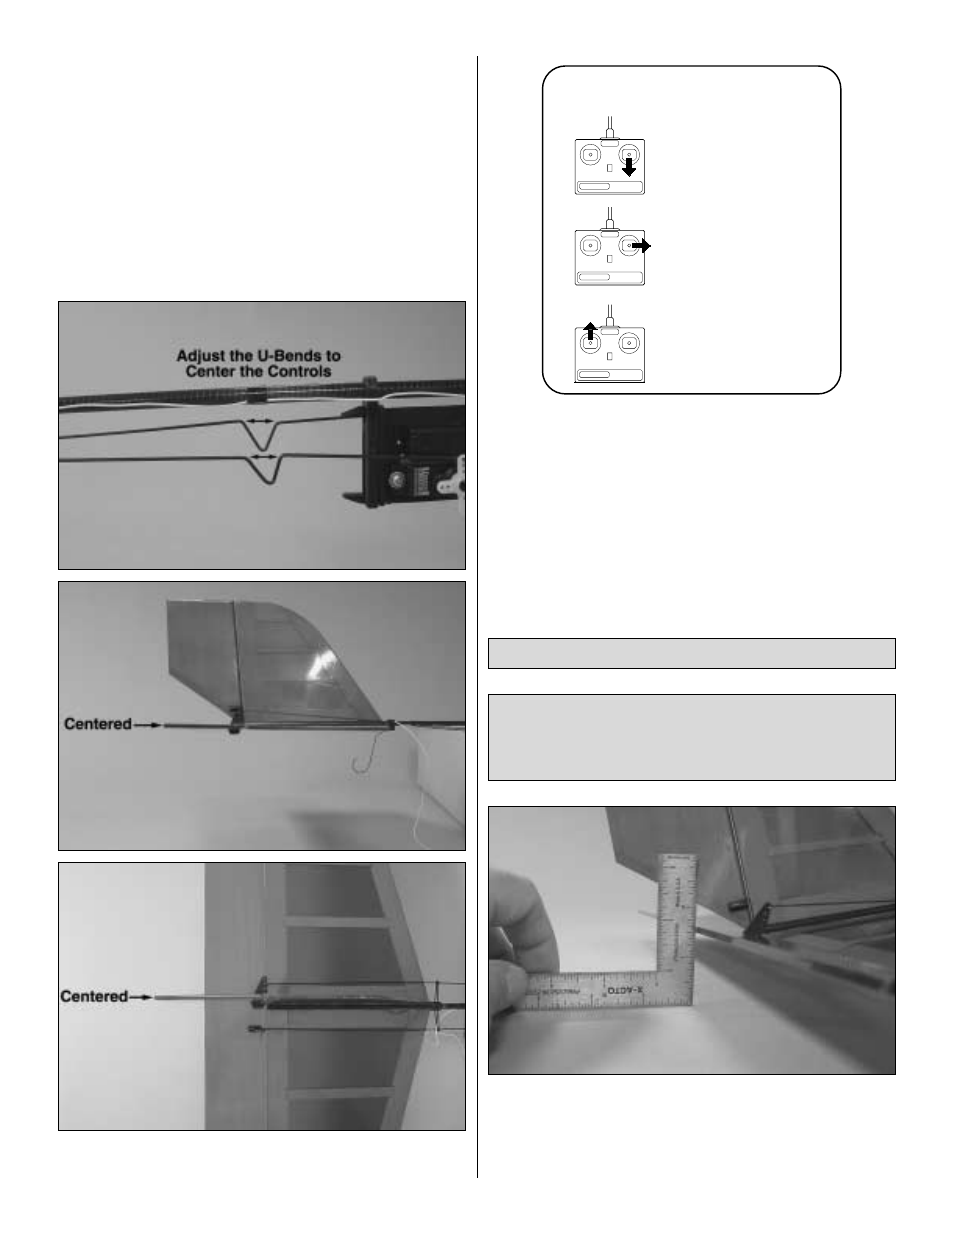
5. If necessary, use pliers to open or close the V-bends
in the pushrods to get the rudder and elevator centered.
❏
6. Use the control sticks on the transmitter to operate the
elevator and rudder. Make certain they respond in the
correct direction. If they do not, use the servo reversing
switches in the transmitter to change the direction.
❏
7. Reminder: The propeller should be removed from the
motor while performing setup operations in the shop. Follow
the instructions included with whatever speed controller you
have selected to turn on the motor. If necessary, reverse the
throttle servo reversing switch to get the motor to turn on
when the throttle is advanced.
❏
1. Use the transmitter to move the elevator all the way up
and down and measure the distance the trailing edge moves
(throw). The distance should be 3/4" [19mm] up and 3/4"
[19mm] down. If necessary, move the elevator pushrod to
another hole in the control horn to change the throw. Moving
IMPORTANT: Do not overlook this important procedure.
The control throws have a great effect on how a model
flies and may determine whether or not your first flight is
a success.
Set the Control Throws
4-CHANNEL
TRANSMITTER
TRANSMITTER
4-CHANNEL
TRANSMITTER
4-CHANNEL
ELEVATOR MOVES UP
RUDDER MOVES RIGHT
MOTOR TURNS
3-CHANNEL RADIO SETUP
(STANDARD MODE 2)
11