Install the tail surfaces assemble the fuselage – Great Planes Venus 40 ARF - GPMA1025 User Manual
Page 12
❏
11. Use a hobby knife with a sharp #11 blade to trim the
covering on the belly pan 1/16" [1.6mm] away from the
edge. Seal the MonoKote down with a sealing iron.
❏
12. Use 30-minute epoxy to glue the belly pan to the
wing. Make sure the belly pan is aligned with the fuselage.
Use weights and/or tape to hold the belly pan in place. If you
are afraid of gluing the belly pan to the fuselage, you can
use some Plan Protector film or wax paper between the
fuselage and the wing. Wipe off any excess epoxy using a
paper towel and alcohol. Remove the weights once the
epoxy has cured.
❏
13. This completes your wing.
❏
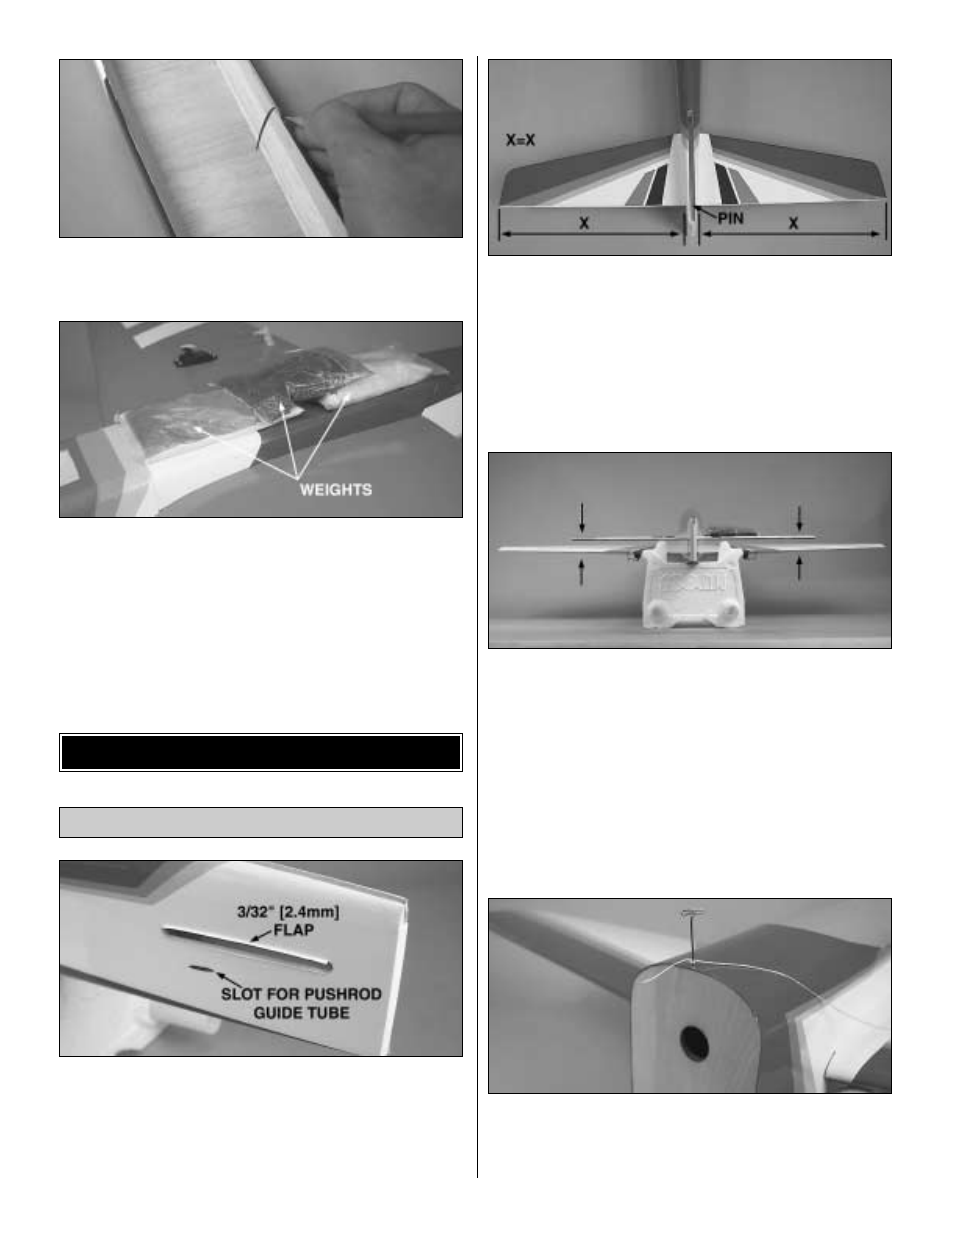
1. Cut the covering from the slots in the fuse for the stab
and for the pushrod guide tubes. There should be two guide
tubes for the elevator and one for the rudder. Hint: Cut the
covering from the slots for the stab and fin 3/32" [2.4mm]
from both edges, thus leaving flaps of covering that can be
ironed to the stab and fin after gluing them into position.
❏
2. Fit the stab into the fuse. Center the trailing edge by
taking accurate measurements as shown in “X”=“X” in the
photo. Once the trailing edge of the stab is centered, stick a
pin through the fin slot into the stab’s trailing edge to keep it
in position.
❏
3. Bolt the wing to the fuse. Place the model in a building
stand. Stand five to ten feet behind the model and view the
stab and the wing. The stab and the wing should line up. If
they do not line up, place a weight on the “high” side of the
stab to bring it into alignment. If much weight is required,
remove the stab and sand the “high” side of the slot in the
fuse where the stab fits until the stab aligns with the wing.
❏
4. Stick a pin into the center of the fuselage on top of the
firewall. Tie a small loop on one end of a 42" [1066mm]
piece of non-elastic string such as a K & S #801 Kevlar
thread (K+SR4575). Slip the loop in the string over the T-pin.
Install the Tail Surfaces
ASSEMBLE THE FUSELAGE
12