Assemble the fuselage – Great Planes Ultimate Bipe 1.60 ARF - GPMA1307 User Manual
Page 14
❏
4. Once the wing is attached to the struts, install a 4-40
x 1/2" [13mm] socket-head cap screw into the cabane
mounting holes. Set the fuselage and wing assembly aside
until the glue has fully hardened.
❏
1. Cut the covering away from the wing bolt holes on the
bottom of the belly pan.
❏
2. Place the belly pan on the bottom wing, positioning it
over the wing bolts. Trace the outline of the belly pan onto
the bottom wing.
❏
3. Cut the covering from the fuselage inside the lines you
have drawn on the wing. Use the same technique for cutting
the covering as used for the wing bolt plates. Glue the belly
pan to the wing.
❏
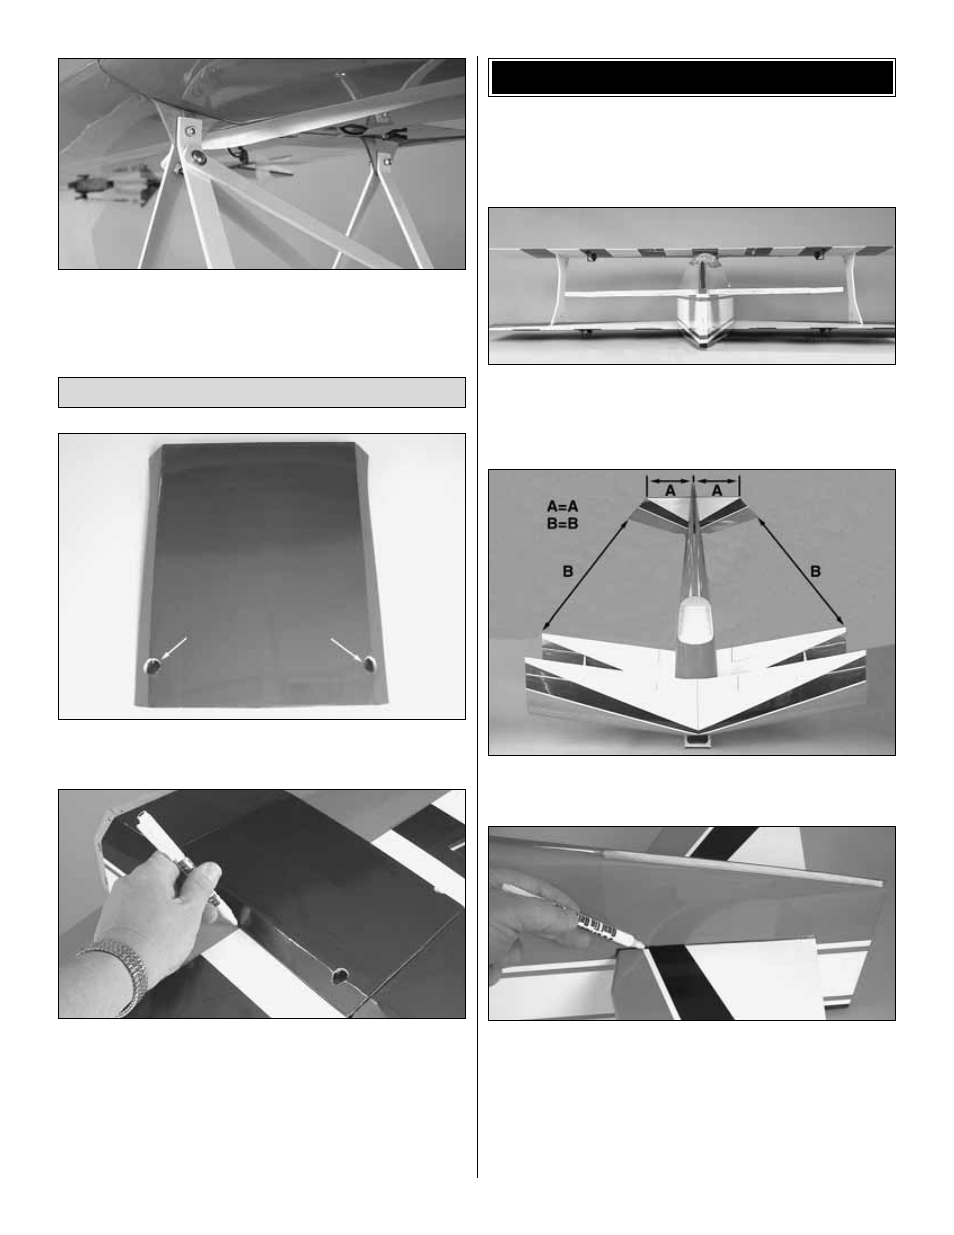
1. If you have removed the wings, re-install them to the
fuselage. Cut the covering from the back of the fuselage to
reveal the slot for the horizontal stabilizer and the vertical fin.
❏
2. Slide the horizontal stabilizer into the slot in the
fuselage. Stand back and look at the stab in relation to the
wing. The stab should be parallel with the wing. If not, sand
the stab saddle until the stab and wings are aligned.
❏
3. Measure the distance from the tip of the stab to the tip of
each wing. Adjust the position of the stab until they are equal.
❏
4. Using a fine-point felt-tip pen, mark the outline of the
fuselage on the top and the bottom of the stab.
❏
5. Cut the covering on the top and bottom of the stab
inside the line you have drawn. Use the same technique for
cutting the covering as used for the wing bolt plates and the
belly pan, cutting along the lines you have marked. Use care
to cut only into the covering and not into the wood.
ASSEMBLE THE FUSELAGE
Mount the Belly Pan
14