Great Planes Ultimate 3D E-Performance ARF - GPMA1546 User Manual
Page 11
11
BUILD THE FUSELAGE
Assemble the Tail Section
❏
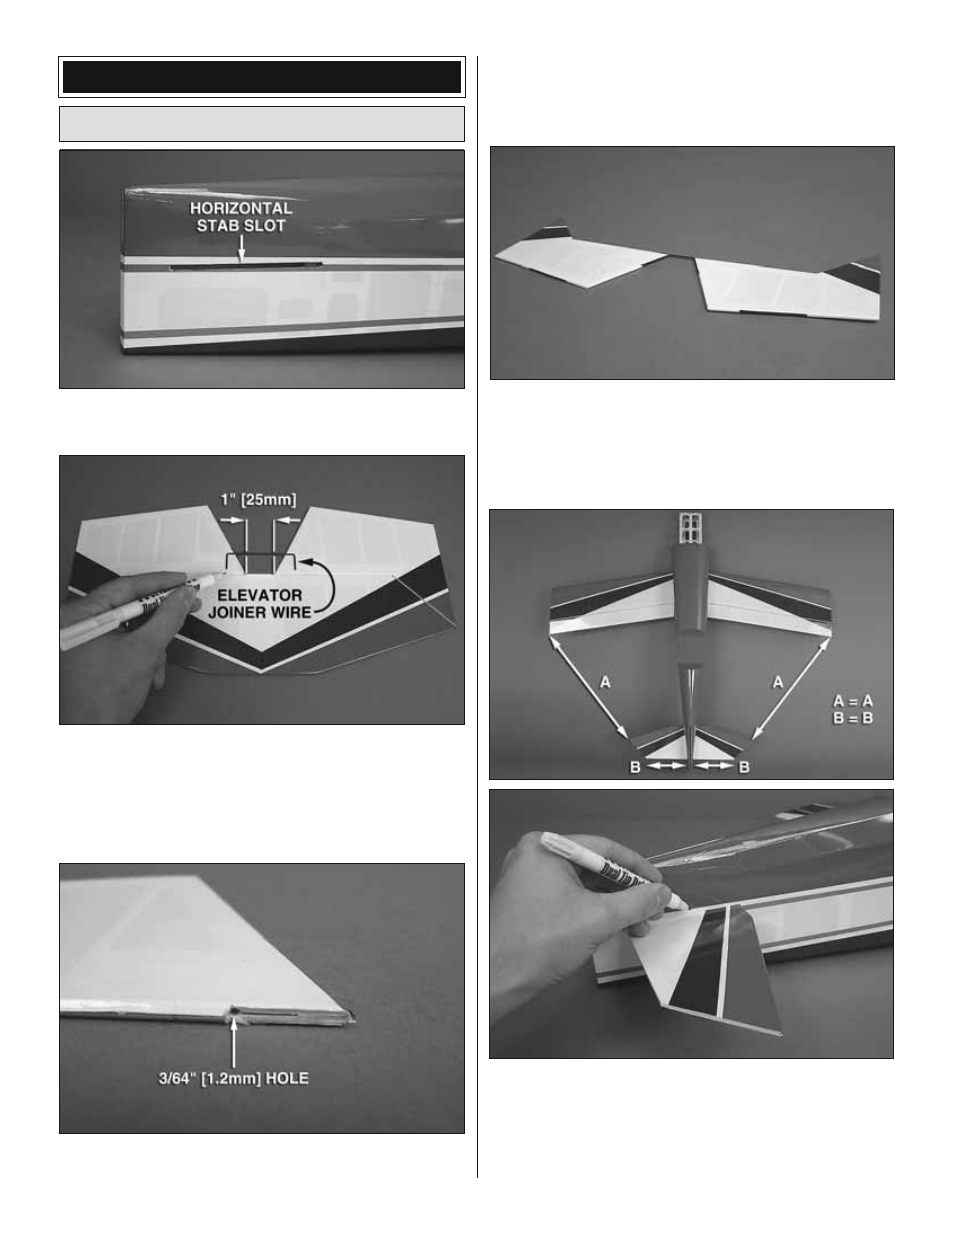
1. Trim the covering from the horizontal stabilizer slot in
the fuselage.
❏
2. Place the horizontal stabilizer on your work surface
and align the elevator halves behind it. Separate the elevator
halves 1" [25mm] apart as shown. Center the elevator joiner
wire over the elevator halves. Mark the position of the joiner
wire ends at the LE of each elevator half.
❏
3. Using a 3/64" [1.2mm] drill bit, make a 3/4" [19mm]
deep hole into each elevator half at the marks you made.
Be sure you are drilling through the center of the elevators,
perpendicular to the LE. Trim away approximately 1/16"
[1.6mm] of the LE between the holes you made and the
inside edge of the elevators.
❏
4. Test fi t the elevator joiner wire into the holes. Lay the
elevators down on a fl at work surface and confi rm that they
lay fl at. If not, remove the joiner wire and “tweak”, or twist it
until they do. Do not attempt to bend the joiner wire while it is
inside the elevator halves.
❏
5. Position the horizontal stab in the stab slot, being sure
that it is as far forward in the slot as it will go. Center the stab
left and right in the fuse, and square its position by measuring
the distance between the tips of the stab and the wing tips
and making them equal. When satisfi ed, use a fi ne, felt-tip
pen to trace the outline of the fuselage onto the stab.