Great Planes Spectra ARF - GPMA1050 User Manual
Page 8
[127mm] long unthreaded wires and two 7" [178mm] long
threaded one end wires.
❏
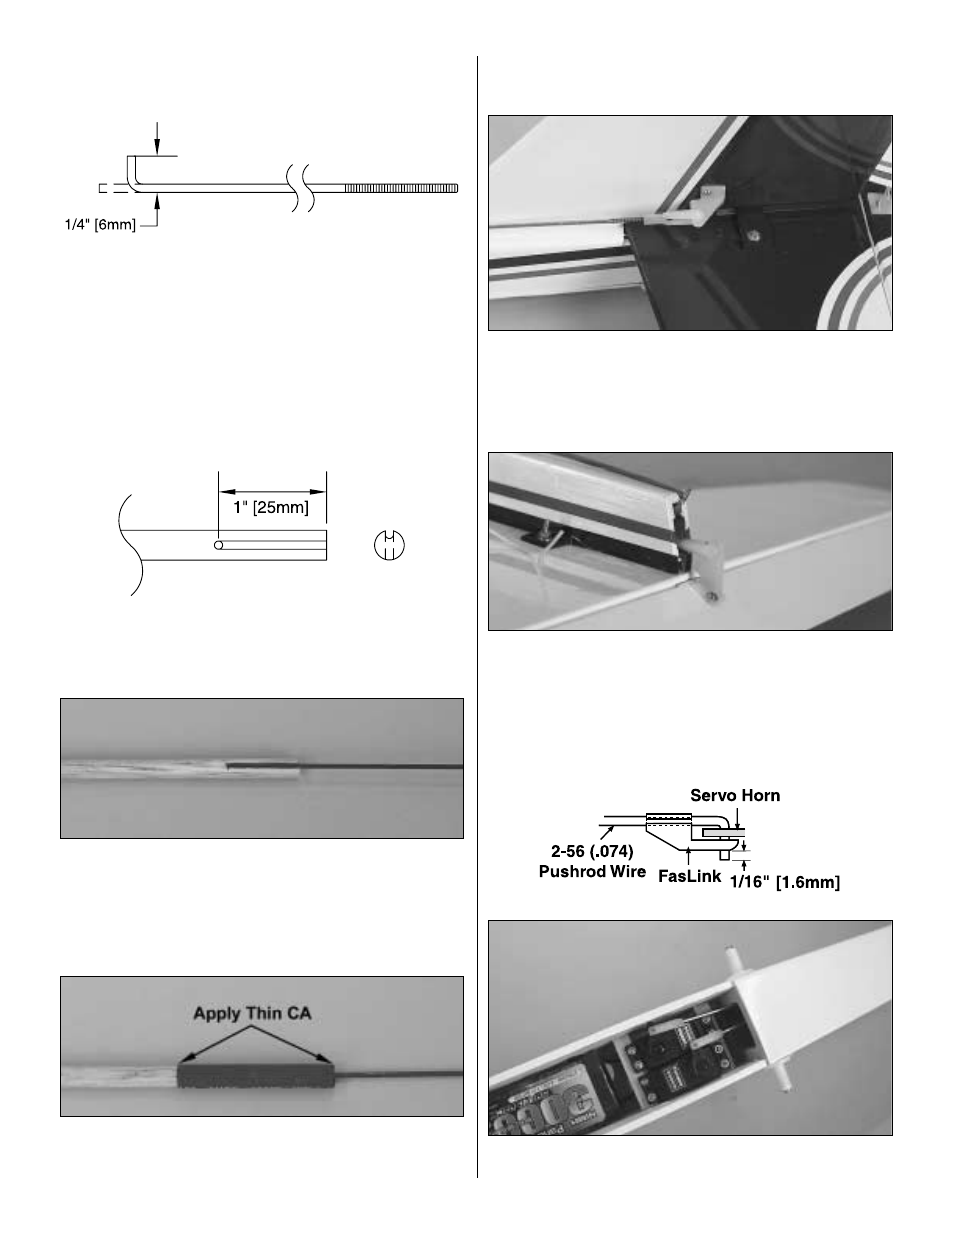
8. Make a 90° bend 1/4" [6mm] from the non-threaded
end in one of the threaded pushrod wires as shown in the
sketch. Make the same 90° bend in one end of the
remaining threaded and non-threaded pushrod wires. Wipe
off each wire using a paper towel dampened with rubbing
alcohol to remove any oil.
❏
9. Cut the pushrod dowels from the hardwood dowels.
The elevator pushrod dowel should be 12" [305mm] long.
The rudder pushrod dowel should be 10" [255mm] long.
❏
10. Drill a 5/64" [2mm] hole 1" [25mm] in from both ends
of each pushrod dowel. Cut a groove in each pushrod dowel
from the hole to the end of the dowel.
❏
11. Insert the 90° bend of one of the threaded pushrod
wires into one pushrod dowel. Insert the 90° bend of one of
the non threaded pieces of wire into the hole on the
opposite end of the pushrod dowel. Tack glue the wires in
place with a couple drops of CA. Repeat this procedure to
make the other pushrod.
❏
12. Use the heat shrink tubing at all the ends of each of
the pushrod dowels to hold everything in place as shown in
the photo. Use a heat gun to shrink the tubing. Apply a few
drops of thin CA to each end of the heat shrink tubing to
secure it.
❏
13. Install the rudder pushrod. Thread a clevis 14-turns
onto the pushrod. Attach the clevis to the control horn at the
4th hole from the inside. Bend the pushrod as necessary to
allow for free movement. Use a silicone retainer to secure
the clevis.
❏
14. Install the elevator pushrod. Center the elevator and
thread the clevis 14-turns onto the pushrod. Attach the
clevis to the control horn at the 4th hole from the inside. Trim
the opening at the rear of the fuselage as necessary to
allow the pushrod to move freely. Use a silicone retainer to
secure the clevis.
❏
15. Center the rudder and the rudder servo arm. Attach
a FasLink onto the pushrod in the radio compartment and
8