Attach the cowl and add the decals – Great Planes Sopwith Pup EP ARF - GPMA1133 User Manual
Page 8
8
❏
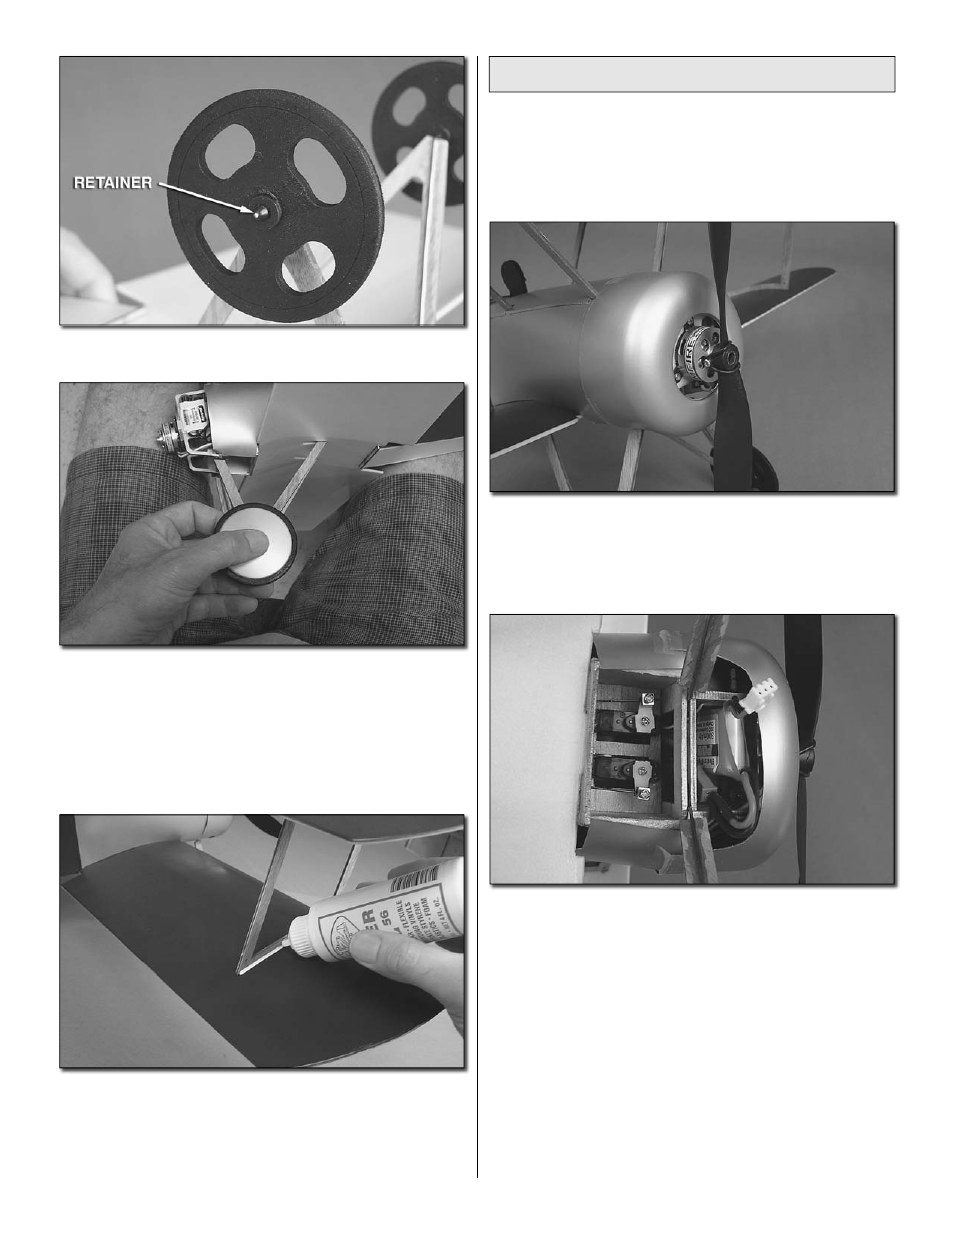
6. Fit the wheels onto the gear followed by the small, black
nylon wheel retainers.
❏
7. Glue the wheel covers to the wheels—it may be
necessary to cut a portion of the gear wire protruding from
the wheel retainers to accommodate the covers. An easy way
to glue on the hubs is to hold the plane in your lap with the
wings vertical and the fuselage across your legs. Hold the
cover in position with your thumb and your fi ngers around
the other side of the wheels, and then apply medium CA all
the way around.
❏
8. Now that all the parts of the airframe have been glued
together, reinforce the joints between the wings and the
wood struts with J&Z Products RC-56 or white glue. Do the
same for the tail surfaces.
❏
9. Glue the pilot into position.
Attach the Cowl and Add the Decals
❏
1. Before attaching the cowl, connect your battery and turn
on the radio and momentarily power up the motor to make
sure it is turning the correct direction (counterclockwise when
viewed from the front). If the motor is turning backwards, switch
any two wires between the motor and ESC with each other.
❏
2. Fit the cowl into position. If using a 2.4GHz receiver,
loop the second antenna (that is not inside the fuselage)
around the inside of the cowl. Use a few pieces of clear
tape to hold the cowl in place. Mount the propeller with the
propeller saver O-ring.
❏
3. While we’re working on the front end, cut a small strip of
the softer “loop” side of the adhesive-backed hook-and-loop
material and attach it to the middle of the battery. Test mount
the battery in the fuselage.
❏
4. Cut out the decals and carefully position on the model
where shown on the kit box cover.