Radio installation – Great Planes Silhouette EP 3D ARF - GPMA1132 User Manual
Page 6
6
❏
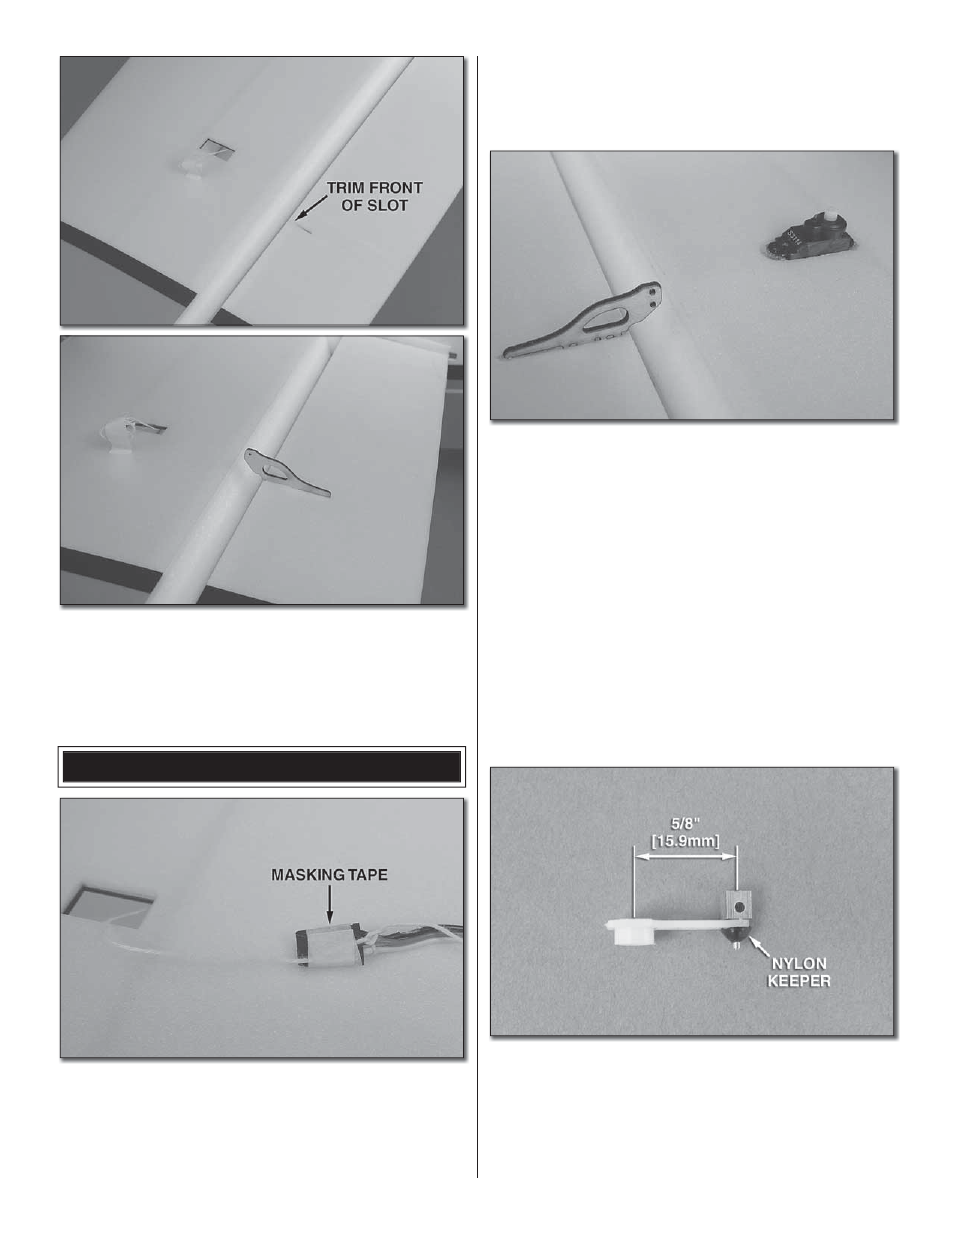
5. Trial fi t the remaining two plywood control horns in the
bottom of the ailerons. You may need to use a sharp hobby
knife to open the front of the slot to allow the control horns
to seat against the bottom of the aileron. Use foam-safe thin
CA to glue the control horns in the ailerons.
RADIO INSTALLATION
❏
❏
1. Install a 12" [304mm] servo extension on each aileron
servo. A piece of electrical tape can be used to secure the
extension to the aileron servo lead. Tie the string from one
of the aileron servo trays to the end of the aileron servo lead
extension. Then use a piece of masking tape to secure the
string out the end of the connector.
❏
❏
2. From the battery compartment, carefully pull the
aileron lead through the wing and out the opening in the
center of the wing.
❏
❏
3. Use medium foam-safe CA to glue the aileron servo
in the aileron servo tray.
❏
4. Follow the same procedure to install the second aileron
servo in the other wing half.
❏
5. Use a Y-harness to connect the two aileron servos.
Connect the Y-harness to your receiver. A separate receiver
battery or the ESC can be connected to the receiver to power
the servos for set up.
❏
6. Switch on your transmitter and center the aileron
servo trim.
❏
❏
7. Install a servo arm that has a hole approximately
5/8" [16mm] from the center. Enlarge the hole with a #55
(3/64") drill bit. Insert the brass quick connector in the hole
and secure it with a nylon keeper.