Join the wing – Great Planes Shoestring 60 ARF - GPMA1325 User Manual
Page 7
❏ ❏
6. Apply six drops of thin CA to the top and bottom of
each hinge. Do not use CA accelerator. After the CA has
fully hardened, test the hinges by pulling on the aileron.
❏ ❏
7. Cut the covering 1/8" inside the opening in the wing
for the aileron servo. Use a trim iron to seal the covering to
the edges of the opening. Cut the covering from the hole in
the bottom of the wing for the aileron servo wire.
❏ ❏
8. Tie the string inside the wing to the aileron servo
wire. Pull the servo wire out of the end of the wing with the
string. Drill 1/16" holes in the wing for the servo mounting
screws, then mount the aileron servo using the screws that
came with it.
❏ ❏
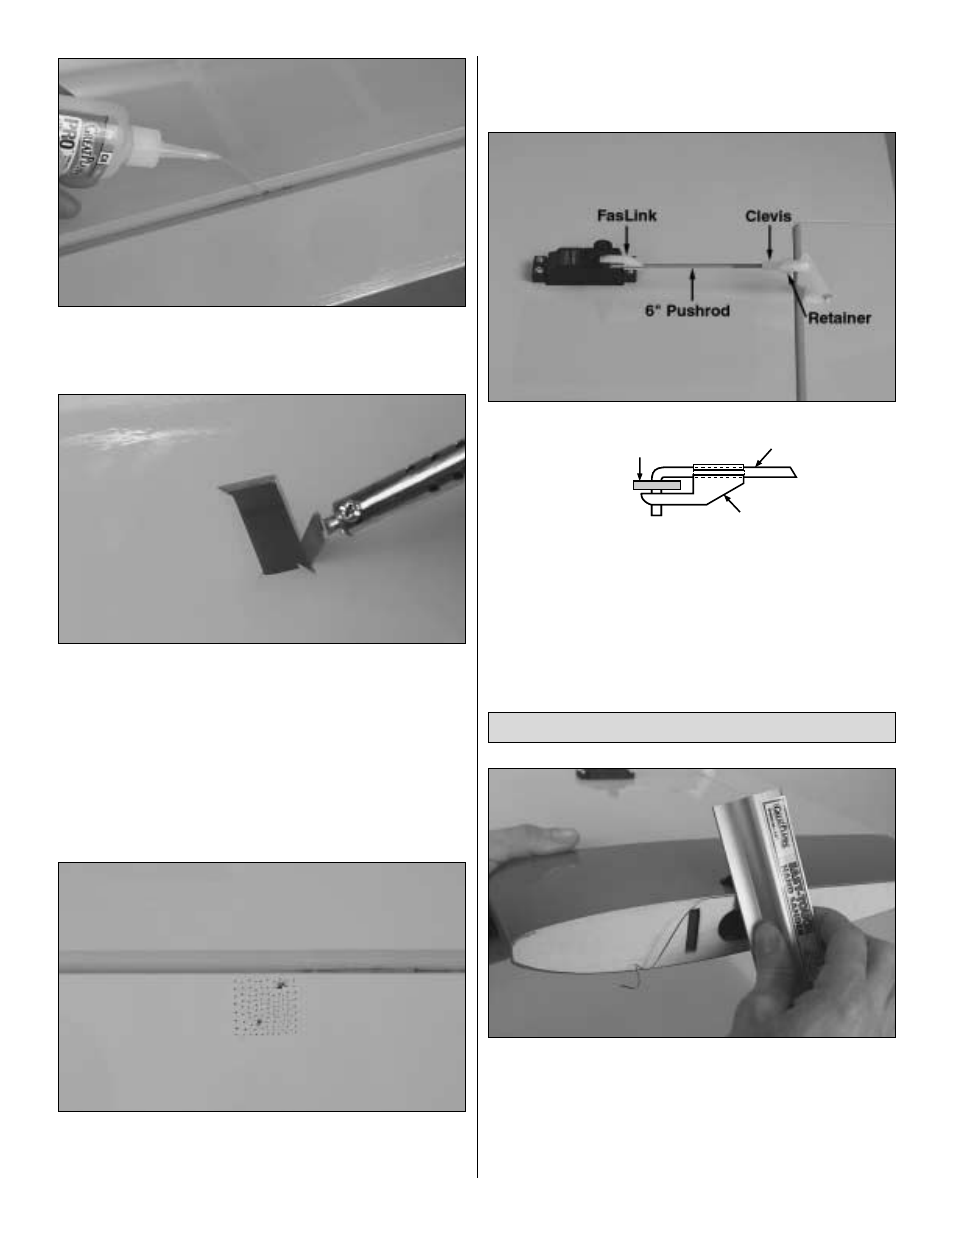
9. Drill 1/16" holes into the bottom of the aileron for
mounting the nylon control horn. Before mounting the horn,
use a pin to poke several holes through the covering in the
mounting location. Saturate the holes with thin CA, wipe
away residual CA and allow to fully harden. Mount the
aileron control horn to the aileron with two #2 x 1/2" screws.
❏ ❏
10. Enlarge the hole in the servo arm with a Hobbico
Servo Horn Drill (or a #48 or 5/64" drill bit). Connect the
aileron to the servo with a 6" pushrod, a FasLink, a clevis
and a silicone retainer.
❏
11. If you haven't yet done so, go back to step 1 and
assemble the other wing the same way.
❏
1. Trim the covering from the ribs on the end of both
wings. This is easily done with a sanding block and medium-
grit sandpaper as shown.
❏
2. Test fit the wing halves with the hardwood joiner. Be
certain the joiner is installed upright (the bottom of the joiner
has an angle for wing dihedral).
Join the Wing
FasLink
2-56 (.074") Pushrod Wire
Servo Horn
7