Installing the tail surfaces assembly of the model – Great Planes Micro Whizz ARF - GPMA1102 User Manual
Page 6
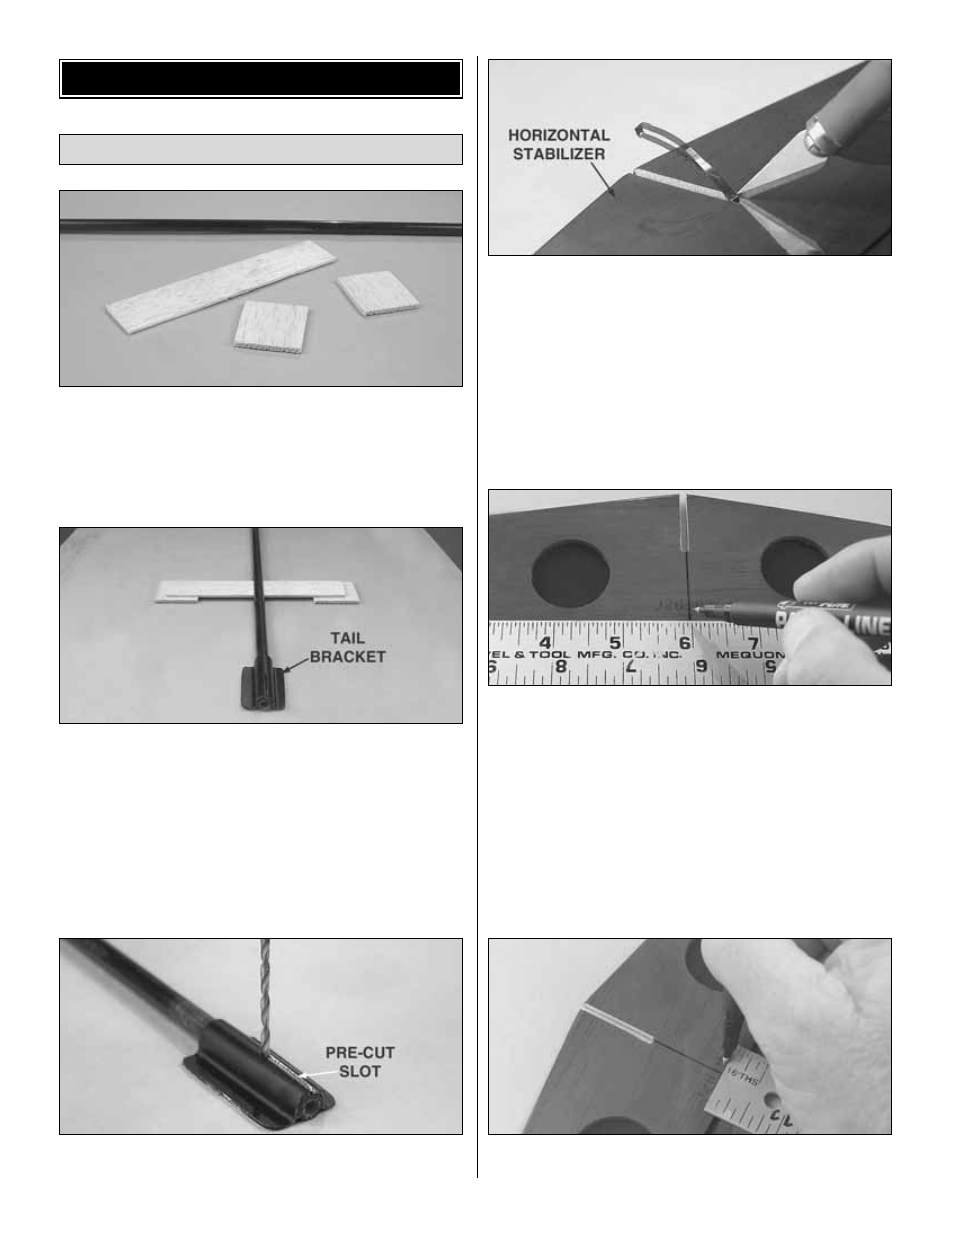
❏
1. Locate the carbon fiber tail boom and note the pre-cut
slot for the pushrods to exit. Cut a piece of 1/16" [1.6mm]
balsa 3/4" [19mm] x 4" [102mm]. Also cut 2 squares of 3/32"
[2.4mm] balsa 1" [25mm] x 1" [25mm]. Note: Wood not
supplied with kit.
❏
2. Slide the 1/16" balsa strip into the pre-cut slot. Place
this onto a flat surface and slide the 3/32" balsa squares
under the strip as shown in the above photograph. Locate
the tail bracket and test fit it into place on the end of the tail
boom making sure that both sides of the bracket touch the
flat surface. Make sure that the bracket is flush with the rear
of the tail boom and the pre-cut slot in the bracket is facing
toward the rear. When satisfied with the fit, glue the bracket
into place using medium CA.
❏
3. With a 3/64" [1mm] bit, drill a hole in the tail boom at
the forward end of the pre-cut slot in the bracket.
❏
4. Use a sharp hobby knife to cut the covering away from the
slot in the center of the leading edge of the horizontal stabilizer.
❏
5. Measure the width of the horizontal stabilizer and
mark a centerline on the bottom of the stabilizer with a felt-
tipped pen as shown above.
❏
6. Measure 3/16" [5mm] forward from the trailing edge of the
horizontal stabilizer at the centerline and mark this location.
Installing the Tail Surfaces
ASSEMBLY OF THE MODEL
6