Channel radio setup, Get the model ready to fly, Set the control throws – Great Planes Headwind B Park Flyer ARF - GPMA1101 User Manual
Page 11: Check the control directions, Complete final radio installation
❏
5. Re-mount the gear box and motor to the mount.
The battery and receiver mounting are used to adjust the
center of gravity (CG). We recommend using the Great Planes
Sanyo
®
8 Cell 350 2/3AA NiCd to power your Headwind B. For
now, temporarily position the battery and receiver in the radio
compartment as shown, but do not secure in place. When
setting the CG (below), adjust positioning as needed,
remembering to also reposition the Velcro
®
and rubber band
mounting to properly hold them in place.
❏
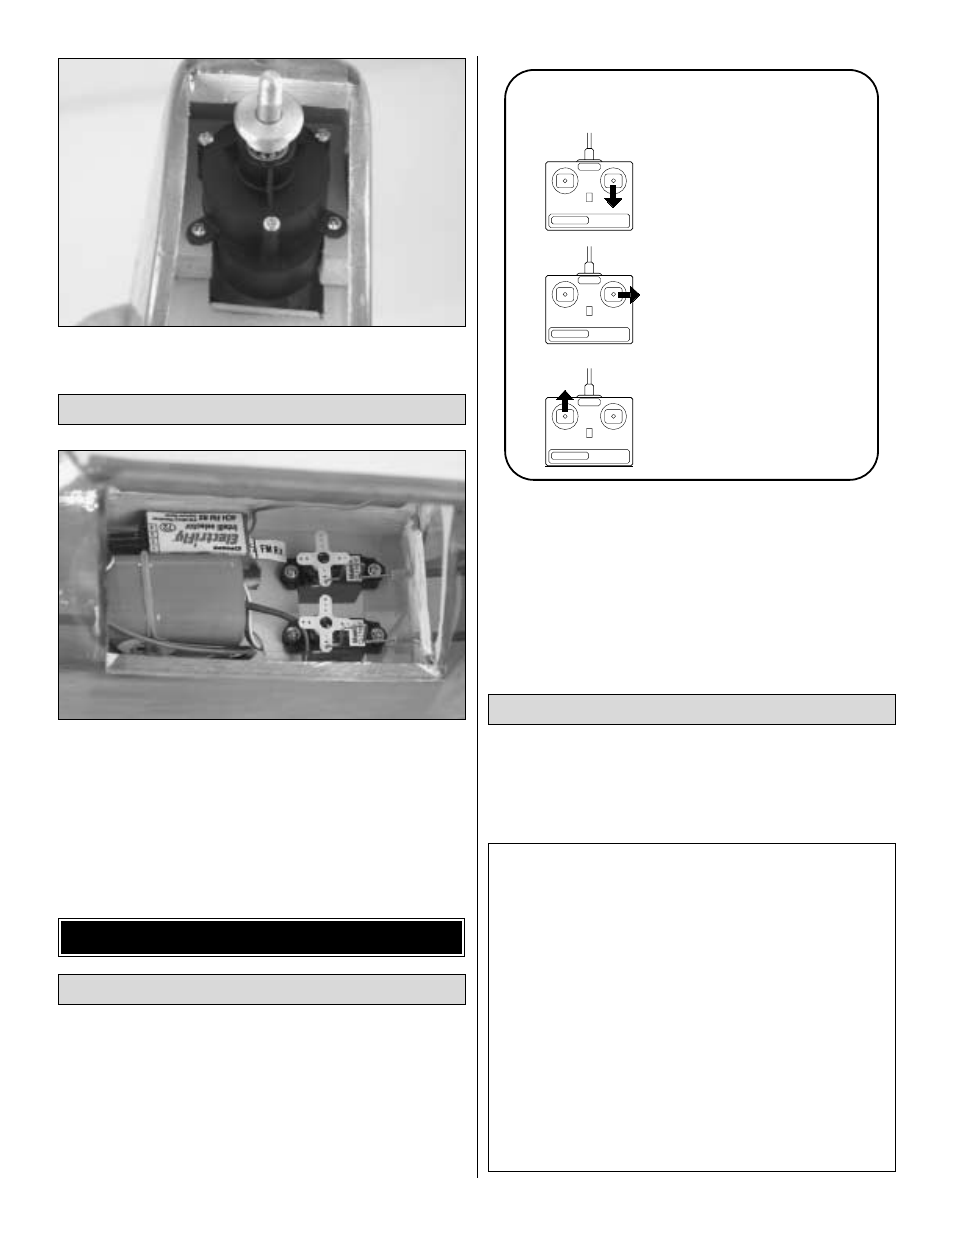
1. Turn on the transmitter and receiver and center the
trims. If necessary, remove the servo arms from the servos
and reposition them so they are centered. Reinstall the
screws that hold on the servo arms.
❏
2. With the transmitter and receiver still on, check all the
control surfaces to see if they are centered. If necessary,
adjust the pushrods to center the control surfaces.
❏
3. Make certain that the control surfaces respond in the
correct direction as shown in the diagram. If any of the
controls respond in the wrong direction, use the servo
reversing in the transmitter to reverse the servos connected
to those controls. Be certain the control surfaces have
remained centered. Adjust if necessary.
Use a Great Planes AccuThrow
™
(or a ruler) to accurately
measure and set the control throw of each control surface as
indicated in the chart that follows. NOTE: The throws are
measured at the widest part of the elevator and rudder.
These are the recommended control surface throws:
ELEVATOR:
1/2" [13mm] up
1/2" [13mm] down
RUDDER:
1" [25mm] right
1" [25mm] left
IMPORTANT: The Headwind B has been extensively
flown and tested to arrive at the throws at which it flies
best. Flying your model at these throws will provide you
with the greatest chance for successful first flights. If, after
you have become accustomed to the way the Headwind B
flies, you would like to change the throws to suit your
taste, that is fine. However, too much control throw could
make the model difficult to control, so remember, “more is
not always better.”
Set the Control Throws
4-CHANNEL
TRANSMITTER
TRANSMITTER
4-CHANNEL
TRANSMITTER
4-CHANNEL
ELEVATOR MOVES UP
RUDDER MOVES RIGHT
MOTOR TURNS
3-CHANNEL RADIO SETUP
(STANDARD MODE 2)
Check the Control Directions
GET THE MODEL READY TO FLY
Complete Final Radio Installation
11