Install the pushrods mount the motor – Great Planes BLT Park Flyer Kit- GPMA0001 User Manual
Page 17
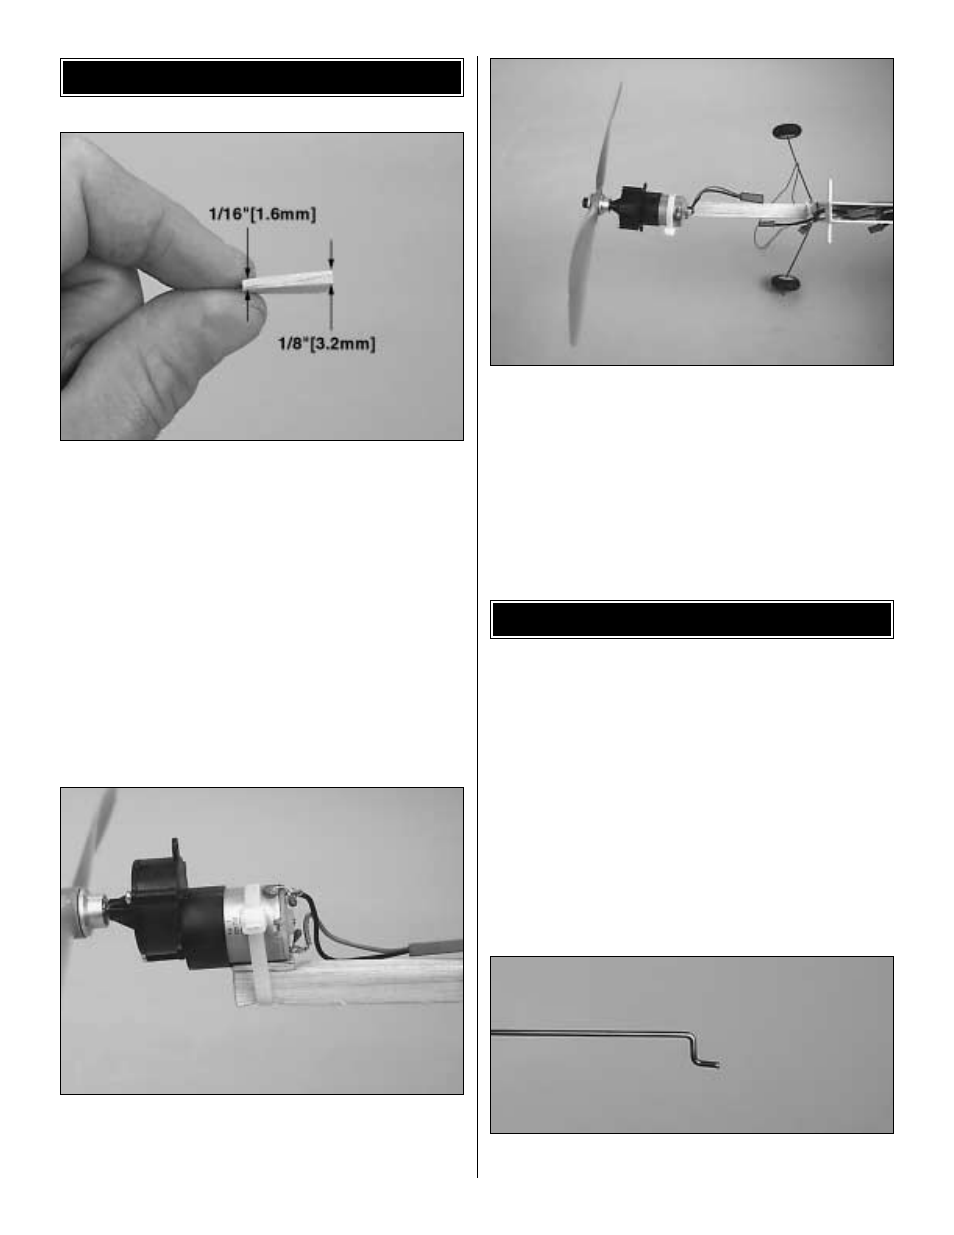
❏ 1. From a leftover 1/16" (1.6mm) laser-cut balsa sheet,
cut two pieces 1/16" x 1/2" x 3/4" (1.6mm x 12.7mm x
19mm). Glue the two pieces together to make a motor
wedge 1/8" x 1/2" x 3/4" (3.2mm x 12.7mm x 19mm). Use
a sanding bar to sand the top of the wedge so that the front
of the wedge is 1/16" (1.6mm) thick and the back is 1/8"
(3.2mm) thick.
❏ 2. Glue the motor wedge on the top front of the fuse so
that the 1/16" (1.6mm) edge is flush with the front of the
fuse. Place the motor on the wedge and secure it with a
large nylon tie strap.
❏ 3. The Basic Light Trainer will fly better if the motor is set with
1 to 2 degrees of right thrust. This can be accomplished by
laying the fuselage on its side and using a protractor to angle
the motor. After the right thrust is set, apply a couple of drops
of CA along the joint between the motor and the motor wedge
to secure the motor.
❏ 4. Plug the motor into the electronic speed control.
Secure the motor and electronic speed control wires to the
fuselage with the small nylon tie strap.
❏ 1. With the propeller removed from the motor, switch on
your transmitter. Move the throttle stick to the off position or
towards you. Then, plug in the charged motor battery. To
switch on your electronic speed control, follow the speed
control manufacturer’s instructions.
❏ 2. Center the elevator and rudder servos. Be sure the trim
levers on your transmitter are centered. Switch off the
electronic speed control followed by the transmitter and
unplug the battery.
❏ ❏ 3. Cut one of the .030 x 20-1/2" (.7mm x 520.7mm)
wires 13-1/2" (342.9mm) long. The 13-1/2" (342.9mm) wire
is referred to as the forward pushrod and the 4-1/2"
(114.3mm) wire is the aft pushrod.
❏ ❏ 4. Make a Z-bend in one end of the forward and
aft pushrods.
INSTALL THE PUSHRODS
MOUNT THE MOTOR
17