GME TX2700 User Manual
Page 8
PAGE 8
INSTRUCTION MANUAL
TX2700
INSTALLATION
LOCATION
It is advisable to spend a little time selecting the best location
for your TX2700. The mounting bracket can be rotated above,
below or behind the radio enabling the radio to be mounted
in a wide range of locations. In addition, an optional fl ush
mounting kit allows the radio to be fl ush mounted in a panel
or dashboard.
When choosing a location:
• Select a location that won’t expose your radio to
continuous direct sunlight which could cause overheating.
• Ensure the location allows a free fl ow of air around the
heat sink on the back of the radio.
• The microphone and all controls should be readily
accessible and the loud speaker easily heard from the
normal driving position. An extension speaker can be
installed if required.
• Electronic interference caused by other electronic devices is
best minimized by mounting your TX2700 at least 300 mm
from such devices, including all wiring and cables.
INSTALLING THE UNIT
After choosing a location, hold the unit with the mounting
bracket attached, to the desired position and mark the
location with a pencil. Remove the mounting bracket from
the radio and drill the mounting holes. Bolt or screw the
bracket in place using hardware suitable for the mounting
surface. The unit is supplied with steel screws, however, if the
mounting surface is unsuitable for screws you may need to
replace these with bolts. Remember the fi xings for overhead
mounted units may have to withstand being driven on
unsealed roads.
The TX2700 mounting bracket is designed with a unique dual
position gimbal mounting slot. This design not only allows
the TX2700 to be tilted over a much greater range, but also
provides a slim, low profi le mounting position for installations
where space is very limited.
Flush Mounting –
(Optional MK200B fl ush
mounting kit available)
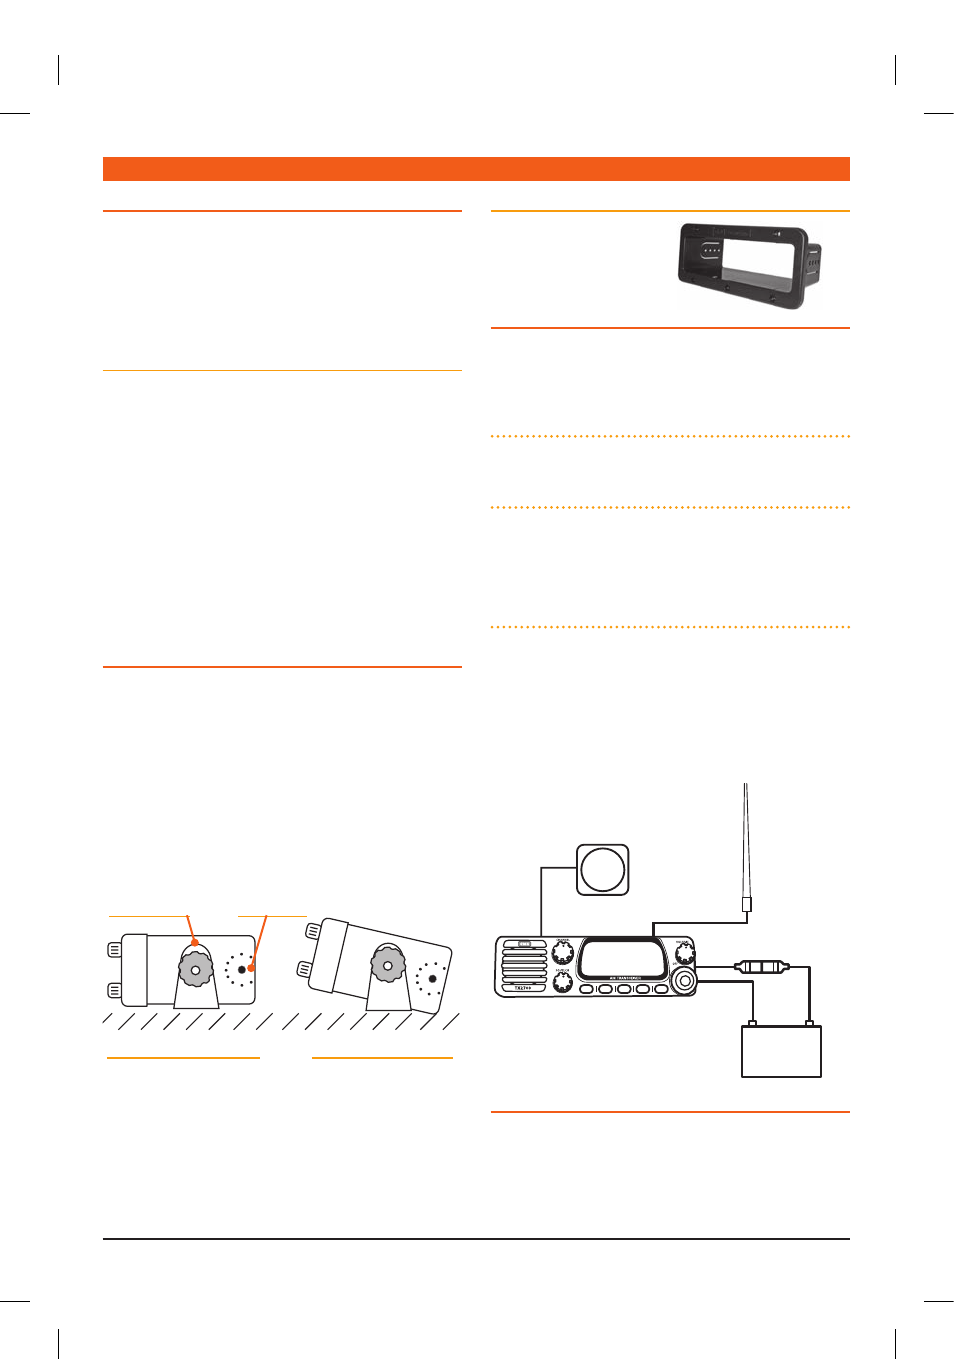
DC CONNECTIONS
Connect the RED power lead to the positive (+) side of the
battery or to an accessory point in the vehicle’s fuse box.
Connect the BLACK power lead to the negative (-) side of the
battery or to a ground point in your vehicle.
NOTE:
The DC Connector is not waterproof. If installed in
an exposed location, the connector should be protected with
waterproof tape to prevent water ingress.
IMPORTANT:
The RED power lead is fi tted with a 2 Amp
fuse. If the fuse blows, use only a standard 2 Amp (3AG) fuse
as a replacement. Use of a higher rated fuse or a slow-blow
type could result in damage to your radio which would void
the warranty.
If required, an extension speaker may be installed to improve
sound levels in noisy environments or in locations further
away from the driving position. For locations exposed to wa-
ter we recommend the SPK45B which will fi t to the supplied
adaptor that connects to the extension speaker socket on the
rear of the radio.
PRI
DW
SCAN
NL
DIM
Extension Speaker
(optional)
27 MHz
Antenna
Fuse
Black -
Red +
TX2700
12 Volt
Battery
ANTENNA INSTALLATION
It is essential to select a good quality, high effi ciency,
27 MHz antenna. A poor quality antenna or one not designed
for the specifi c frequency band you are using
will give very poor performance.
Rear Mount
Centre Mount
LOW PROFILE MOUNTING
RAISED TILT MOUNTING